
It seems odd to write a single blog post about something so big as the Royal School of Needlework Summer Intensive certificate course in Canvaswork I have attended for the past two weeks. However, as it really was a single event I didn’t want to split my experiences into several shorter posts. I hope you can bear with me and that you enjoy reading about my experience of this intensive course.
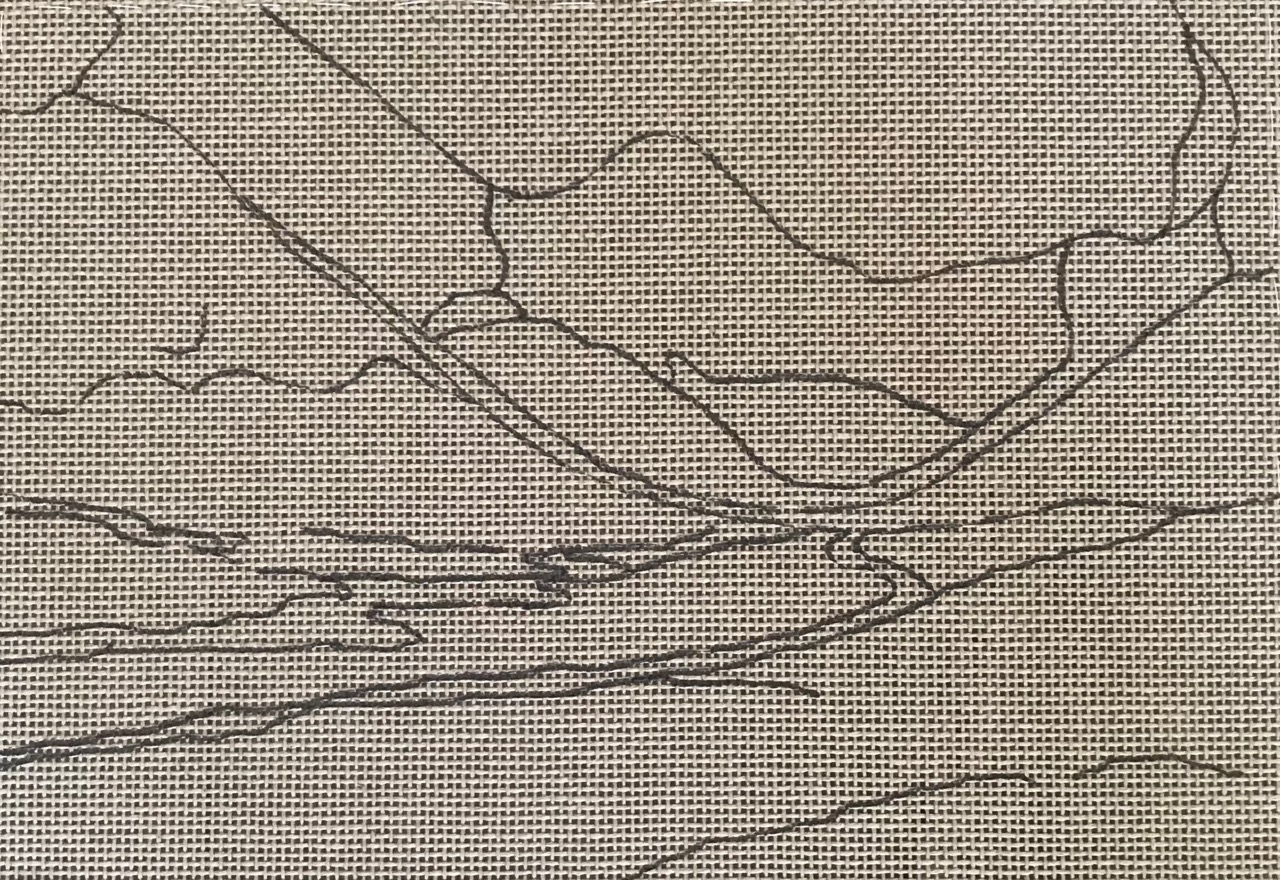
Our tutors for the two weeks were Lisa, Helen J. and future tutor Jess. As you might have seen from my previous post, I came prepared for the course, with my design already approved, the canvas framed up and the design drawn on, and threads picked. All of the other students had thought about their design but had to spend most (if not all) of the first day framing up and choosing threads. As I didn’t need to do all those things I spoke to one of the tutors about the next steps I needed to take and she got me working on a colour plan, stitch plan and picking threads for the foreground areas.
Tutor Lisa told me that I should see my photograph as a source of inspiration rather than something that I have to replicate exactly. Because of the coarseness of canvaswork, it is impossible to replicate something exactly but it has to be my interpretation by looking at shading, texture and perspective.
In contrast to most other embroidery techniques, you start stitching the front of your design first and then work your way back. That way all edges in your design (apex of a hill, the edges of the road and river etc) are defined by what is in front and therefore what you can see, rather than what is behind and essentially hidden.
Before you start stitching for real it is important to sample stitches first. This way you can find out (without un-picking) whether the combination of threads you have chosen work for that particular stitch and whether the threads cover the canvas adequately as there should not be any canvas visible after you have finished stitching. Tutor Lisa gave me some tips on which stitches would work together to get them flowing into each other and how to choose stitches to create distinct areas.
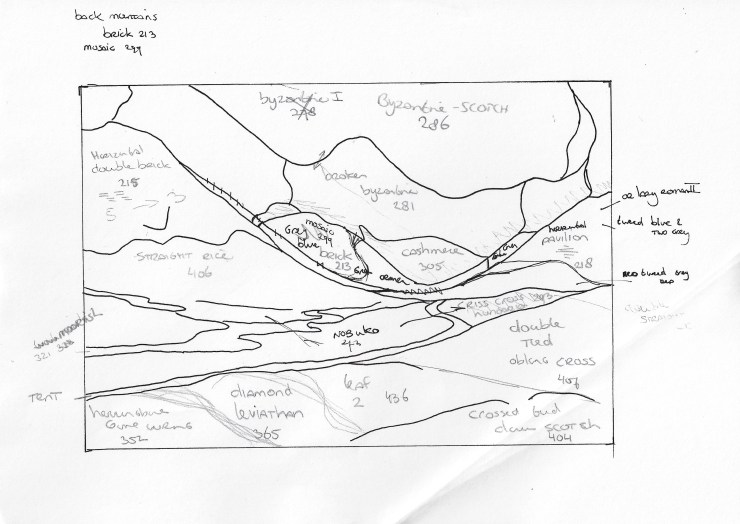
The threads I used are:
- Gumnut yarns ‘Daisies’: 607, 608, 728, 729, 867, 869, 925, 929, 949, 989, 994, 998
- Gumnut yarns ‘Blossoms’: 729
- Handweavers studio ‘Donegal’: Graney, Currane
- Handweavers studio ‘Blue faced Leicester’: Satsuma, Pine
- Anchor stranded cotton: 235, 236
- Appletons Wool: 924
- Au ver a Soie ‘Soie d’Alger’: 1421, 1431, 1432, 1433, 1434, 1714, 3413, 3442, 3443, 3444, 4098, 4104, 4641, 4642
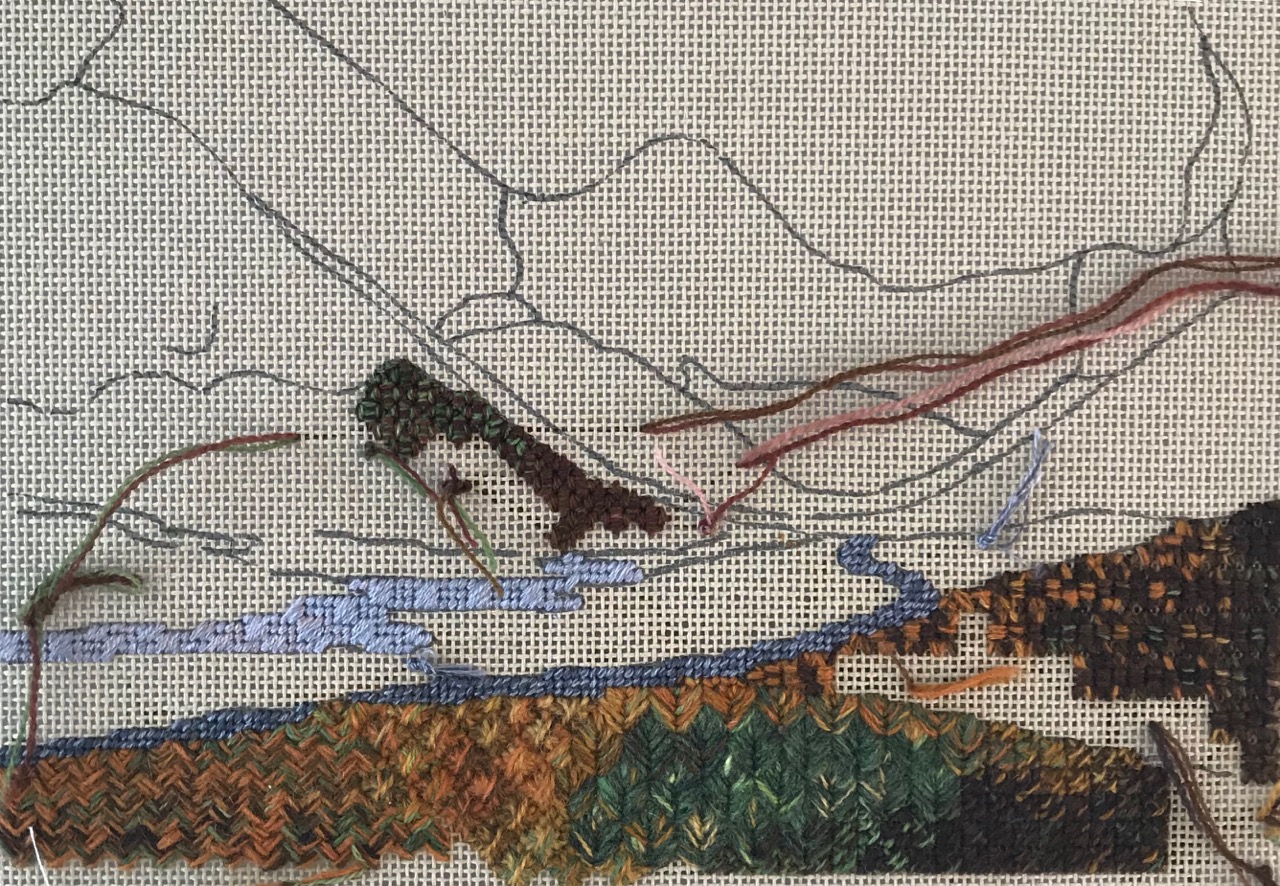
After lunch, on day one I started stitching for real. Is started with leaf stitch and diamond leviathan. The trick to stitching with different colours and stitches is to have several different combinations of threads on the go so it is easier to change the threads you are working with. At one point I had 7 needles threaded! It is quite a challenge to keep track and to keep the colours and shades flowing according to my example photograph. Before I knew it, it was the end of the day and time to go home.

The next morning I continued with these stitches and introduced tied-down scotch in the bottom right corner and oblong tied-cross above it. Because oblong tied-cross doesn’t cover the canvas entirely I had to introduce simple slip stitches at the top and bottom of each stitch to cover up any gaps.
On day 3 I started working on the herringbone gone-wrong at the bottom-left of my design, and continue with the other areas.
Day 4 was the first of our work-on-your own-days. This means that there will be no tutor support but it does mean you can work in the classroom at Hampton Court Palace. I stitched the road in tent stitch and the river in Moorish. I also started on the bottom of the left mountain with Straight rice stitch.

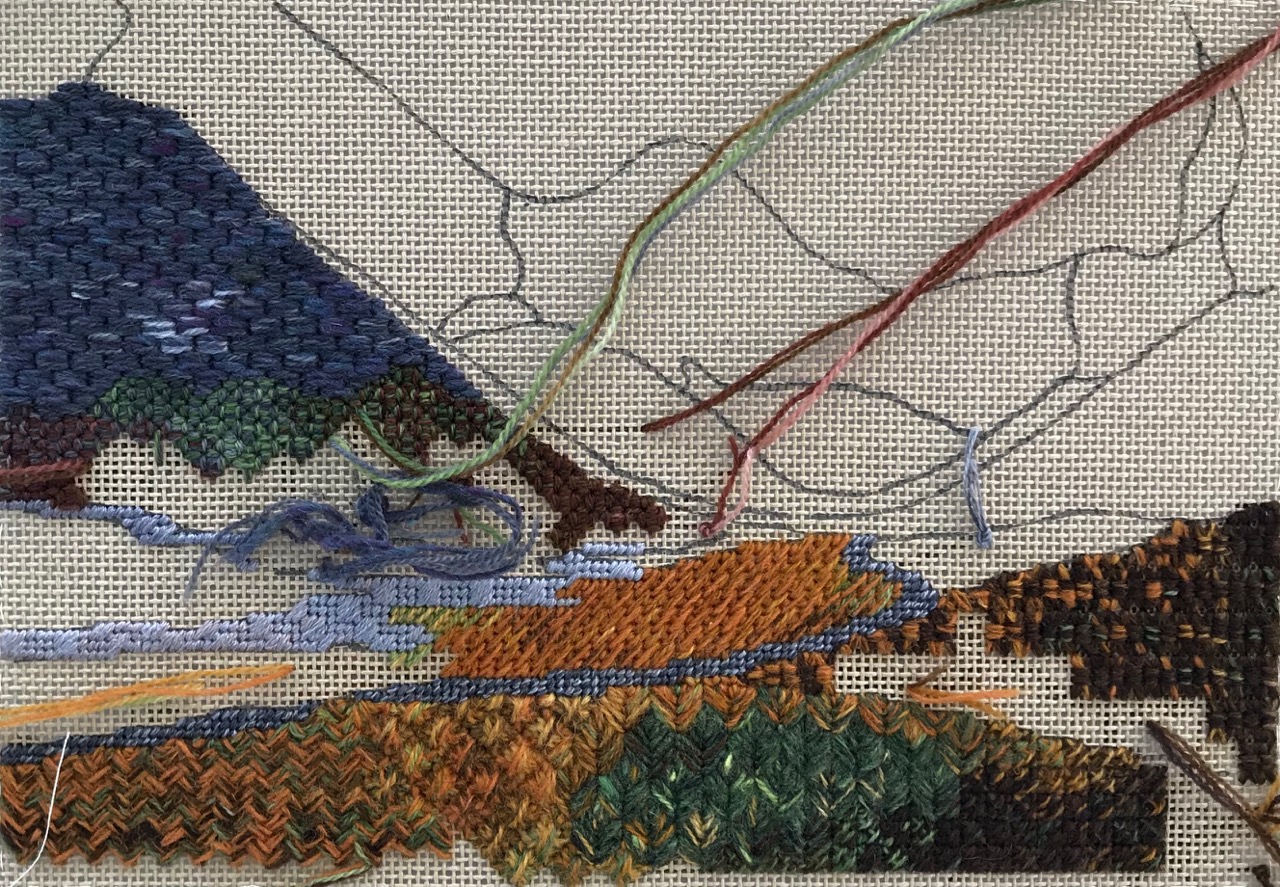
On day 5 I continued with the areas I had already started and worked Nobuko for the central areas and Horizontal Double brick for the top of the right-hand mountain. Stitching those stitches made me realise how much quicker it is to stitch horizontal, vertical or diagonal stitches rather than cross stitches! It saves so much time. However, the brief for the course states that you need to do a variety of stitches of different types. So you can’t get away with not doing any cross-stitches at all!
I worked the right-hand mountain in Pavilion and the mountains at the back of my design in Brick stitch on day 7.
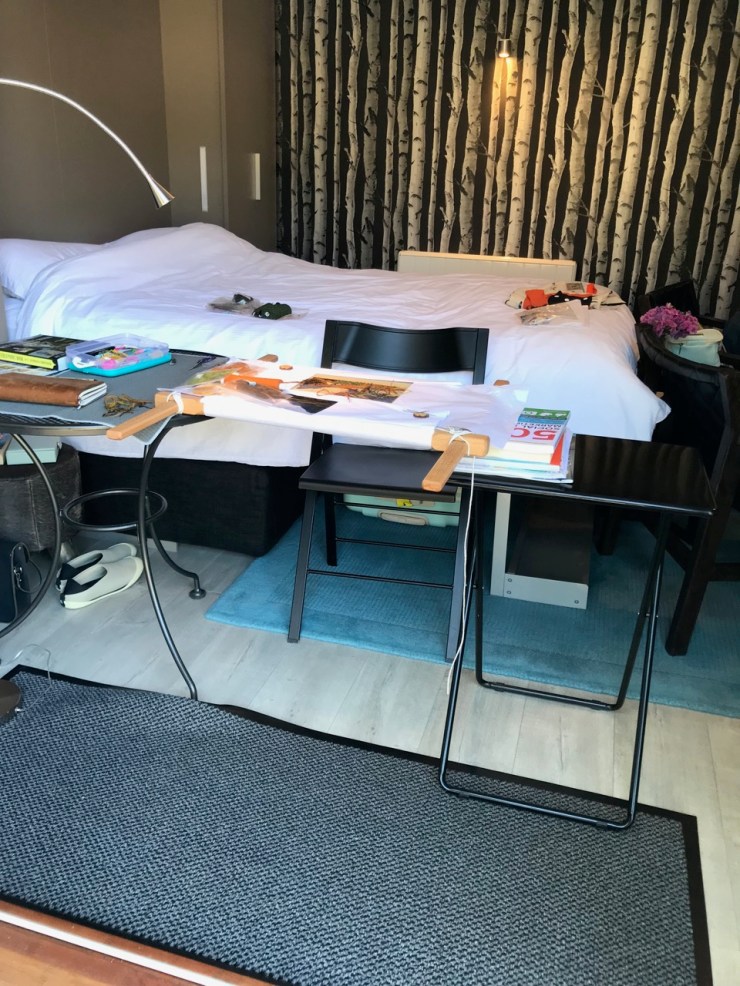
Sunday, day 7 was another work-on-your-own-day. However, unfortunately we couldn’t work at Hampton Court Palace on that day. By being inventive I created a lovely embroidery studio at the Garden House where I am staying. I managed to finish all of the foreground areas, which I was really pleased about.
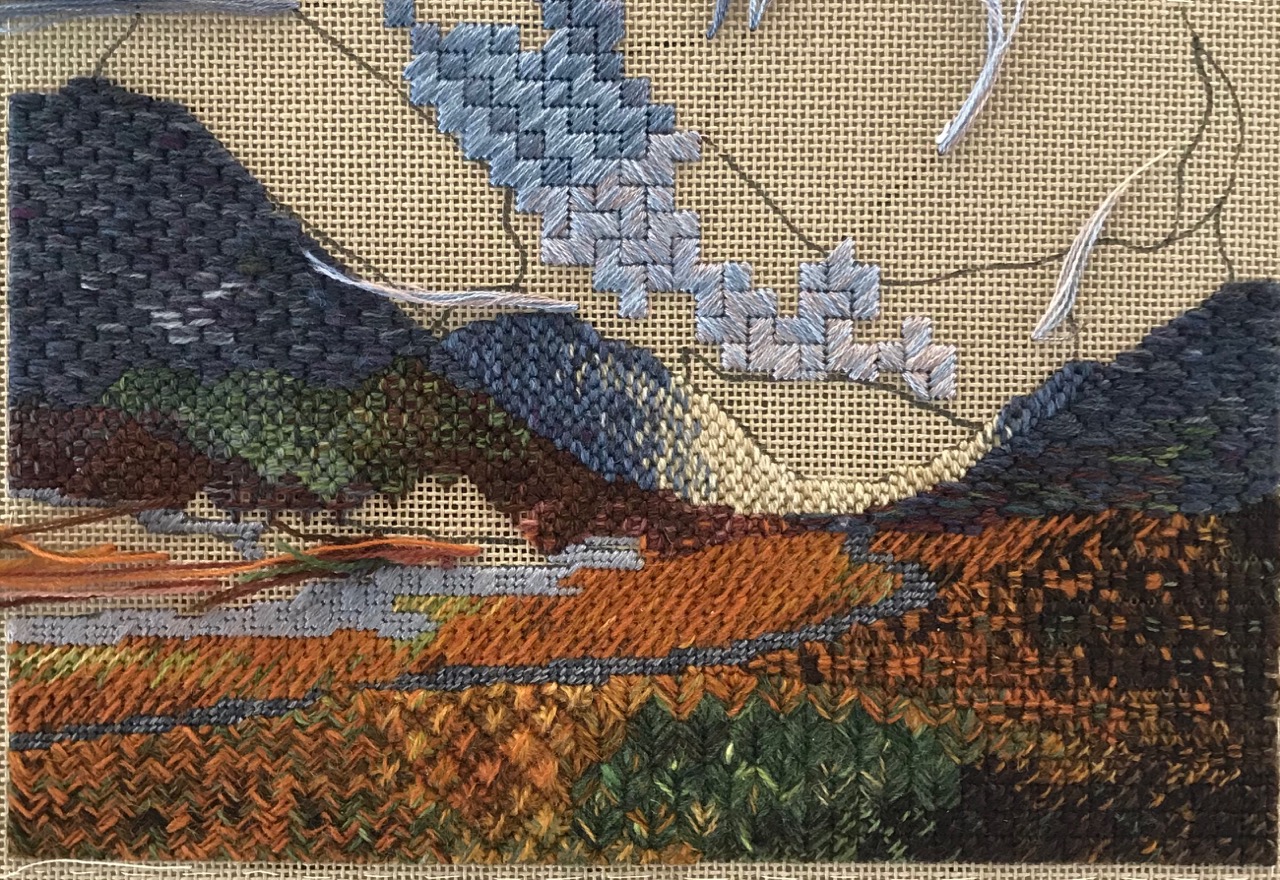
On day 8 I discussed stitching the sky with the tutors and picked my colours. The top part of the design is Byzantine-Scotch, the middle part Broken Byzantine and the bright part at the bottom Cashmere. I found the Byzantine stitches a bit difficult to get into the rythm at first, but once I got it, they went in quite well. In the afternoon future tutor Jess helped me to cut my mount board and cover it in calico.
Day 9 and 10 were work-on-your-own days again. As I wasn’t feeling well I only worked at Hampton Court for one morning and worked the rest from home. I managed to get all of the areas, apart from the sky, entirely finished.
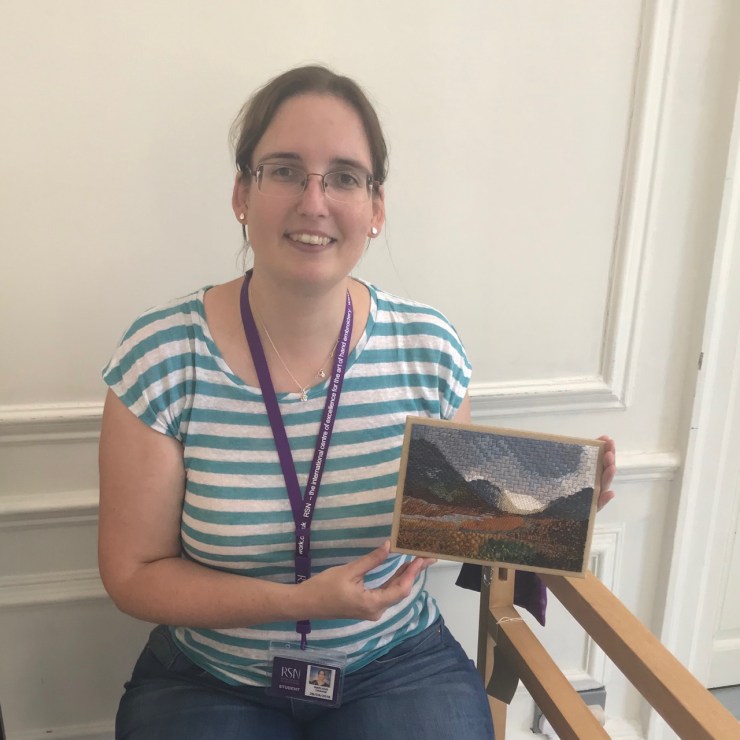
Fortunately, I was feeling better on day 11 and back at Hampton Court I finished stitching the sky just after lunch. After tidying up the back and filling any gaps in my work tutor Lisa had spotted I was able to take my canvas of the frame! Next it was time to pin it to my prepared mount-board ensuring it is tight and straight on the grain. As it had just gone 4pm when I finished that I decided to go home and leave the rest of the mounting for the last day.


On the final day I started herringboning the canvas to the calico. I was really happy that I remembered how to do this when tutor Sarah-Jane explained it to me last February. However, I still find it very difficult to pul the herringbone stitches tight enough. However, fortunately tutor Lisa was able to help me with that. Once I had finished that I pinned on the sateen and slip-stitched it to the canvas. I found this much more difficult compared to last time. The canvas, especially near the corners where there are multiple layers of it, is very difficult to sew through.


However, just after 3pm that was all done and after attaching my name label and checking my work was clean of loose fibres and that there were no visible pinpricks I was able to hand in my work! It should hopefully be assessed in August assessment period, which means I should get my marks in September. Fingers crossed!!! I will, of course, write a post about my results!
Below you will find a slide-show video of the progress of my certificate project (warning: the video has sound). I have also included thumbnail images of all of the days’ work, which you can click on and see them in more detail.


Well, what did I think of the summer intensive way of doing the certificate? It is a whole different game to doing it the term time way. I found that the only way to do it, is to be prepared, know what you want to do and just to go for it. There is no time for endless decisions about which stitches would look best and deciding on which threads you need to use. In addition, there is no time for lots of unpicking. So make sure that you make all of your stitches count. Even though I said before I started that I wouldn’t mind if I didn’t finish, you do get sucked into the psyche of having to finish when you are getting really close. People in my class were feeling down because they wouldn’t finish. I think about 7 or 8 out of the 11 who were in my class managed to finish on the final Friday. What I was surprised about that I managed to get so much done during office hours. I never stitched in the evening but just kept going between 9am and 5pm but with taking regular break times.
I will not do an intensive again unless I have already framed up, the design drawn/painted on, practised the technique and chosen my threads. If you are considering to do a summer intensive course, I would try and get your design approved before you come, or maybe book a private lesson beforehand to help you frame up. Think about the stitches you want to use, and practise them and/or try a kit or take a day class. I stitched Rachel Doyle’s canvaswork wool rack kit and I found it so helpful I had done this as it at least gave me some idea about what to expect during the certificate. Also, if you are doing the canvaswork intensive: bring your own threads. The RSN only stocks Appletons, DMC and Anchor and there are so many more lovely threads out there. So bring your stash! Also, bring enough thread. Canvaswork takes up a lot of thread and I had to place an emergency order from the London Bead company to get some more Gumnut Yarns before I ran out!
The best book for canvaswork to get is, in my opinion, Jo Ippolito Christensen’s ‘The Needlepoint Book’. Well recommended!
Doing an intensive course is very demanding and I would advice you to think very carefully before signing up for more than one or even all four in the same summer. You won’t have much spare time and even the weekend between consecutive modules will be taken up by preparation for the next module. Even the tutors have found it difficult to do consecutive modules!
What is next? I have no firm planning yet but the next certificate module I need to do is silk shading. I am hoping to be able to go back to the UK in October-November time and start it.

This is such an interesting ‘blog’ for me. Having just handed my Jacobean in for assessment, I now have the summer break to think about my Canvas piece – your words of wisdom have been extremely helpful and I feel a trip to The London Bead shop coming on – I will also put the book you have recommended on order and use the break to do some sampling. Like you I struggled with the mounting and on reading your words on how much tougher it is to mount the Canvas work I will make sure I leave myself plenty of time. Thank you for taking the time to put out this post.
LikeLiked by 1 person
Thank you so much Shiralee. So glad to hear that you are finding my blog usefull! Good luck with your canvaswork! Do let me know if I can help you with anything else!
LikeLike
I was following along on Instagram. You did an amazing job at coming prepared and staying on point. Congrats on finishing it on time. I’ve seen a few pieces come our from this course and I think this is now my new favorite.
LikeLiked by 1 person
Thank you so much Dima for your comments. It is so nice to read that everyone liked following along on Instagram. I was amazed I managed to finish on time. Just fingers crossed for the assessment now!
LikeLike
What a lovely piece Marlous! I did almost all of my modules as intensives (I just booked my eight days in the space of 12 days) and loved it. And in the old days, you would not get the brief before class started :). No prep work! But I loved being able to focus for 12 days and then have a completed piece at the end. I could not have done it without triple chocolate desserts from M&S though!
LikeLiked by 1 person
Thank you Jessica! That is amazing. It is brilliant to be able to focus on stitching for 12 days solid, and not have to worry about work etc, however, it was quite a challenge for me, especially since I am not used to stitching that much in one go (yet). I know M&S is a life saver!
LikeLike
Well done indeed. And you are not the first to have blessed the existence of the London Bead Company!
LikeLiked by 1 person
Thank you so much! That shop is brilliant and it was great they helped me out so quickly. Wish they were a bit closer to HCP though!
LikeLiked by 1 person
Het is weer een hele interessante blog geworden. Leuk de slideshow met muziek. Ik denk dat toekomstige cursisten daar weer veel van kunnen leren.
LikeLiked by 1 person
Dankjewel Mama! Ik hoop dat toekomstige cursisten er veel aan hebben.
LikeLike
Well done Marlous! Such a great achievement to be able to start and finish in such a short space of time. It looks wonderful too.
One of the advantages of the intensive is that you have to get into the technique quite quickly. I really struggled getting into canvas work, and I wonder had I done at least a few intensive days if that would have helped. It definitely would have helped with silk shading, which despite your comments on the intensive, I wish I had done! Though maybe the ‘term time’ way of intensive.
Thanks for your comments about the intensive, and I’m not really surprised you weren’t feeling well one day. I imagine it does take the enjoyment out of stitching a little. But still, if there is no other option, it is a good thing they offer it. This gives me food for thought on how I will approach the Diploma. I am jealous at how quickly you did complete the piece, and wonder if you did actually learn more this way. I guess it all depends on the tutor.
LikeLiked by 1 person
Thank you Catherine! It is really an advantage to be able to immerse yourself in a technique. I think the silkshading is doable if you are framed up and have your design approved. The tutors even suggested that to some of us who are coming back next year to do the intensive. The pressure did take the enjoyment out of it a little, but I also found out how much I was enjoying embroidery too, being able to stitch while I was not very well!
LikeLiked by 1 person
You should be so proud! Terrific work under pressure and you finished! I thoroughly enjoy living vicariously through your adventure. Thanks so much for taking the time to post. Barb in CA
LikeLiked by 1 person
Thank you Barb! Glad you enjoyed reading about my adventures!
LikeLike