
I spotted Jenny Adin Christie‘s wren for the first time when Catherine of Hillview Embroidery and I attended a workshop by Jenny at Au ver à Soie in Paris during their Nuit de la Broderie in February 2018.
The odd thing was that at first I never realised that it was embroidered when I saw a workshop advertised for it in the Beating around the Bush 2018 programme. I contacted Jenny about it and she sent me a catalogue with all of her kits. You can order the wren, the mossy hillock, the wooden base (with or without tape measure) separately to suit your budget and how you would like to display your finished wren. In the end, my lovely boyfriend bought me the kit for my birthday last year!
As embroidery kits go, it is quite an expensive one, but it is well worth it, as there are so many different techniques and materials used in it and everything is packed and labelled separately so you know exactly which bits go where. All designs are traced on the fabric and backed by cotton so you can use a hoop for stitching. The instructions are very detailed (and also include left-handed instructions where appropriate) and there is quite a bit of freedom to adapt the design. Jenny also provides plenty of threads and other materials to allow for mistakes. Of most bits I had stuff leftover, the only thing I ran out of was the beige and translucent sewing thread but those were easily substituted from my own stash. You also don’t need any special equipment of your own to make this kit. All you really need is a 6″ hoop, embroidery scissors, awl/stiletto, paintbrush, mellor and some strong glue.
After reading through the instructions I decided to start with the hillock as the wren daunted me a bit and I wanted to feel a bit more like what I was doing before I got stuck into the bird. I did think it was a good move as it gave me the opportunity to try needlelace on the fungi before attempting a much bigger piece for the bird’s back.


I had previously never tried needlelace, needle weaving and I had only little practice at (teardrop) eyelets and stumpwork. So in the progress of working this kit, I have learned so much. I don’t think I have ever done a kit that has taught me so many different things at once. This kit is definitely not one for pure beginners at embroidery. However, if you have a little bit of experience in or more embroidery techniques and you are good with small and intricate details this kit is for you. Jenny’s instructions will help you achieve the very best result possible.
Since this design is so specific and detailed I am not sharing a lot of images of the different steps to creating this as it would be an infringement of copyright and it is part of the fun of stitching this kit if you are surprised by how all of the techniques fit together to create this wonderful little bird.
I have heard on the grapevine that Jenny might be planning to design a male wren too. I hope she does, as I love the bright blue colour of that bird and I would love to stitch it to accompany my female wren.
Jenny Adin-Christie hasn’t got a webshop yet and is not active on social media yet. If you like to purchase this kit or any of her other ones please send her an e-mail at Jenny.adin-christie@sky.com or contact her through her current website.


Well done! It really is such a lovely design, you’ve done credit to Jenny and her brilliant kit and instructions! I love how it is so ‘different’ from what we consider to be embroidery. Thanks for sharing and for such a great review. Jenny has possibly the best instructions out there, so it’s great to hear that you got on so well with them.
LikeLiked by 1 person
Thank you Catherine! I agree, Jenny has the best instructions I have seen. I just love how she can design these kits which involve so many different techniques but still look as they all belong together.
LikeLike
Sorry – I think I might have left two comments in my excitement, please feel free to delete this and one of them if you like (oops!)
LikeLike
Yes you did! Excitement is good in this case! I will delete it!
LikeLike
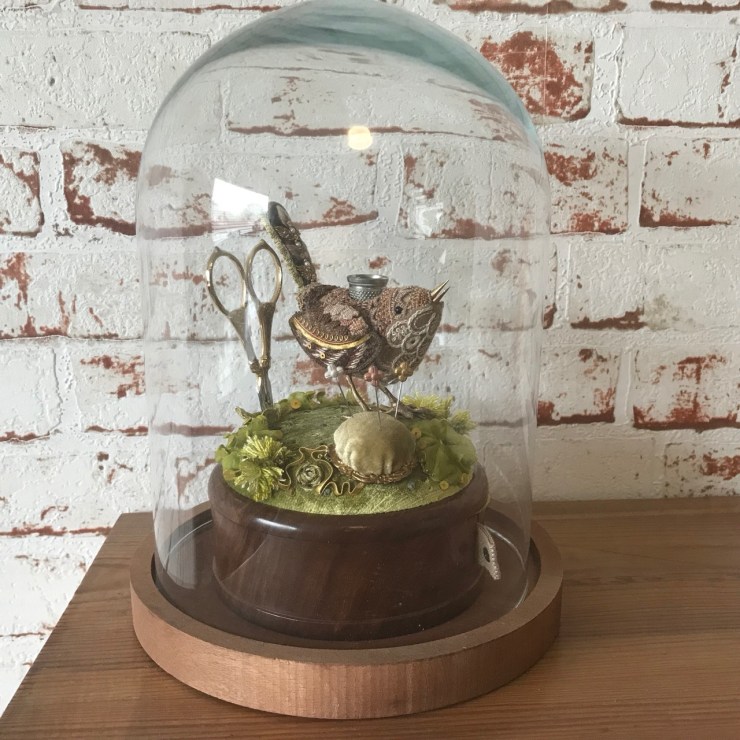
This is amazing Marlous! I love the video too 🙂 It seems like one of those once-in-a-lifetime kits well worth the splurge and that it teaches so many new techniques in the process is amazing. I really like the bell jar you added to keep dust off, she’s almost too pretty to use as a tool caddy! Will you use her though or keep her more as a stitchy decoration? Either way, I really enjoyed following your progress on this one!
LikeLiked by 1 person
Thank you so much Aurelia! That is probably right, I just kept looking at a picture of it and knew how much it would challenge me and how much I like the final look. Especially if you pay a lot for a kit I really want something that I like the look of as I don’t want to make something that expensive just to learn something. I bought the bell jar as soon as I got the kit as otherwise it would get ruined too quickly! I don’t think I will use it, but it looks really nice on top of my printer’s cabinet!
LikeLike
That is spectacular!
LikeLiked by 1 person
Thank you so much Robin!
LikeLike
I love Wrens. And I love yours, it turned out beautiful.
LikeLike
Thank you so much Lizzie!
LikeLike
How utterly enchanting – well done indeed!
LikeLiked by 1 person
Thank you! Yes, that is why I like the design so much, it looks so vintage and at a glance like a stuffed wren.
LikeLiked by 1 person