What a week I have had! Five full days at the Royal School of Needlework, which were the first five days of my first certificate course module: Jacobean Crewelwork. Even though I had been to the RSN before I did feel quite nervous and lost on my first day but during the next few days I quickly started to feel at home. It is so fantastic to get taught in a historic building of such grandeur and to walk outside during lunchtime in the magnificent gardens. I feel well and truly a student again with my own RSN student pass.


On arrival on my first day, tutors Shelley Cox and Becky Quine straightaway dropped a big pile of books in front of me and told me to start designing my project. I knew that this would be the first thing I needed to do, but seeing all of these books and no indication on how, why and what I felt rather lost. I think Shelley spotted my fear and produced a large folder with line drawings of various ‘Jacobean Crewelwork’ elements that I could combine and trace. That made life a whole lot easier. I had thought about my design a bit before my arrival and I knew I didn’t want the traditional tree with hillocks but more of a freeform branch. I settled on an S-shape to be the main shape of my design. In a book my Hazel Blomkamp I spotted a flower that I really wanted to use as inspiration but Shelley pointed out that there are a lot of the same stitches in that flower and that I should aim for flowers with the possibility of variety in stitches. In the end, I picked two flowers, which at first glance appear the same but are actually different. They will sit at either end of the S and the area in between quickly became filled with smaller flowers, leaves, a butterfly and a snail.
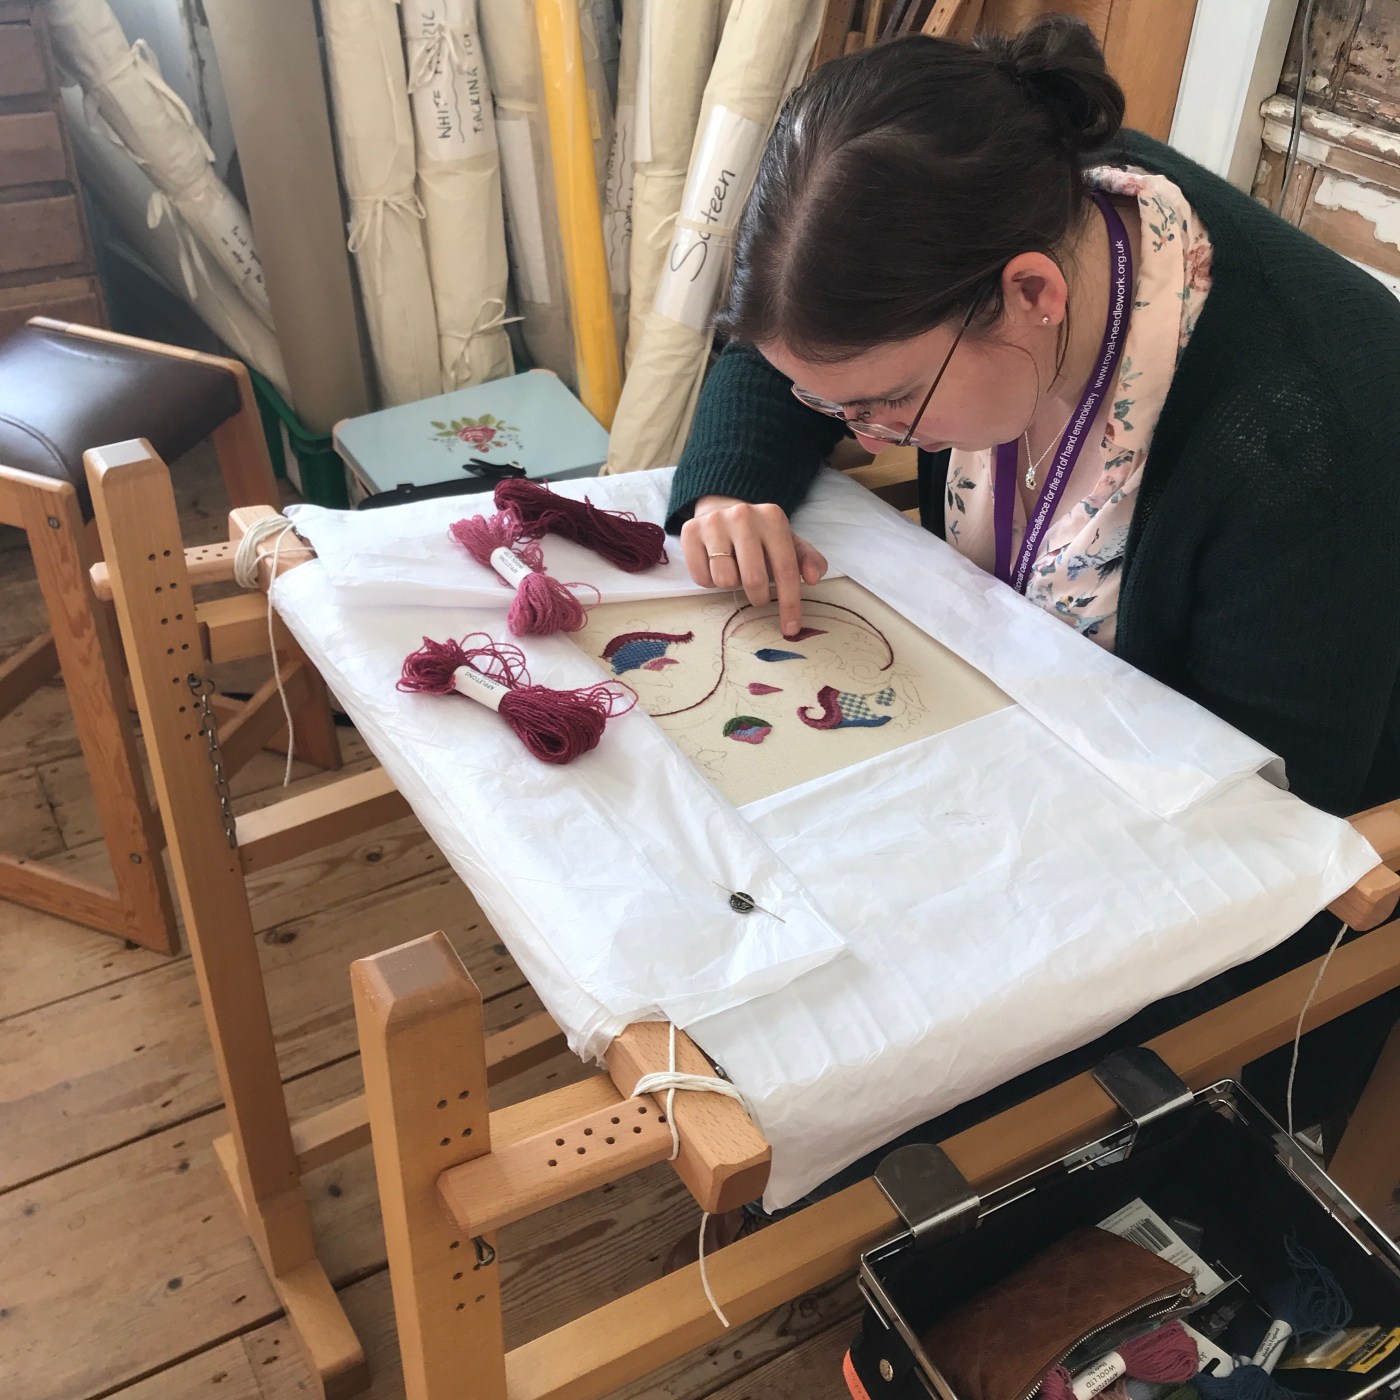
Next, Becky helped me to set up my frame by sewing the fabric to it, applying webbing to the sides and lacing it. It was actually less difficult than I imagined. Even applying tension so the fabric is thought, which Lisa Bilby helped me do the next morning was far easier than I thought. Shelley in the mean-time drew my stitch-plan. I wish I could have brought my stitch-guide or even thought about what stitches I wanted to use. However, the stitch-plan is not set in stone and when I get home I can look for some more nice stitches.


The last things I did on the Monday was to prick my design so I could pounce and paint my design the next morning. I also chose my colours. I was really happy I chose them already as the wool rack has been put in a very dark part of the school so you can’t really tell the colours properly. Shelley approved my choice so that was very quickly settled. In the evening I sat on the bed in my Airbnb and drew up the colour plan.
On Tuesday my tutors were Lisa Bilby and Kate Barlow. After Lisa helped me set up my frame Kate helped me pounce my design. It was actually much quicker and easier than I thought and the design appeared very clearly. The next challenge was painting the design on. I was really happy I brought my own very fine paintbrushes as the one they supply is not really fine enough. I ended up using a 000 brush. The painting went fine, no major disasters, and I actually managed to paint the lines so thin that I can sometimes hardly tell that they are there. I was finally ready to start stitching.
As with any Crewelwork design you usually start with trellises and when I talked to Kate and explained I had done one before during a day class she was quite happy for me to get on with it. Counting, however, is not quite my strong point. Kate quickly pointed out that my trellis wasn’t equal even though I was convinced I had counted correctly and they were equal distances apart but I obviously had made a mistake. The second try was much better. Next Lisa helped me with stem stitch. I knew how to do that stitch but I always forget that holding the loop one way is the real stem stitch and holding the loop the other way is actually outline stitch. However, which one is which? Thanks to Lisa I now know! When stitching away from you the loop should be to your right and stitching towards you to your left for true stem stitch. Next Lisa started me on the raised stem stitch, which I was glad I had tried before too. Then it was already time to go home.
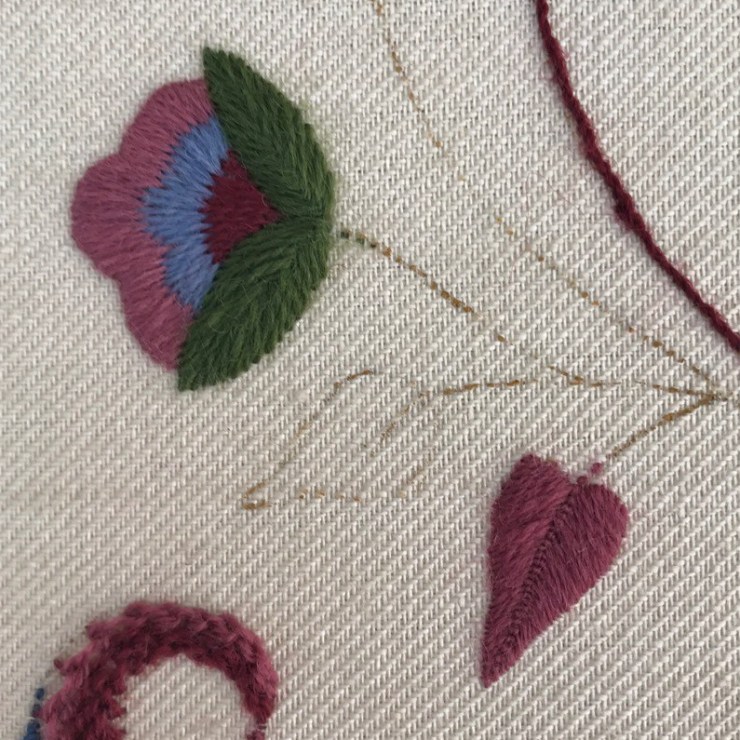
On Wednesday my tutors were Rachel Doyle and Jacqui McDonald. Rachel showed me how to do block shading, closed fly stitch, raised fishbone and laid work. I was really happy with the flower and accompanying leaves I stitched. I talked to Rachel about the planning of my classes and she suggested to come on the Thursday as well, as originally I had not booked that day, to get as many stitches learned as possible. That way when I come back in February I will have three lessons left in which I can do the finishing touches and mount it. That is hoping the tutors are happy with what I have stitched at home and that I don’t need to pull it all out, which is a great fear!


Before class on Thursday, I un-stitched the darkest part of the laid work as all evening I had been looking at photographs of my design and I just was not happy with that colour change as the jump was far too great. I was much happier with my second attempt and the choice of colour for the trellis. My tutors of the Thursday were Becky Quine and Heather Lewis. Becky had seen my design on the Monday and was really happy to see how it had progressed. During the day I learned raised chain stitch (which looks like a knitted band but is very fiddly to do), satin stitch and Cretan.

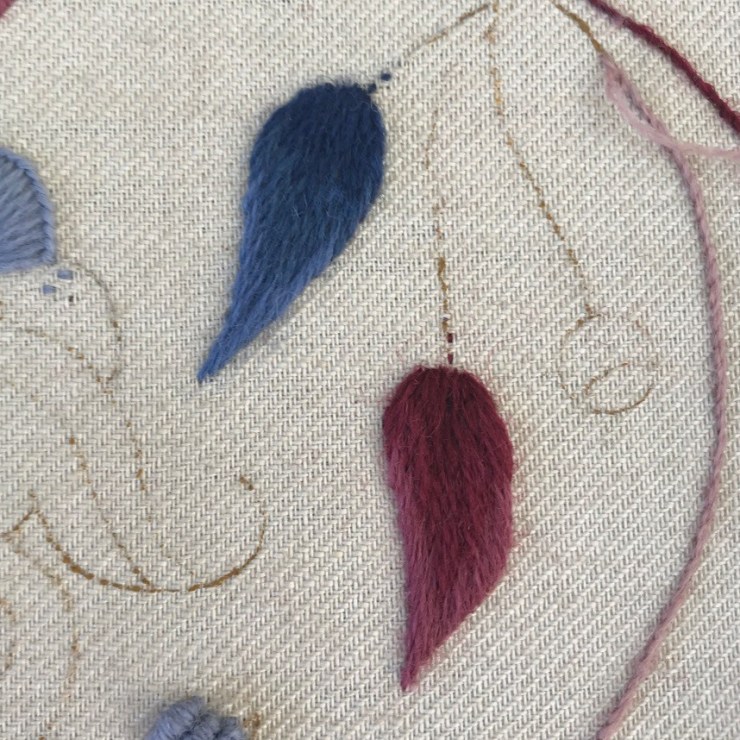
Before class on Friday, it was un-stitching time again and I redid part of the trellis over the laid work as it was not exactly. Again a better second attempt. Today we only had one tutor Owen Davies because there were only four of use. Owen showed me how to do long and short stitch which is my least favourite as I am never happy with how it turns out. He guided me through the first leaf and I did the second on my own. Owen said even though it wasn’t perfect it was a really good attempt as I managed to get the point of the leaf perfectly sharp, the edges neat and the colours flowing correctly. The only thing he would have changed was the angle of some of the stitches in the lightest colour but other than that it was really good. He said because I am a beginner it is important to show progress throughout the design. So I think I will leave the leaf in as I doubt the second attempt will be much better. He also showed me bullion knots, which are difficult to get in the correct tension. Loose enough so they will fit over the needle but tight enough to form a neat shape. We talked more about how to continue, the order of work and which stitches I could use, which was really helpful advice, as I need to do work the majority on my own. I nearly gave Owen a heart-attack though, when I produced a seam-ripper to pull some stitches out. I explained that I thought using scissors would be far scarier but he showed me how to use my new Ernest Wright curved embroidery scissors safely. So I will be using them from now on!
The week absolutely flew by and wish I was staying for another week. The place is just so inspiring that you just simply want to keep stitching. I am also rather nervous continuing on my own, as I have no tutor’s to regularly check back with. I just hope I will be stitching everything correctly, keep my threads in good condition and the fabric clean. Fingers crossed all will be well.
Can’t wait to work on my project now and see it progressing. I will be posting regularly on my blog, Facebook and Instagram to share my progress. I would really welcome any feedback or suggestions you may have as I rather get my stitching as good as possible before I return in February rather than tutors telling me I need to pull it all out!

I’m glad things were not as scary as you expected them. That must be because you were so prepared 😉 I love the piece you designed. It’s such a change from the typical tree and stag we constantly see.
LikeLiked by 1 person
Thank you Dima. I am glad I was! Other blogs already had given me a good idea of what to expect. I am hoping I am helping others with my blog. The main thing I had decided before I started designing, and that I didn’t want to compromise on, was to stay away from the static tree and stag sign. I prefer a much more flexible design.
LikeLike
Looking good Marlous! Once we did not live in Salisbury anymore, I came over from the Netherlands for two weeks at a time. It is hard work, but I could just stitch one module during this time.
LikeLiked by 1 person
Thank you Jessica! Wow I couldn’t imagine just yet doing it all in two weeks! Although I am planning to do the summer intensive in Canvaswork. But I am planning to get a head start and having my design, threads and frame all ready before the intensive starts. What I did find difficult is that I can’t really work very well at the place that I am staying at. Bad light, no desk/trestles. To get some homework done I arrived at the RSN at 9am and left at 5pm. That worked ok for me.
LikeLike
I was wondering if you have been using your slate frame bag while you have been travelling back and forth to the RSN? Has it worked out as you expected?
LikeLiked by 1 person
Yes I did use it. I was really happy with it as it felt a lot safer carrying my embroidery around. The bonus was that I could hang it on the handle of my suitcase trolley (see photo on instagram) so I would have another hand free and it wouldn’t bang against anything. The only thing was that the frame is just too big for the regular security scanners at St Pancras. The officer kept trying to push it through even though you could tell it would not fit! That was a scary moment. The bag kept it safe though. In the end he told me that he would put it through a larger scanner which they did have 😬
LikeLike
Thank you for allowing us to travel on the Crewelwork journey with you. You have made a wonderful start, keep up the good work.
LikeLiked by 1 person
Thank you very much Sally!
LikeLike
Very nicely done. Long and short stitch is badly explained and badly drawn in almost all stitch dictionaries, so I’m not surprised you struggled. I did too, and it’s still not a favourite, although Tracy Franklin gave some advice, almost as an afterthought during a weekend course I did with her!
I think the best advice for you, since you’ve now had the more helpful tutoring, is just don’t rush it!
LikeLiked by 1 person
Thank you!
LikeLike
Please keep taking us through your project, a really interesting blog, thank you for sharing your experience. Live your laid work.
LikeLiked by 1 person
Thank you very much. I definitely will, so please keep checking back!
LikeLike
I’m so glad you’ve had such a great start to your Certificate! I’m looking forward to watching it grow. I love your colours 😊
LikeLiked by 1 person
Thank you Catherine!
LikeLiked by 1 person
What a fab start you have made – the design is lovely. I know what you mean about long and short stitch – it is one of my least favourite too! Look forward to seeing your progress.
LikeLiked by 1 person
Thank you!
LikeLike