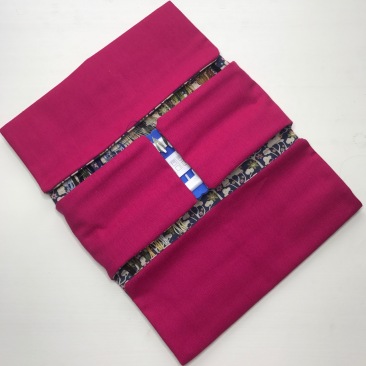
In previous posts, you will have seen that I like using a Pako Floss Organiser to keep my threads organised when working on a particular project. I really like using this organiser but the only problem is that you always need to wrap it in something or put it in a little bag to ensure that the threads don’t get dirty, especially when you are on the go.
I always had the idea to make a bag for it but never quite got round to it. However, since I am using my floss organiser a lot at the moment for my miniature needle painting project and since I managed quite well when making my slate frame bag I thought I would give it go.
I didn’t make it overly complicated but just a nice little wrap that is sturdy, protects the threads and organiser and looks good! Have a read of the how-to below if you would like to make one yourself.
Materials
- 60 cm * 60 cm of fabric for the outside (I used canvas cotton in fuchsia)
- 60 cm * 60 cm of lining fabric (I used Tilda Wildgarden 3)
- 60 cm * 60 cm of fusible fleece batting H630.
- 80 cm of cord or leather strap
- label or other decoration
- Snap hook (I used a small 7*38 mm snap hook by prym in brass)
Instructions
- Cut from each corner of the outer fabric, lining and batting a piece measuring 24 cm * 15 cm. Your pieces of fabric should look something like this:
- Iron the batting to the wrong side of the lining fabric.
- Put the outside fabric and lining wrong side together and stitch nearly all the way around, leaving a small opening for turning and leaving a 1/4 inch seam allowance.
- Turn right side out and ladder stitch the opening shut.
- Machine-stitch the outer fabric and the lining fabric together from inside corner to inside corner (see below).

- Wrap your floss organiser as shown.
- Fold your cord or leather strap in half and attach the hook as shown.
- Stitch the cord/strap securely to the outside fabric and cover the raw edges with a label or other decoration.
- Stitch the cord/strap to the bottom of the wrap.
You have finished your floss organiser wrap!


It’s so cute! I love how all your stuff has your logo.
LikeLiked by 1 person
Thank you! I really like using the labels I had made by Wolcafé.
LikeLike
It looks lovely!
LikeLiked by 1 person
Thank you!
LikeLiked by 1 person
A very elegant looking wrap.
LikeLiked by 1 person
Thank you!
LikeLike
That looks a lovely, usable wrap. It will keep your threads beautifully organised!
LikeLiked by 1 person
Thank you!
LikeLike