I can’t believe it has been over a year since my last post. Those of you who are following me on social media will know that I have not been idle. I just had so many large projects on the go, and I didn’t want to write really short posts with just a few progress photographs, that is what I like to use social media for. In addition, with Covid-19 and lockdown I have not really been in the mood for writing either, I just wanted to do practical things like stitching.
Just before lockdown started in the Netherlands and in the UK I was over at the RSN at Hampton Court palace to start my second diploma module. I had started my blackwork module the previous October but since that is so slow going I really wanted to start another to run side by side so I would have plenty to do in class when I was over and plenty of homework to get on with. How different did it all end up….. I had three live lessons at the end of February and a good idea of what I wanted to do with my design and had planned to be back in May for a few more lessons. However, that never happened. Fortunately the RSN started to offer one-on-one online certificate and diploma classes so I did one of those and everything else was done at home and on my own. Applique was quite a handy module to have been working on as some many things you can sample and try off your frame before finally committing. Those of you who know me, know that I am not usually a big fan of sampling but I definitely really enjoying sampling and experimenting for this design. During the small window of opportunity in August in which there were no quarantine restrictions for me to travel to the UK I went back to the RSN to have my work checked over and mounted it.
In the end it ended up as one of my quickest projects as I managed to finish it within six months, however, the amount of actual hours I put in was more than likely the most of any project.


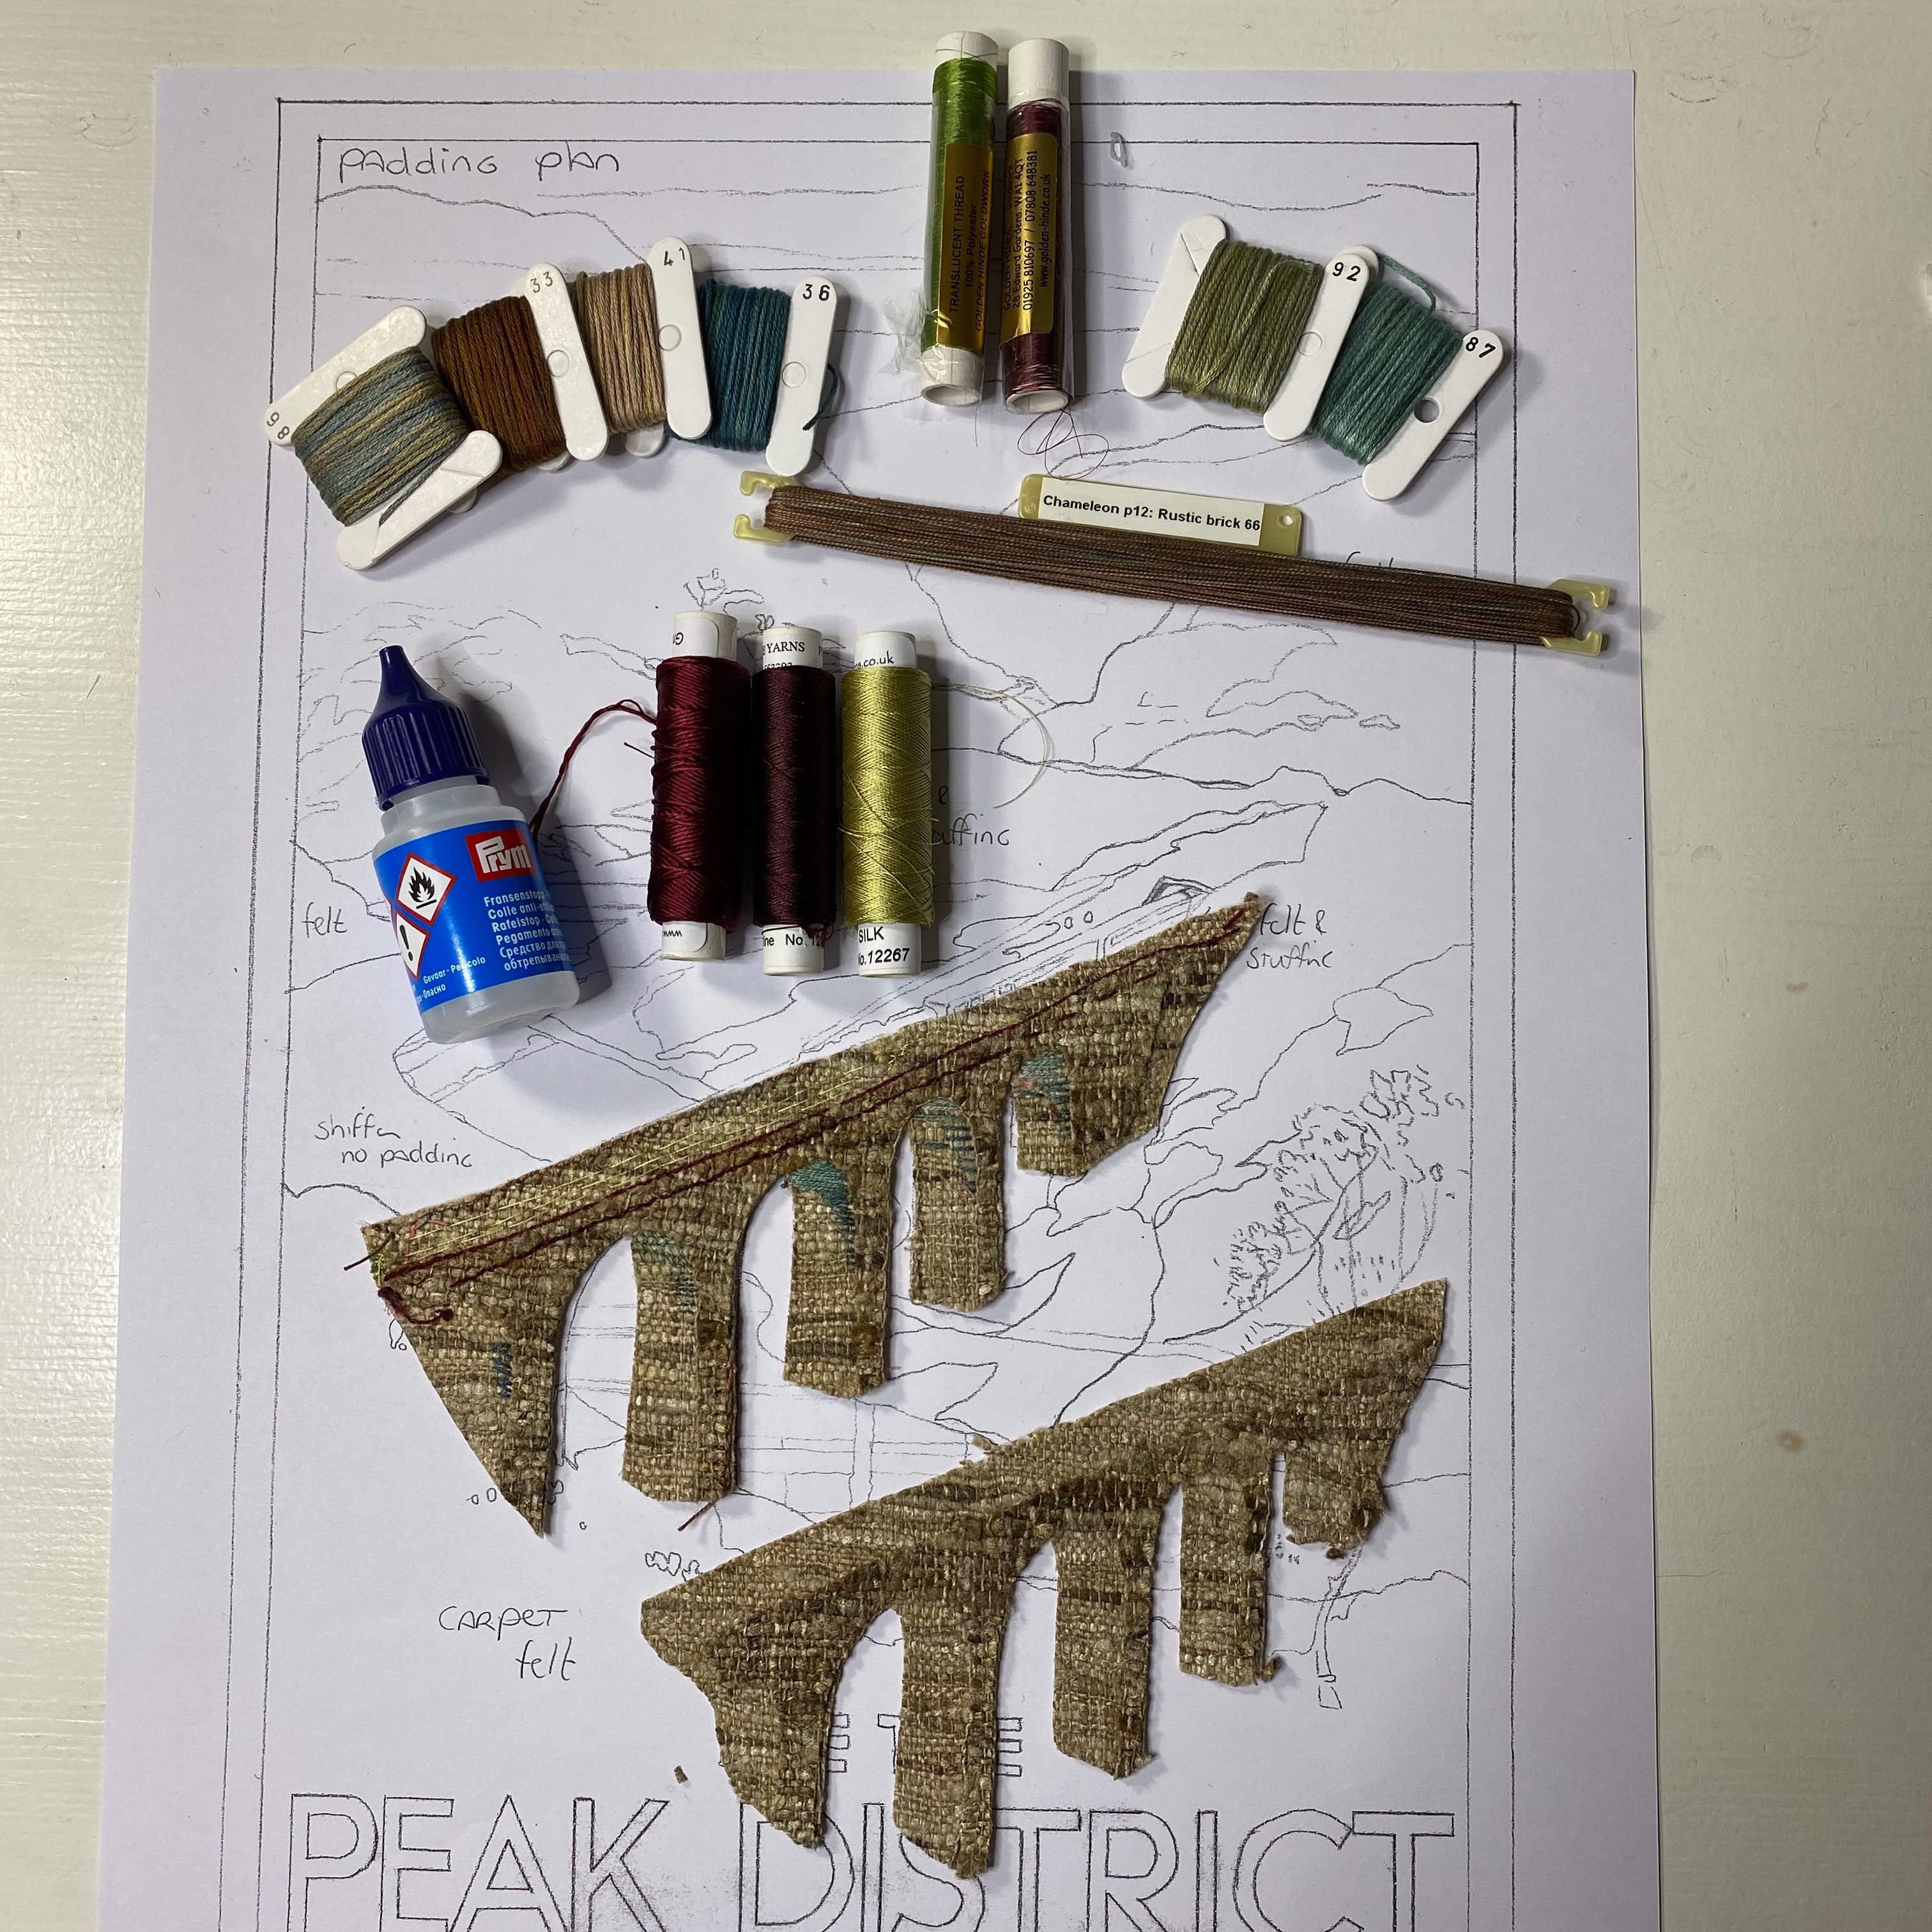
When I picked the design with one of the tutors in October 2019 I had a rough idea what I wanted to do with it. Having a design and idea in mind certainly made shopping for fabrics easy. Shelley from Thistlittlethread and I had a fabulous day out in London exploring the fabric shops of Soho and Brick Lane. I manage to find quite a lot of fabric there and I bought the rest at the Knitting and Stitching show at Alexandra Palace. Having compiled the fabric pack made the design really come together in my head and it was easy to find the threads to match from my stash.
To give you an idea of the threads and fabrics I have tried to keep a list. However, do ask me if you have an specific questions:
- Appletons wool: 546, 693
- Chameleon p12: Rustic brick 66
- DMC stranded cotton: 3827, 746, 352, 677, 676, 353, 3809
- Au ver a Soie Soie d’Alger: 1743, 1744
- Gutterman: 143, 582, 639
- Amman Mettler: 140, 611, 844, 1468
- DMC Perlé 5: 746
- Devere Yarns Silk: 12267, 72106
- Handweaver’s gallery Donegal Yarn: Glyde and Graney
- Golden Hinde translucent thread: red, green, yellow
- House of Embroidery stranded cotton: 3, 20, 36, 29, 72, 78, 71, 58, 90
- House of Embroidery perlé 12: 90
- Golden Hinde red leather
- Silk Route Silk Tussah: JB823 JB837
- Kaffe Fassett (Rowan) shot cotton fat quarter spring pack (pack no longer available but the different colours are sold separately)
- Borovick fabrics Silk organzas
- The Makers wool felt batts
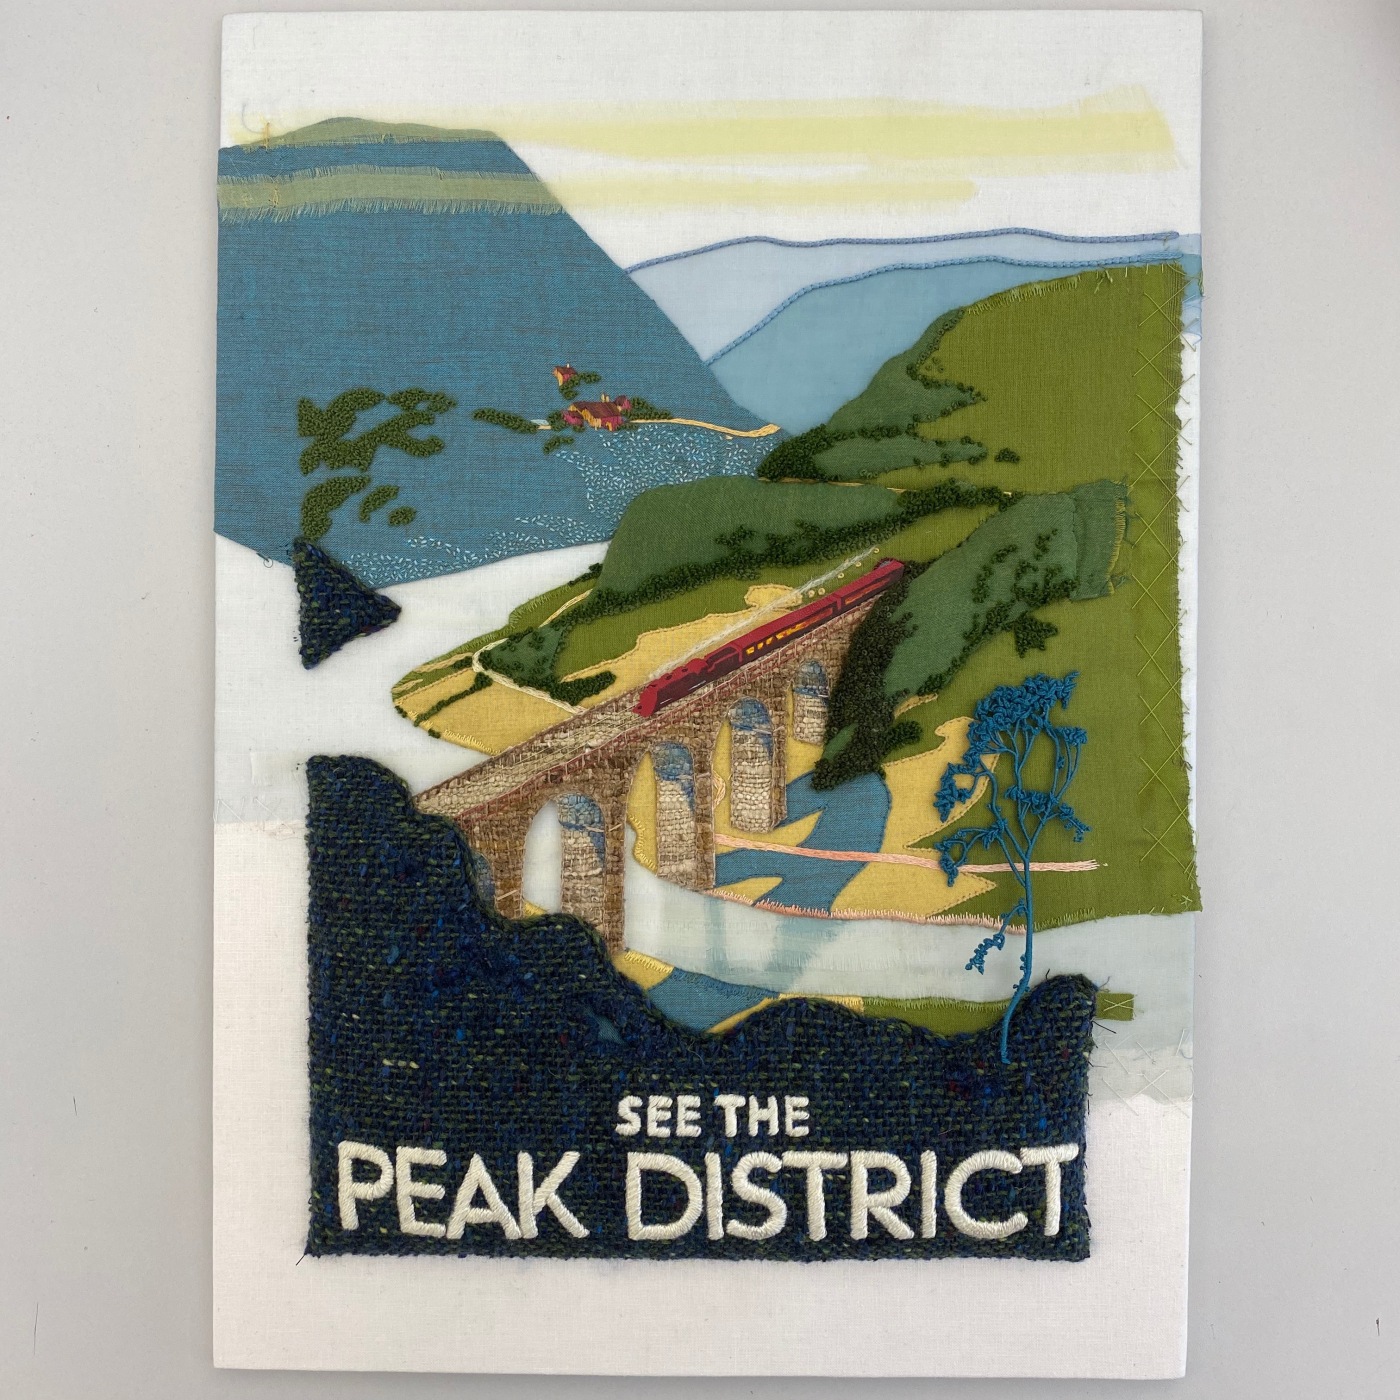
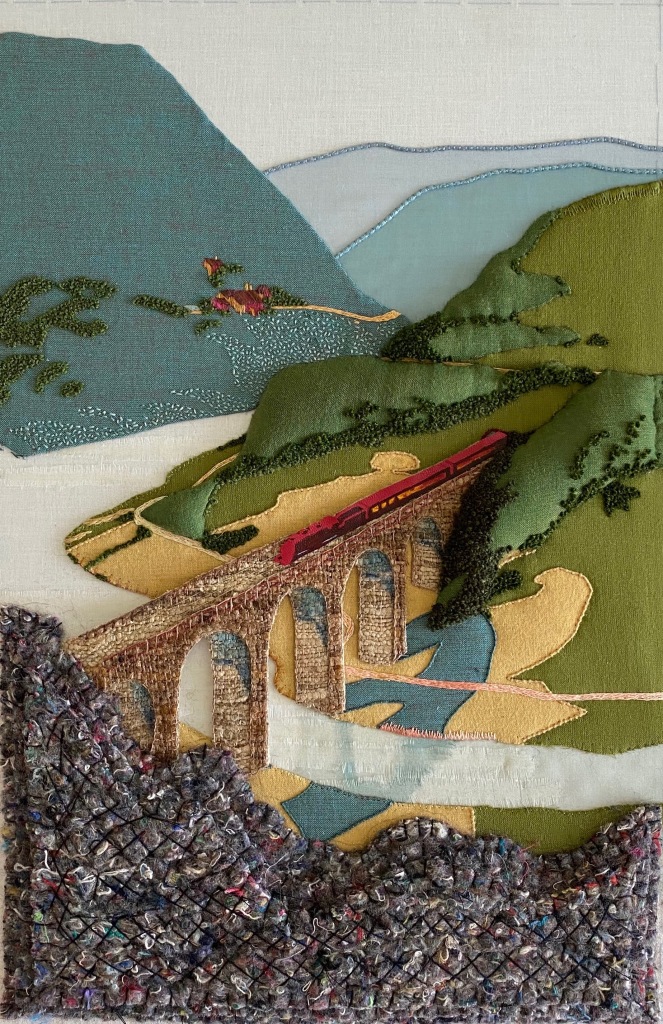
In the remainder of this post I will share any specific techniques I have learned while stitching this design. I am hoping that by focussing on those details I might give you some ideas for (part of) your future projects. As ever don’t hesitate to comment below, or contact me directly via e-mail if you have any specific questions.
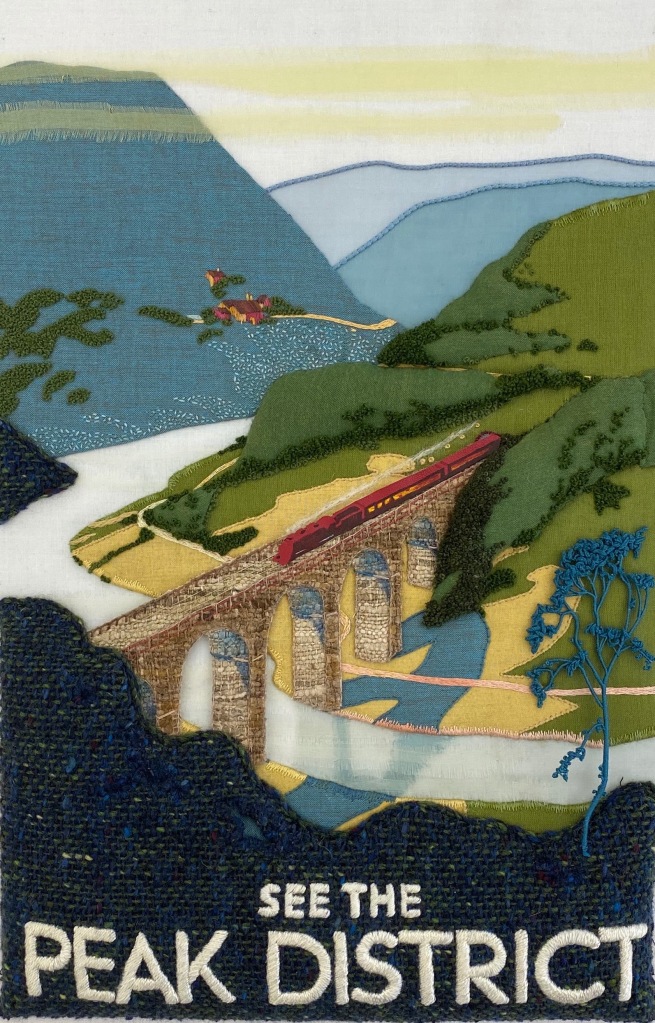
The Foreground
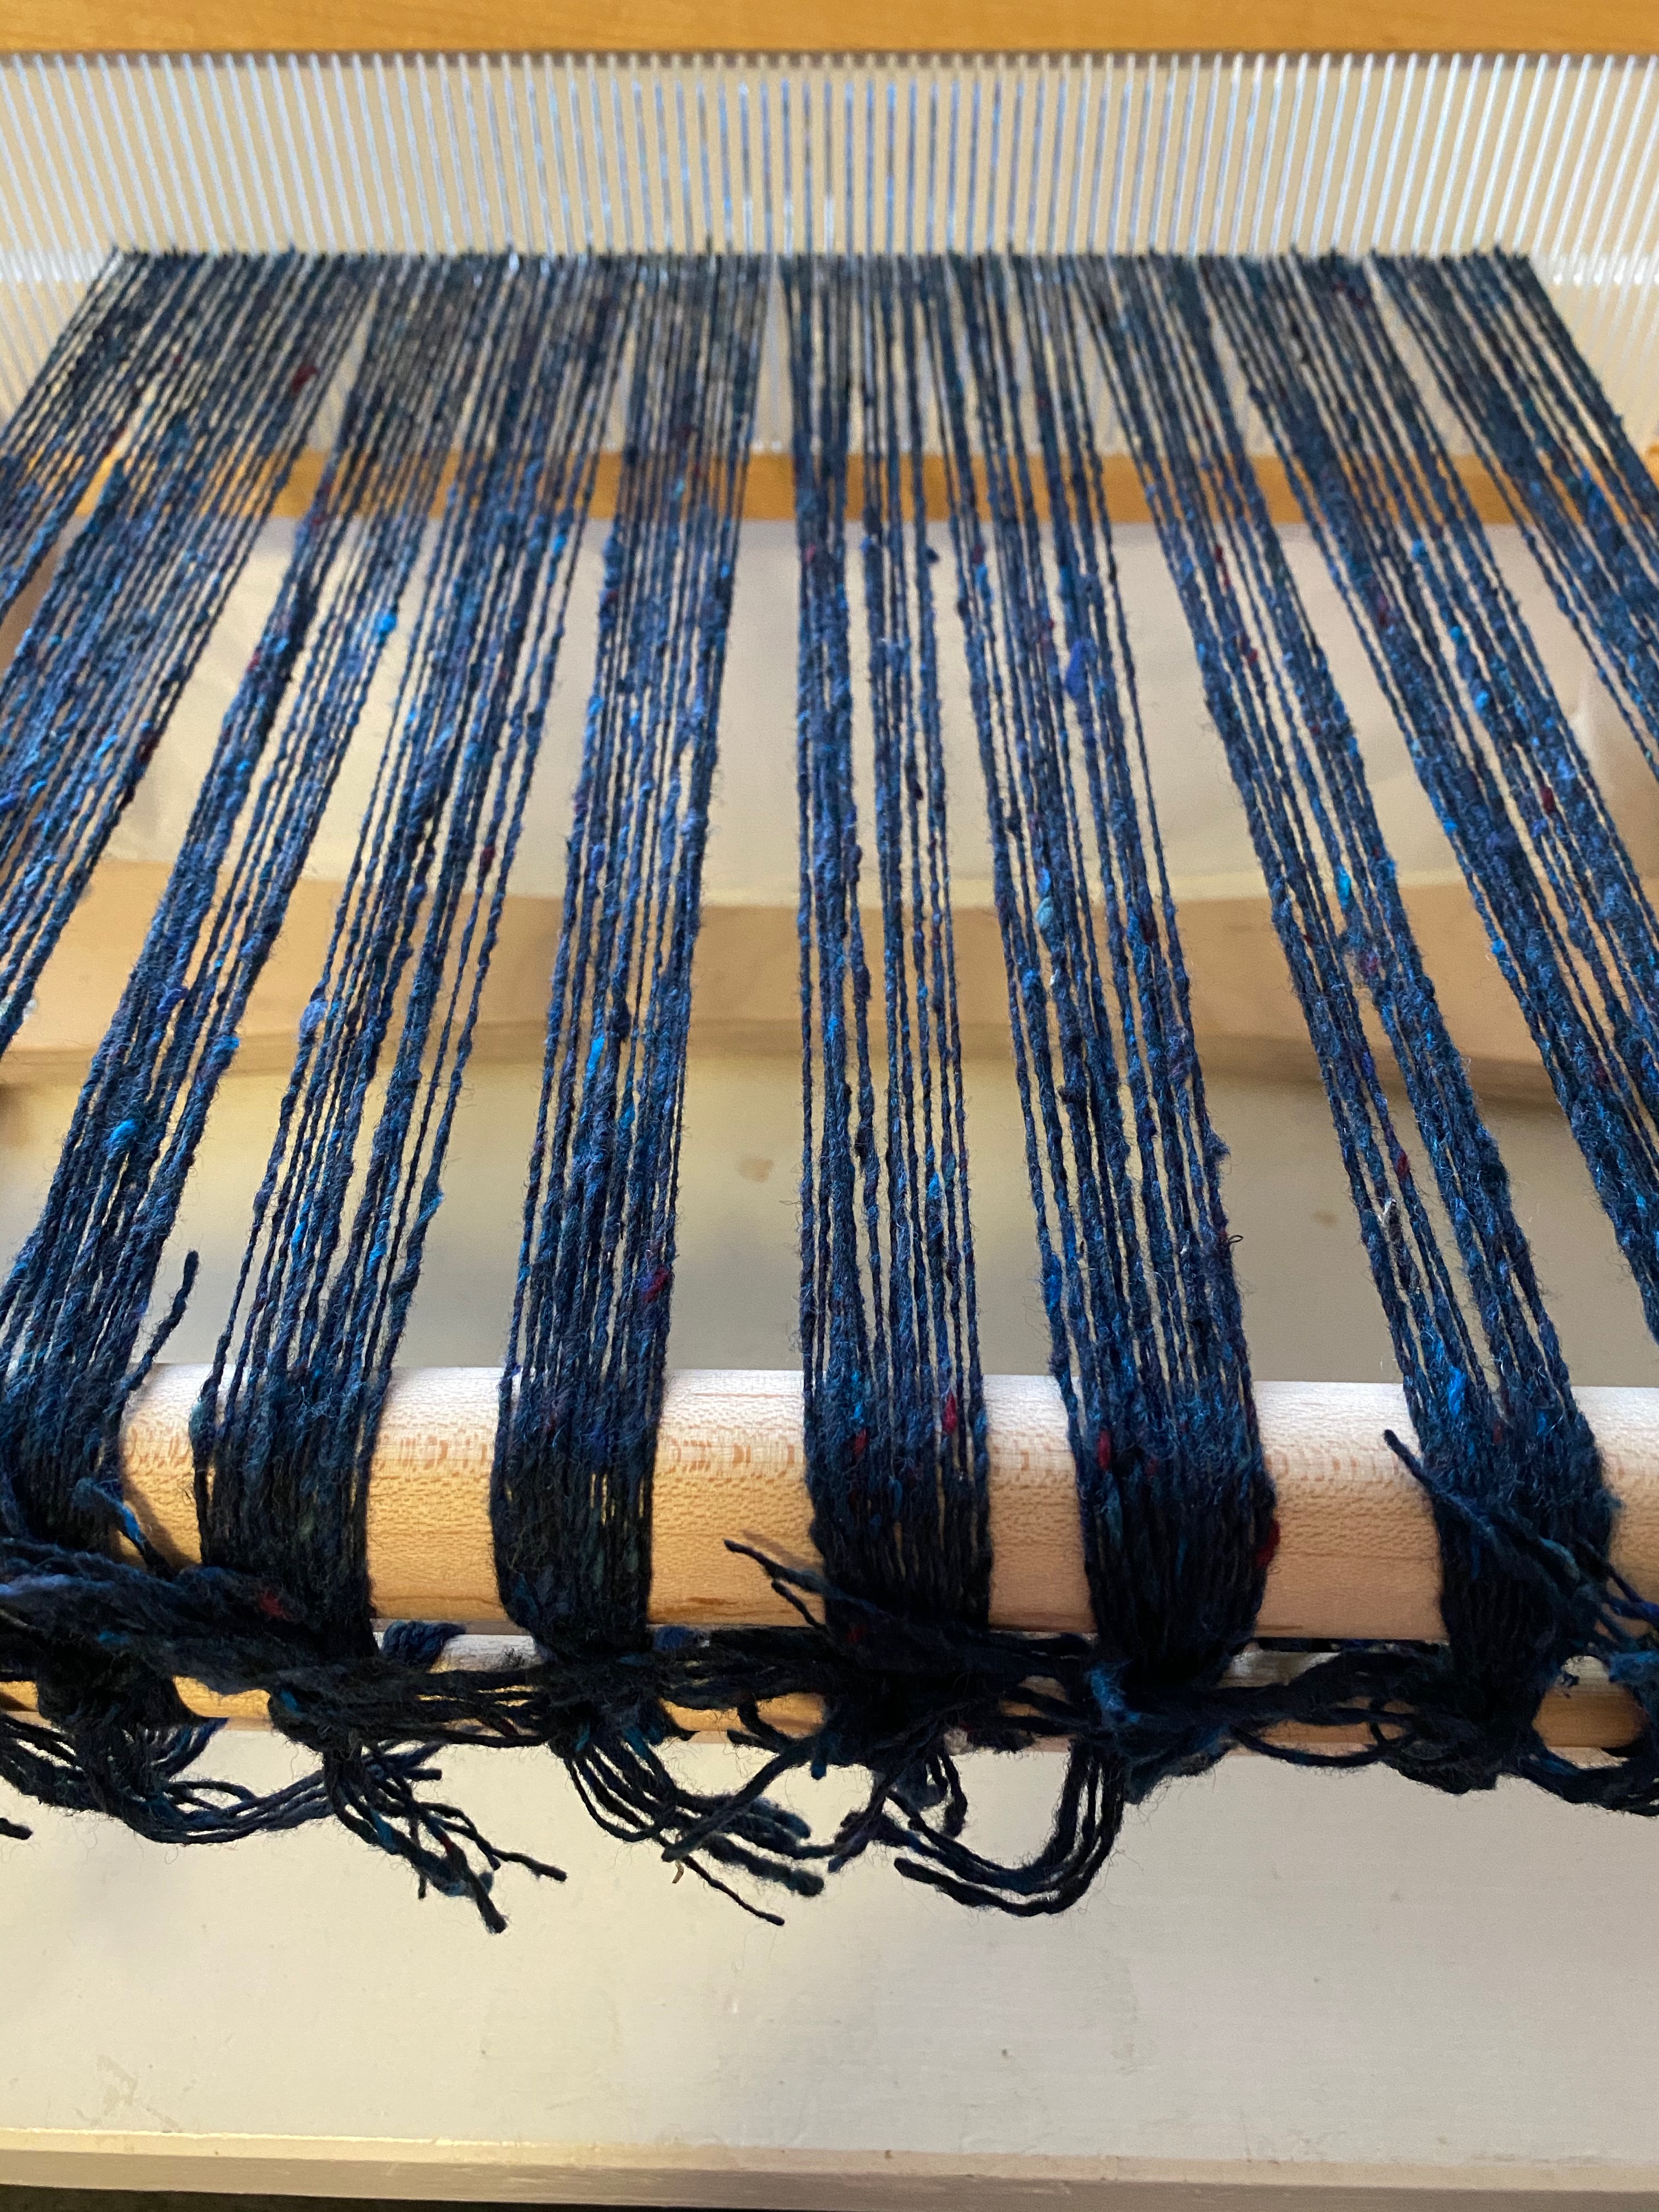
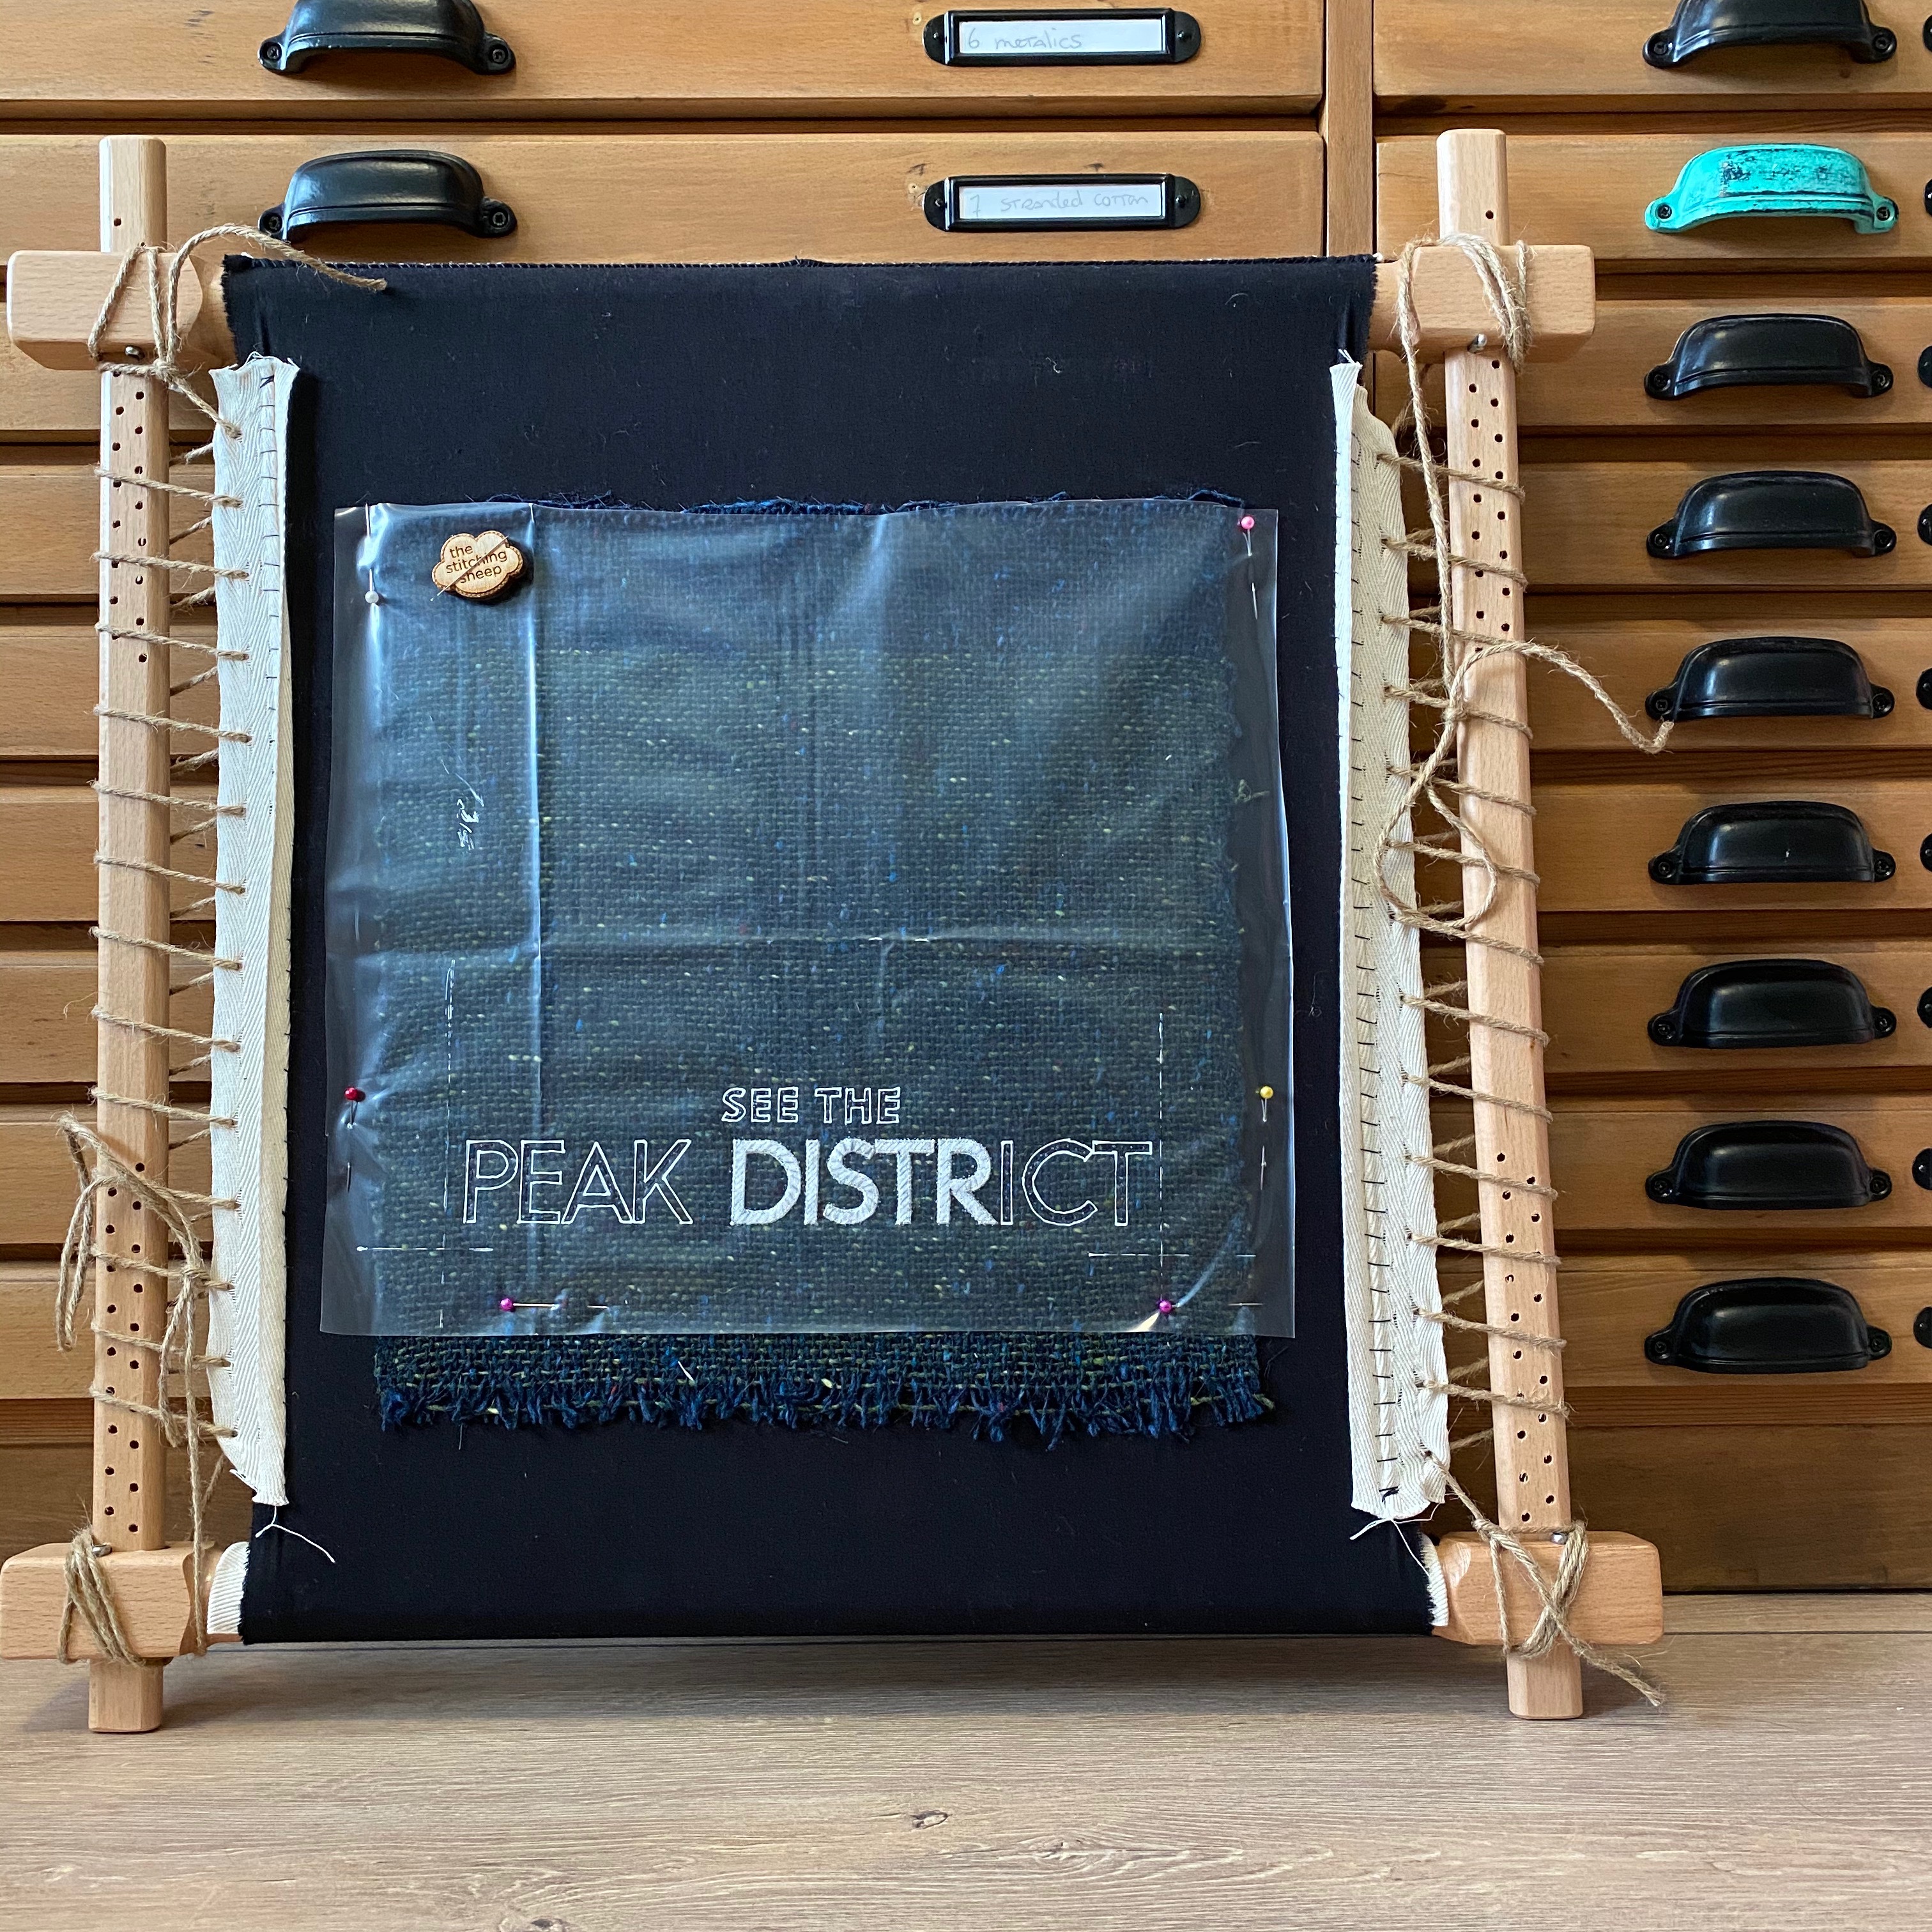
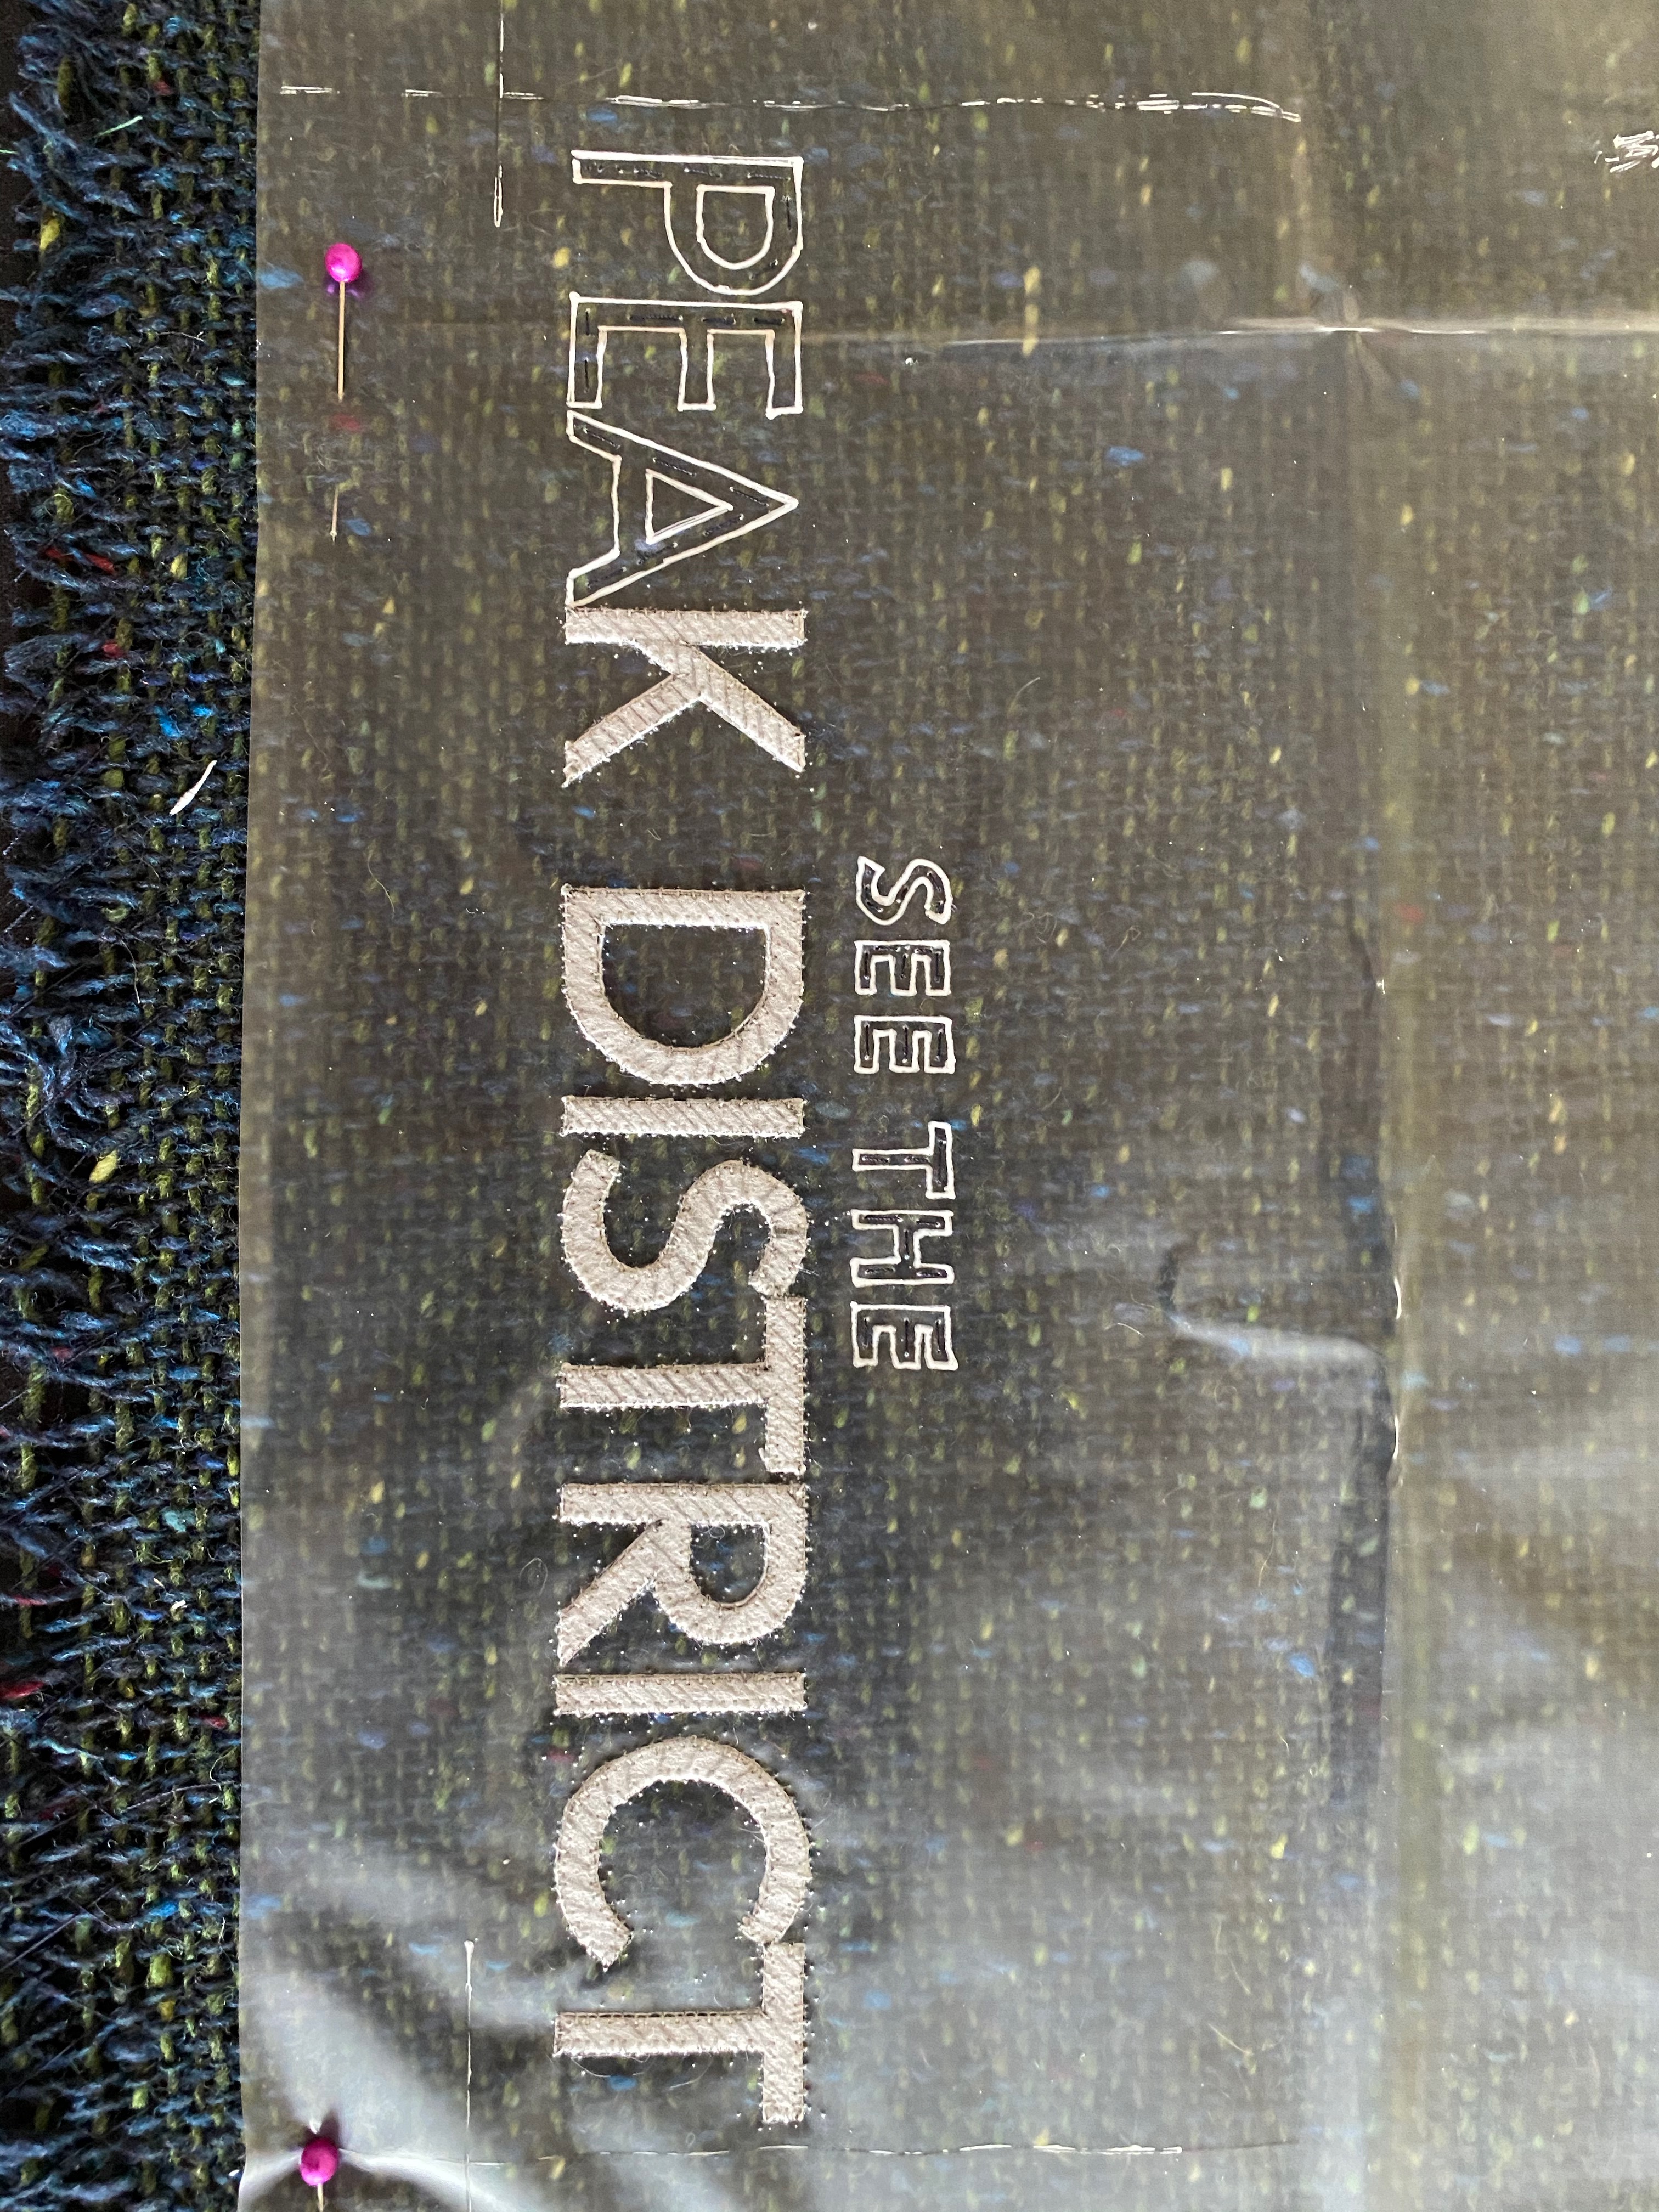
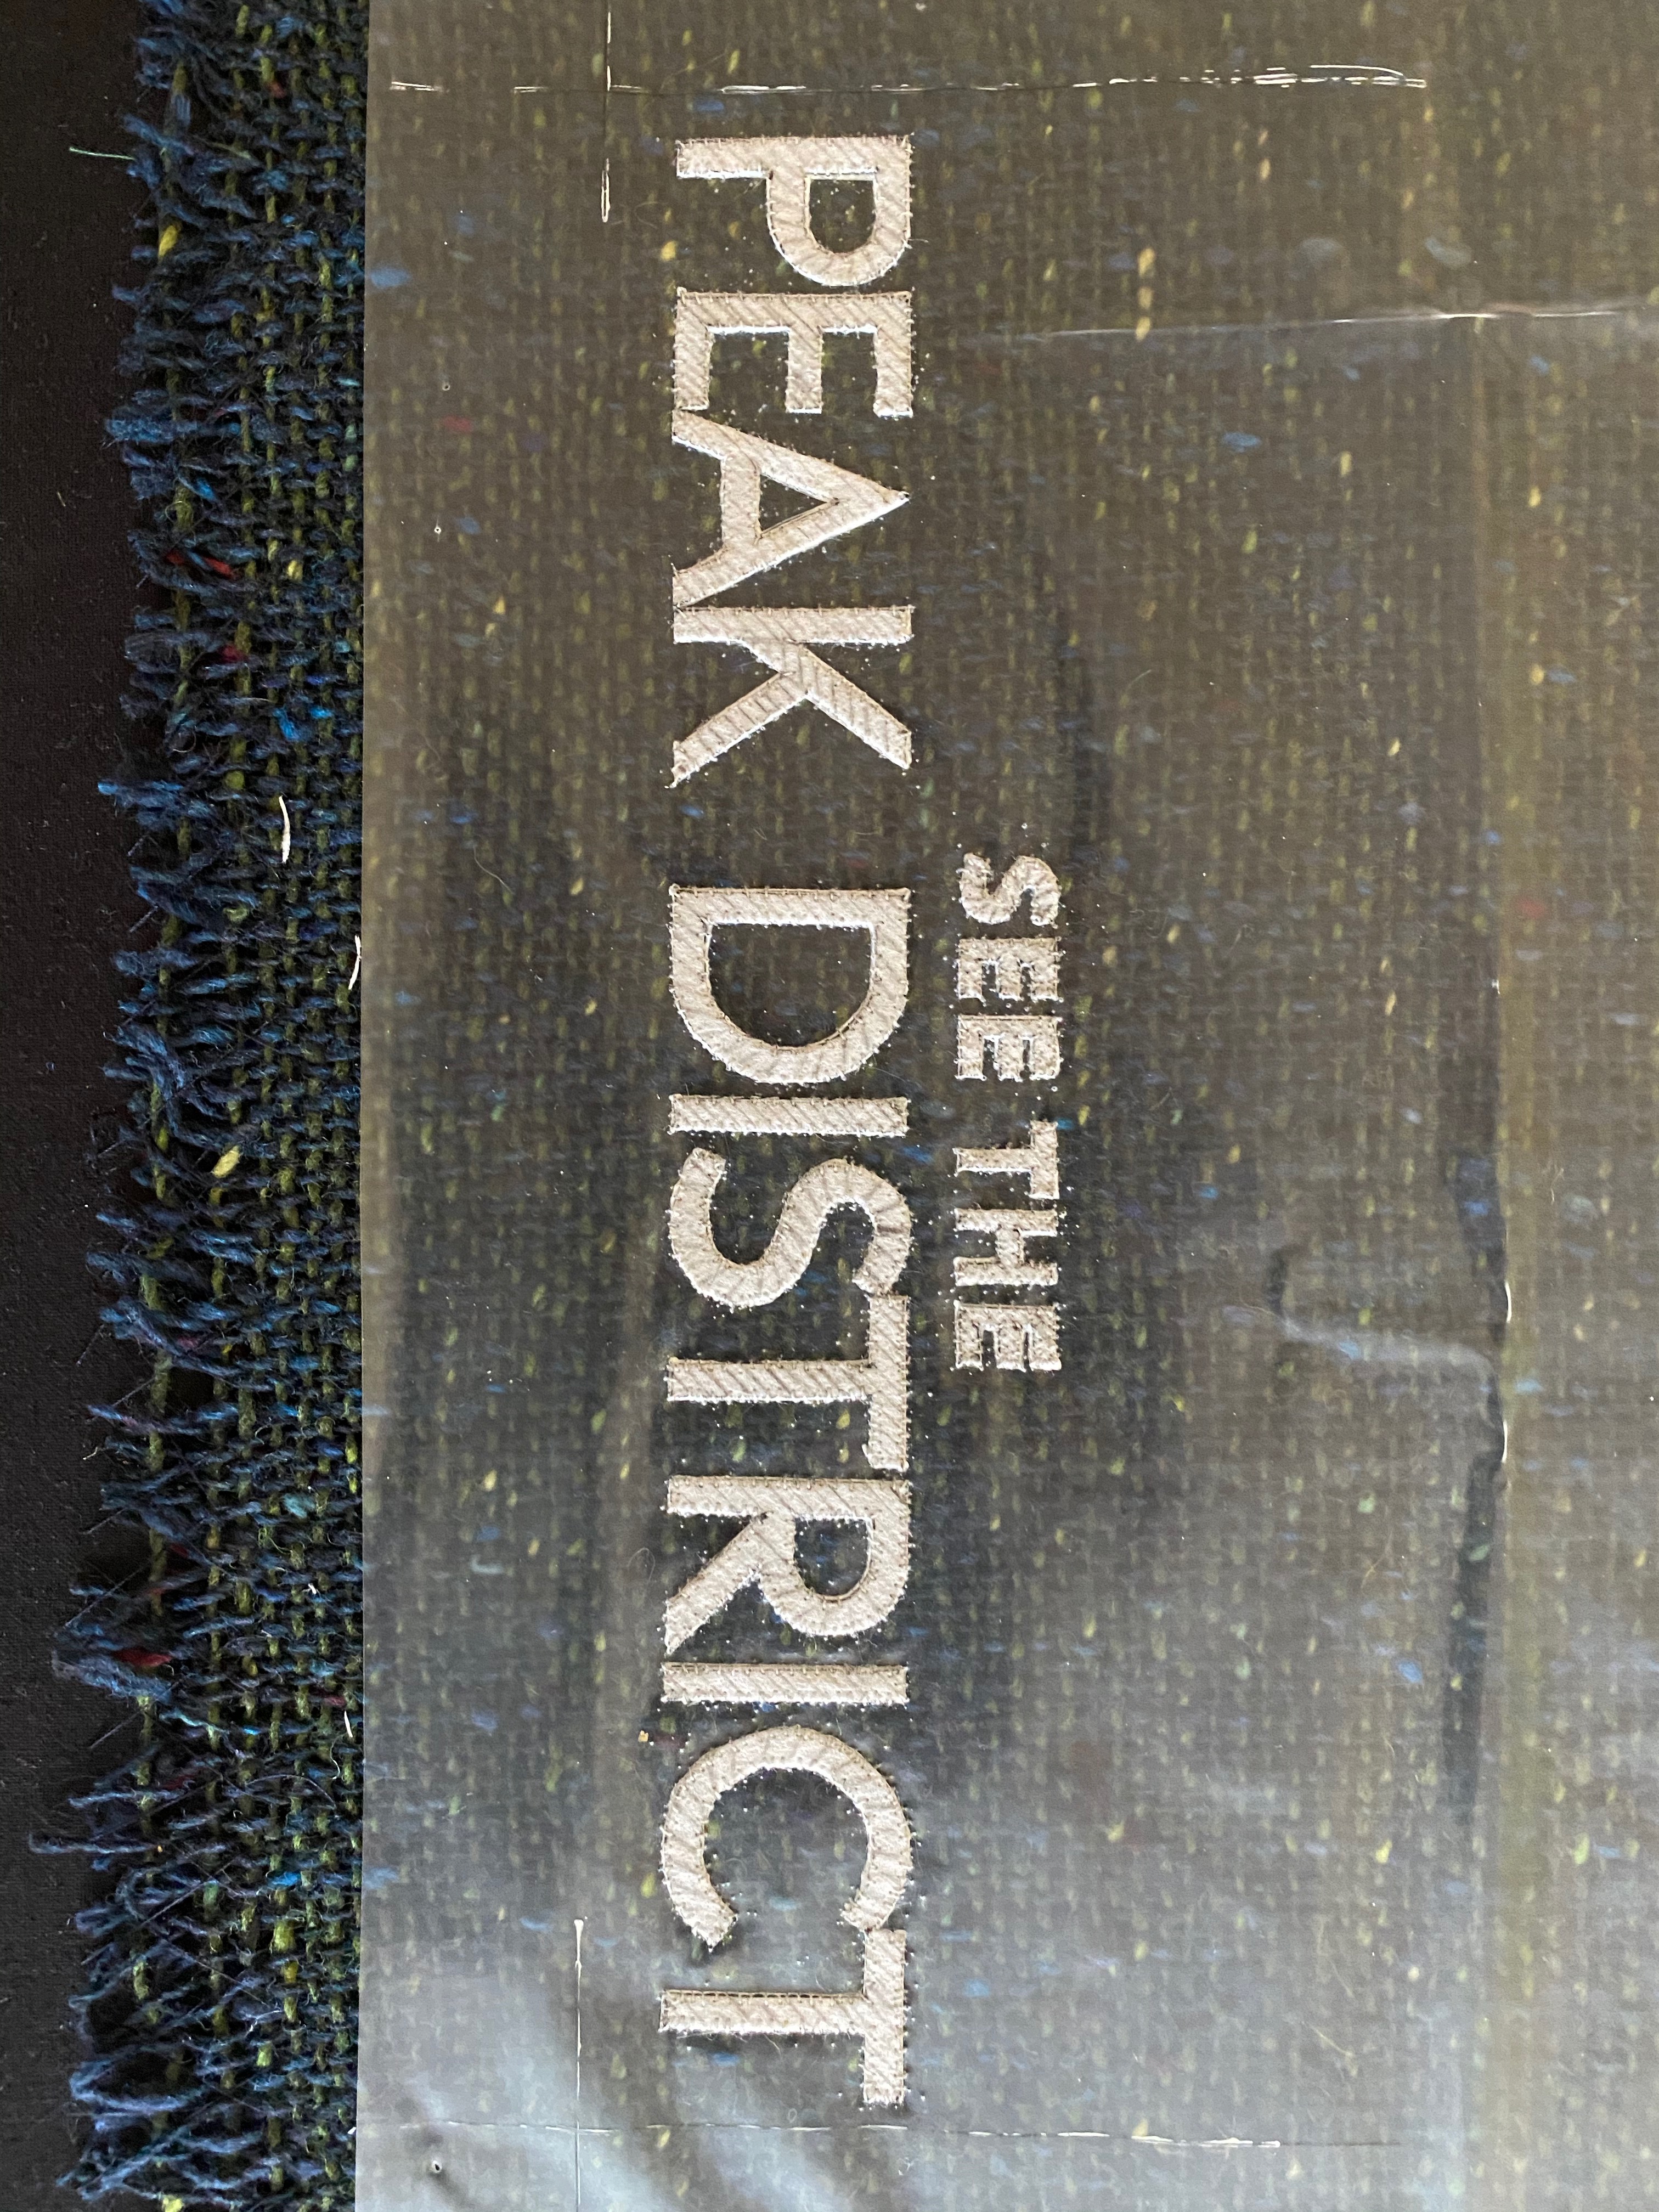
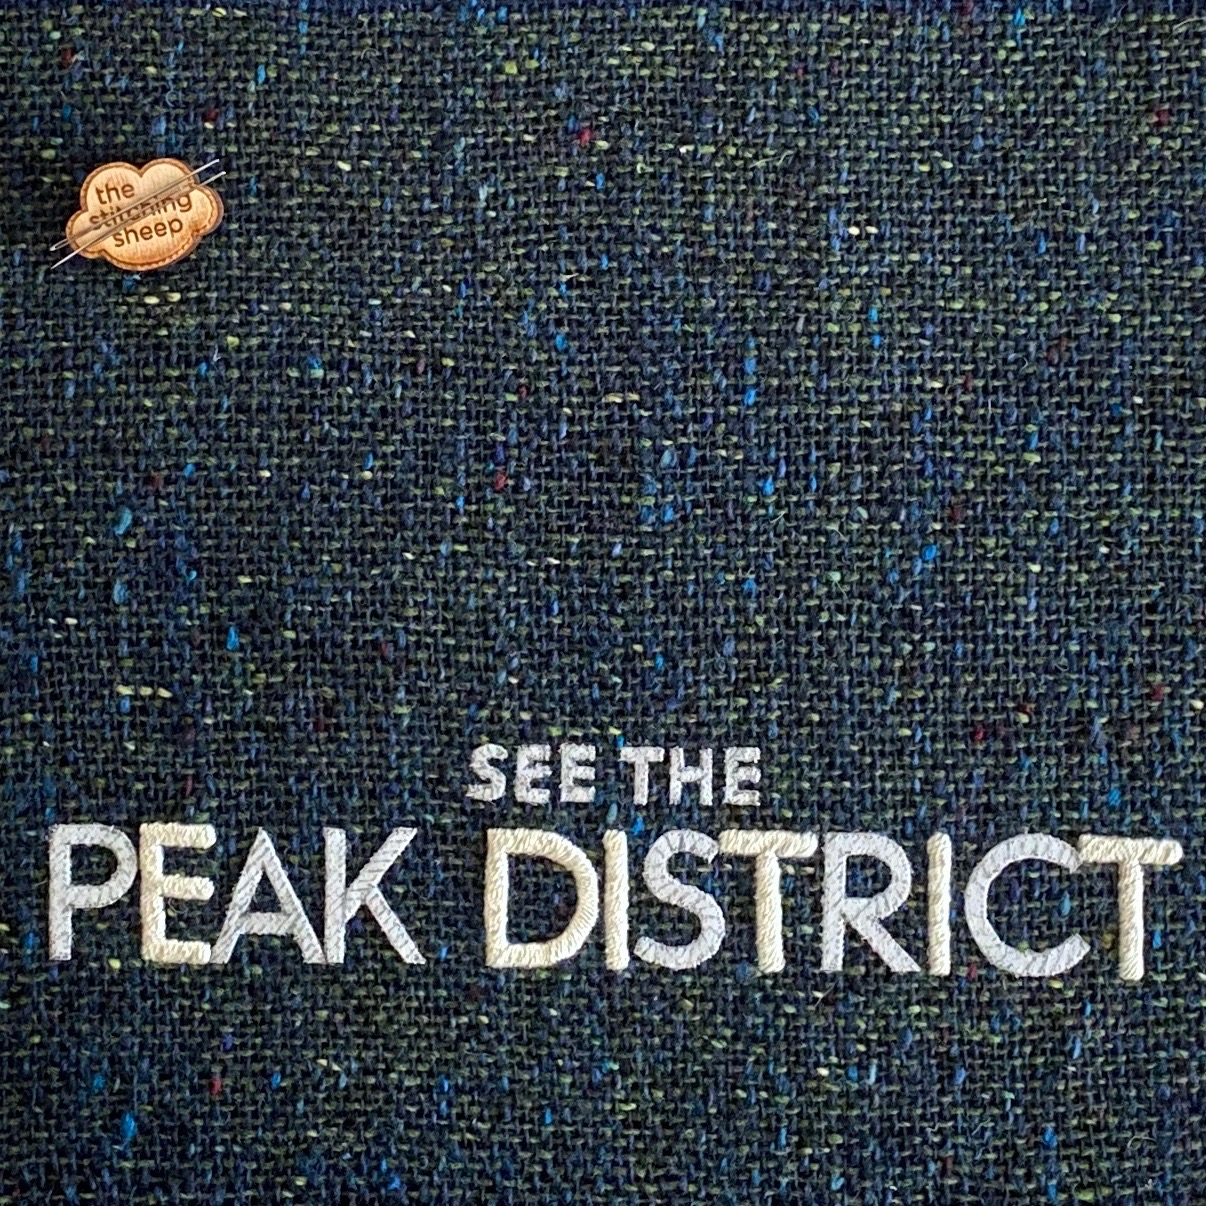
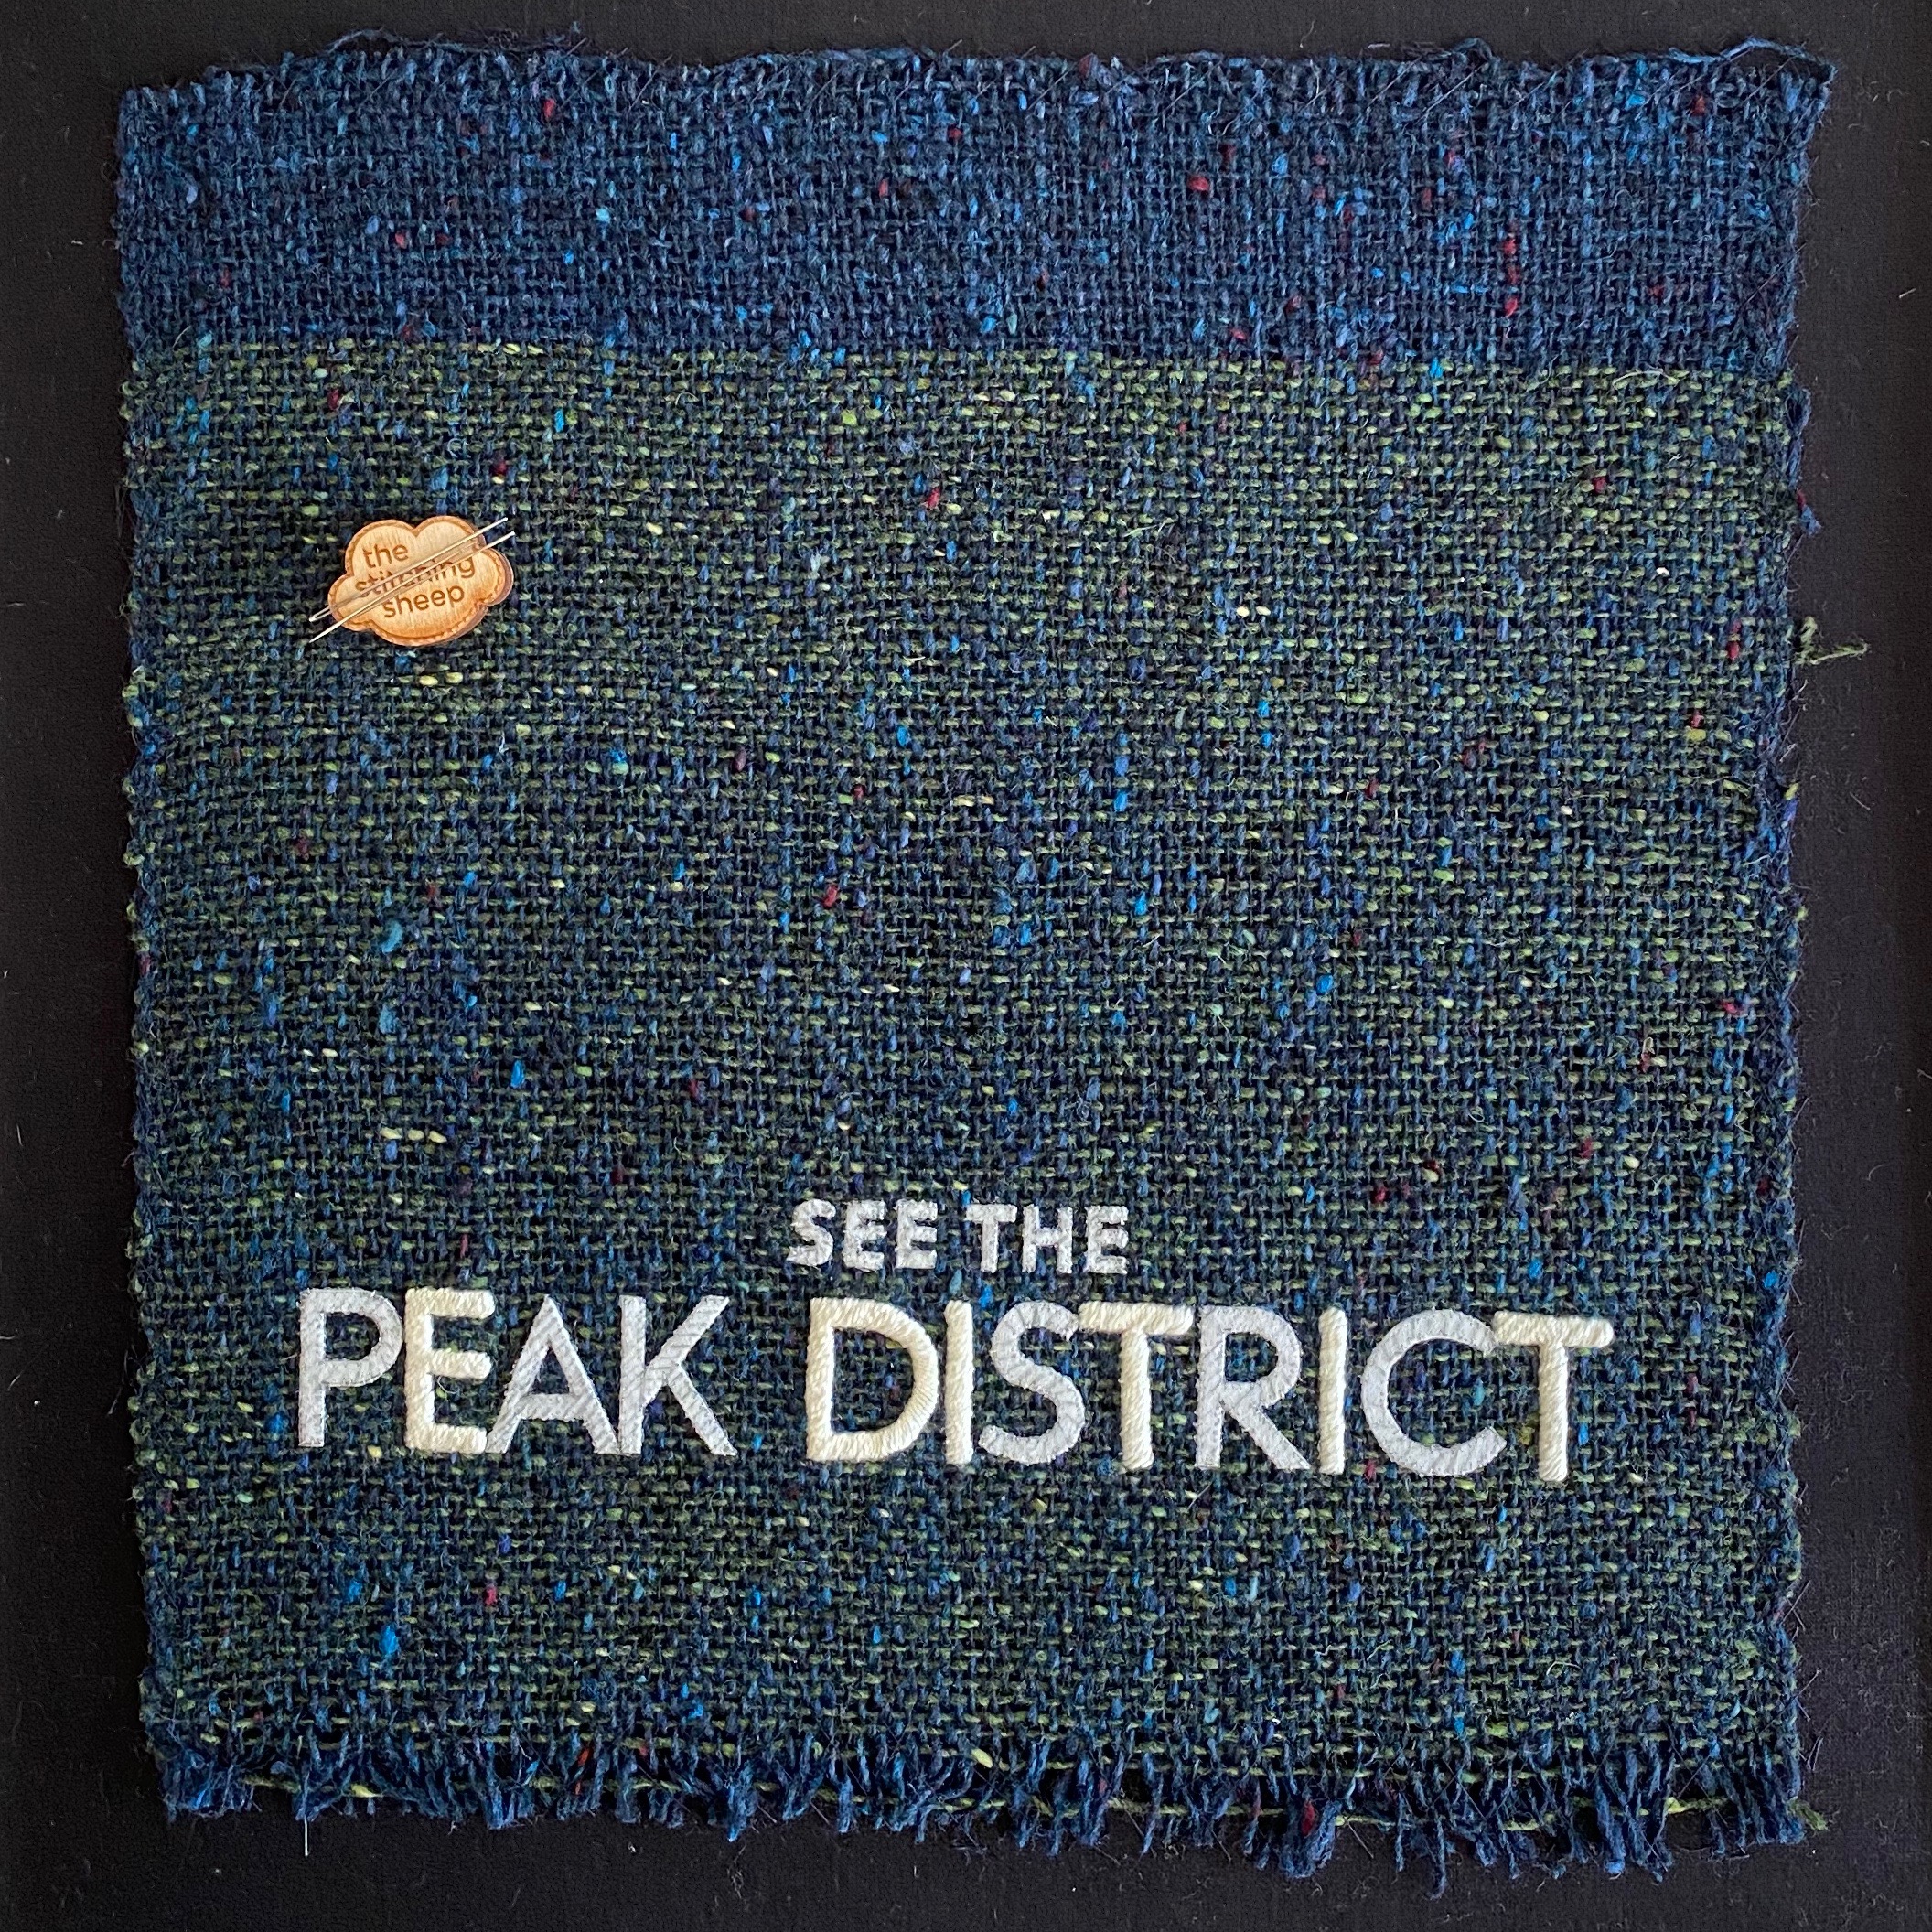
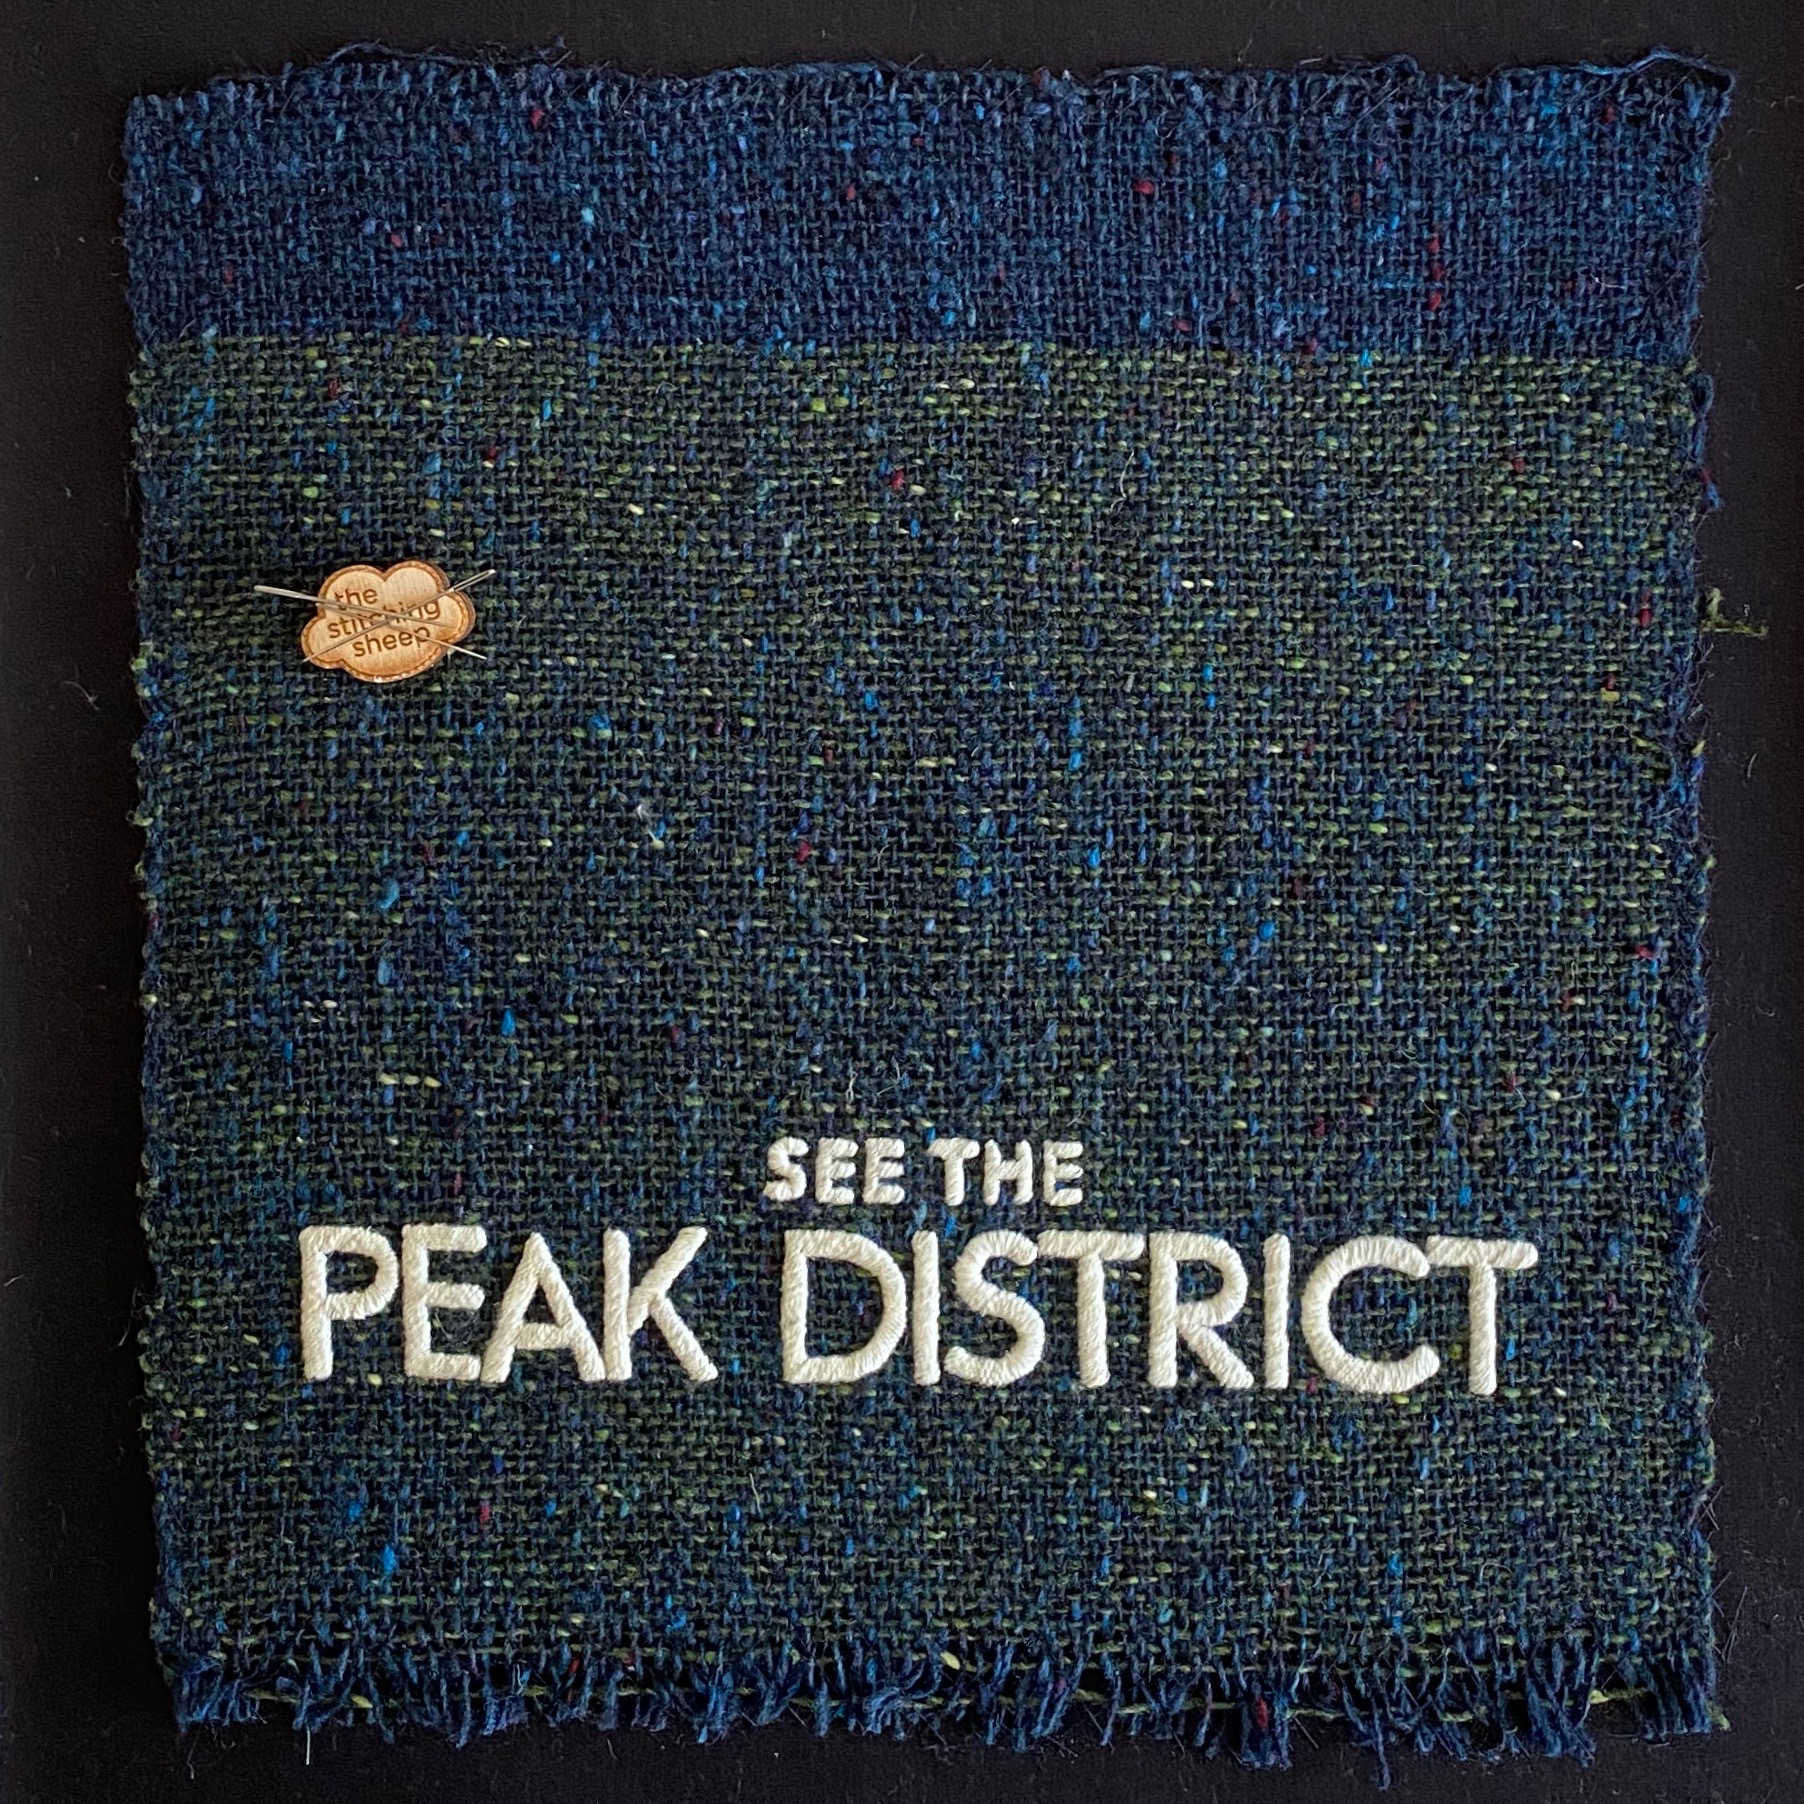
The only fabric I could not find was a dark blue/green fabric for the foreground. I wanted a textured fabric, like a tweed, but nothing was quite the right colour. I considered dyeing something until I had another look through my stash and spotted the green and blue Donegal tweed yarns I had bought from the Handweaver’s Gallery for my RSN Certifcate Canvaswork project. I thought then I could weave my own fabric on my Cricket Rigid Heddle loom. After a bit of experimenting I discovered that a combination of the blue for the weft and the green for the weave made the perfect colour. However, as the fabric would be too loose to embroider the letters on to I decided to strengthen it with a black cotton fabric. Having it framed up in my new 15″ Jenny Adin-Christie slate frame it made it much easier to stitch on the letters.
One of the tutors gave me the tip of transferring the text onto soluble fabric and tack that fabric in place. Next I stab stitched pelmet vilene letters in place with directional lines on them for the satin stitch. Once the letters were attached, I carefully cut and pulled away the soluble fabric. Next, I used perlé 5 thread to stitch the larger letters and a stranded cotton in the same colour for the smaller letters.
Before I got to take it of the frame I did some reverse applique on it so I could show lighter blue details from underneath my woven fabric. I made eyelet and large holes using the same method to create these details.
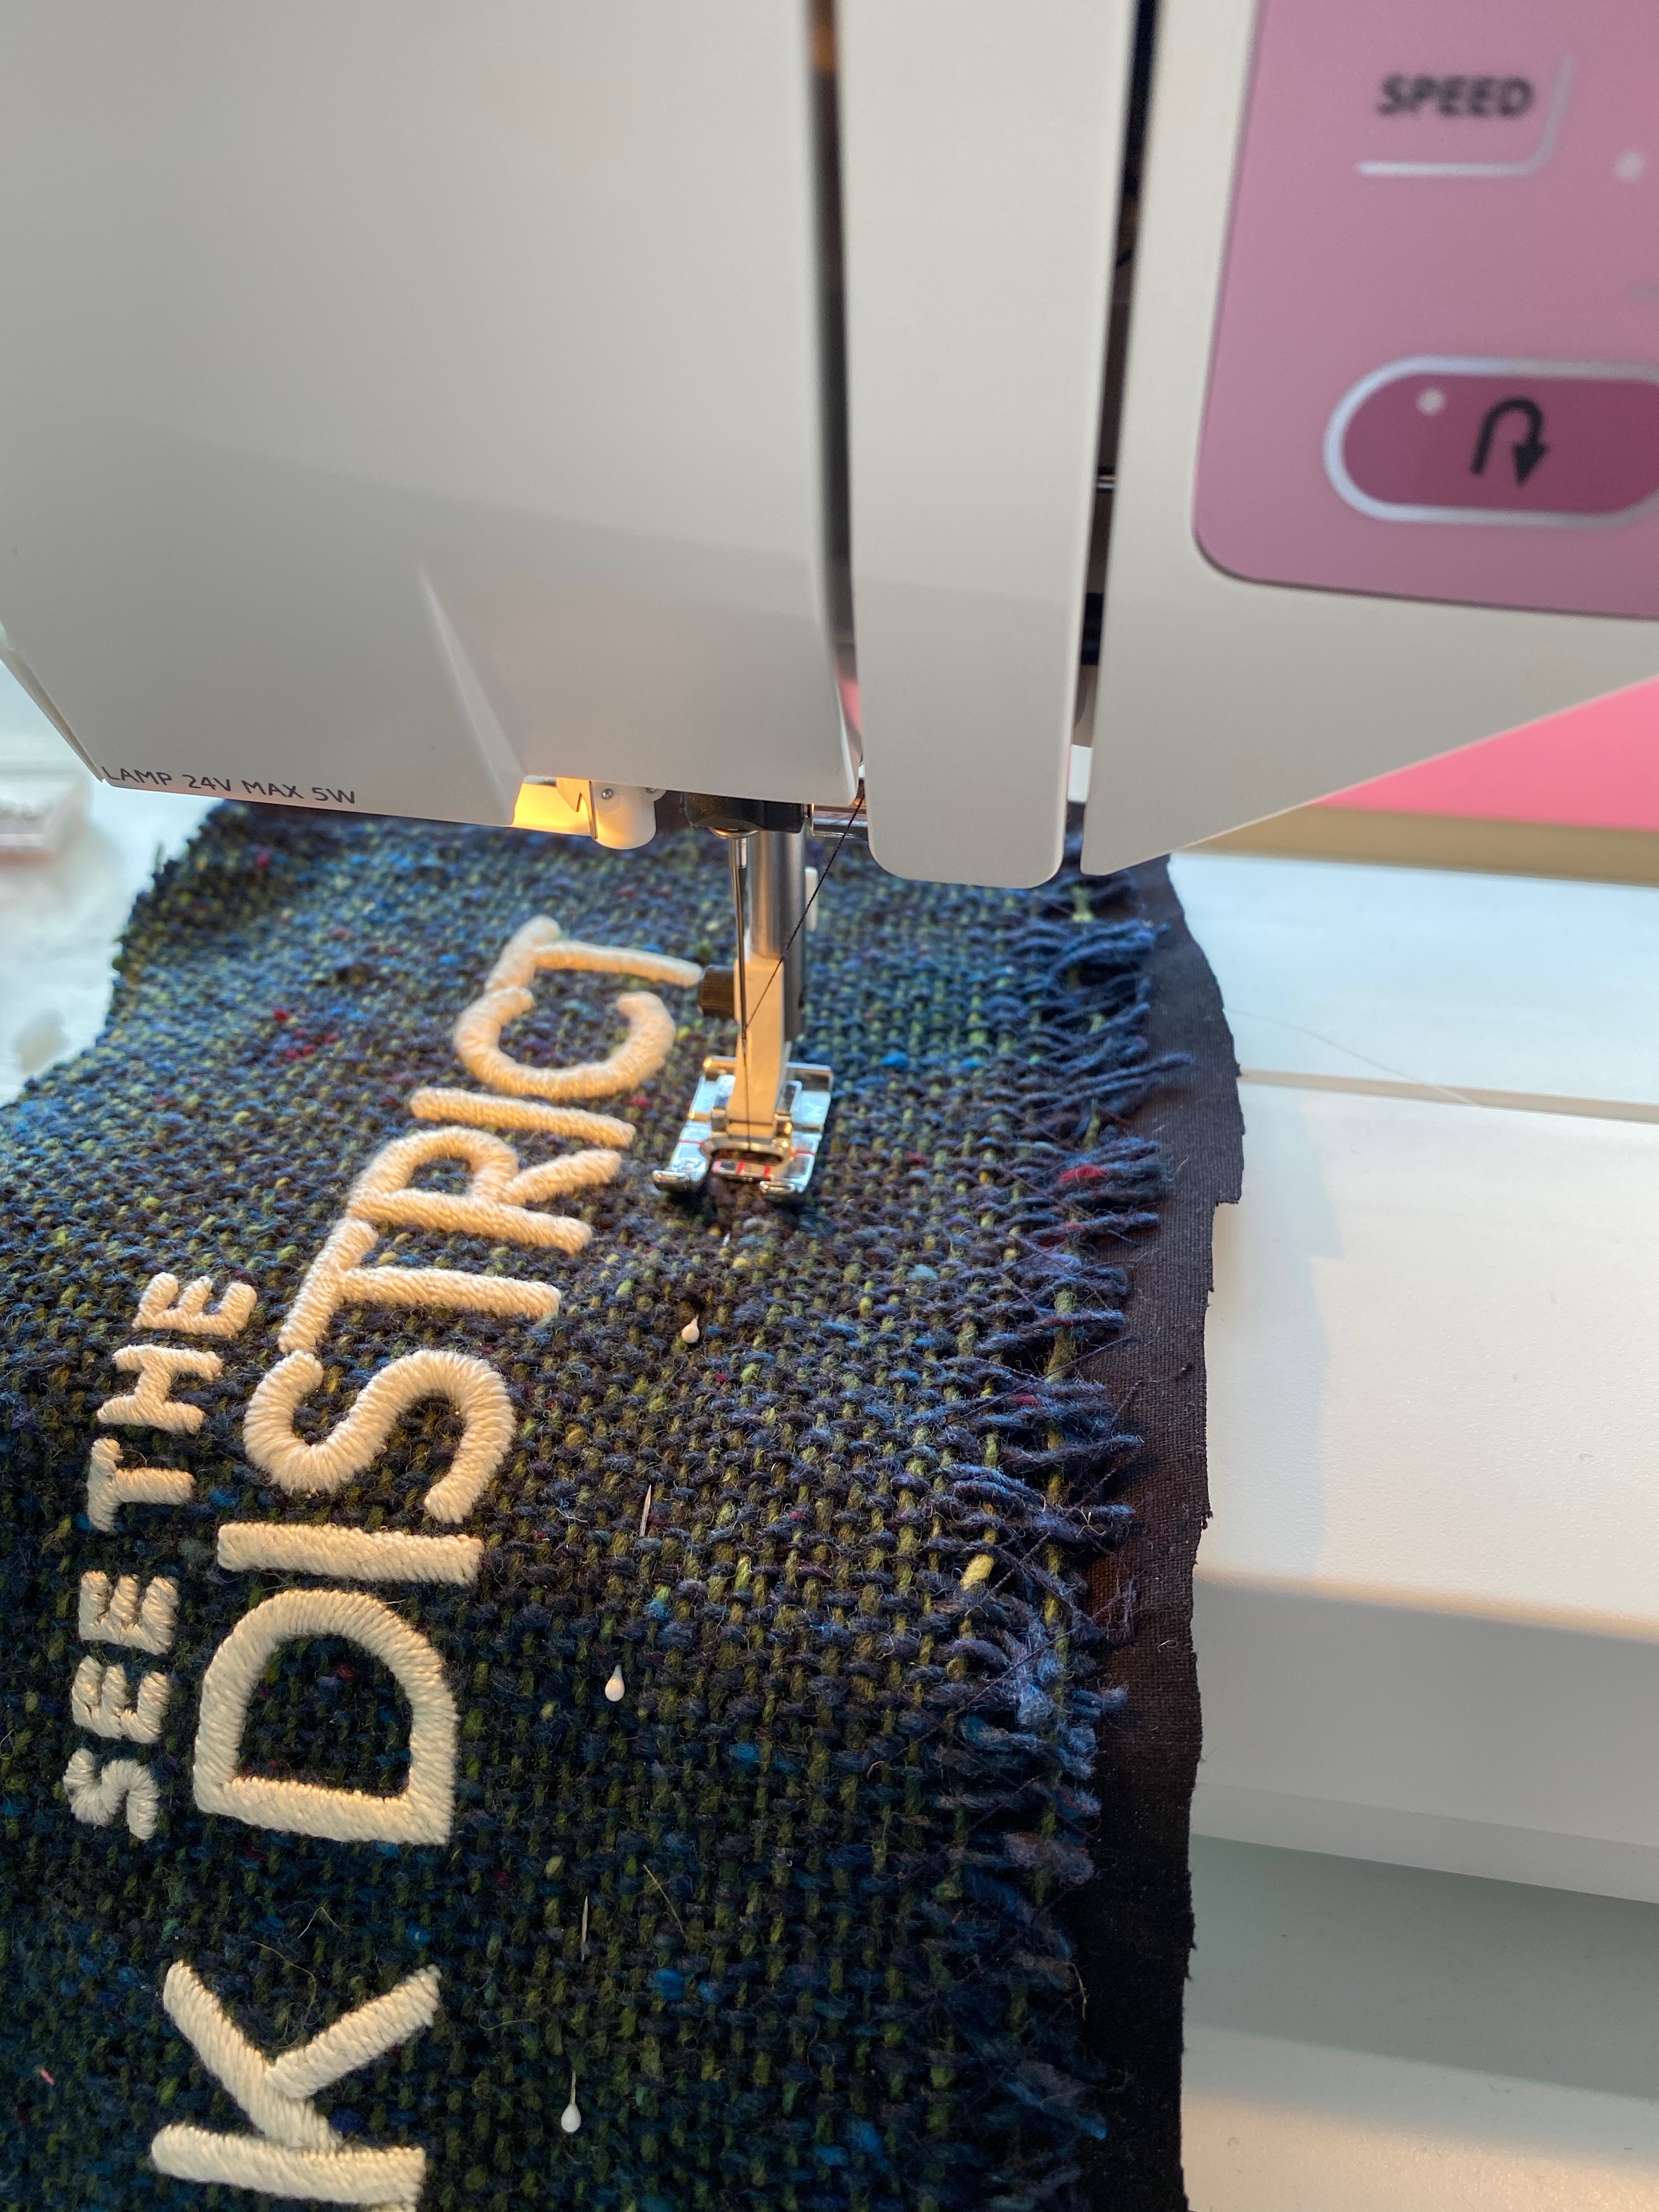
After taking it off the frame I used my sewing machine to stabilise the edges where I would be cutting it out to create a nice edge. As this would not be possible for the scalloped top edge, that edge was covered with a rope made from the same yarn as the fabric.


The Viaduct
I had found some lovely silk tussah fabric at the Silk Route stand at the Knitting and Stitching show. It almost resembled a rough brick / stone structure and I bought a light and dark colour so I could create a 3d effect by showing shade. However, silk tussah is a very loosely woven fabric so a nightmare to stitch with as it frays like anything.
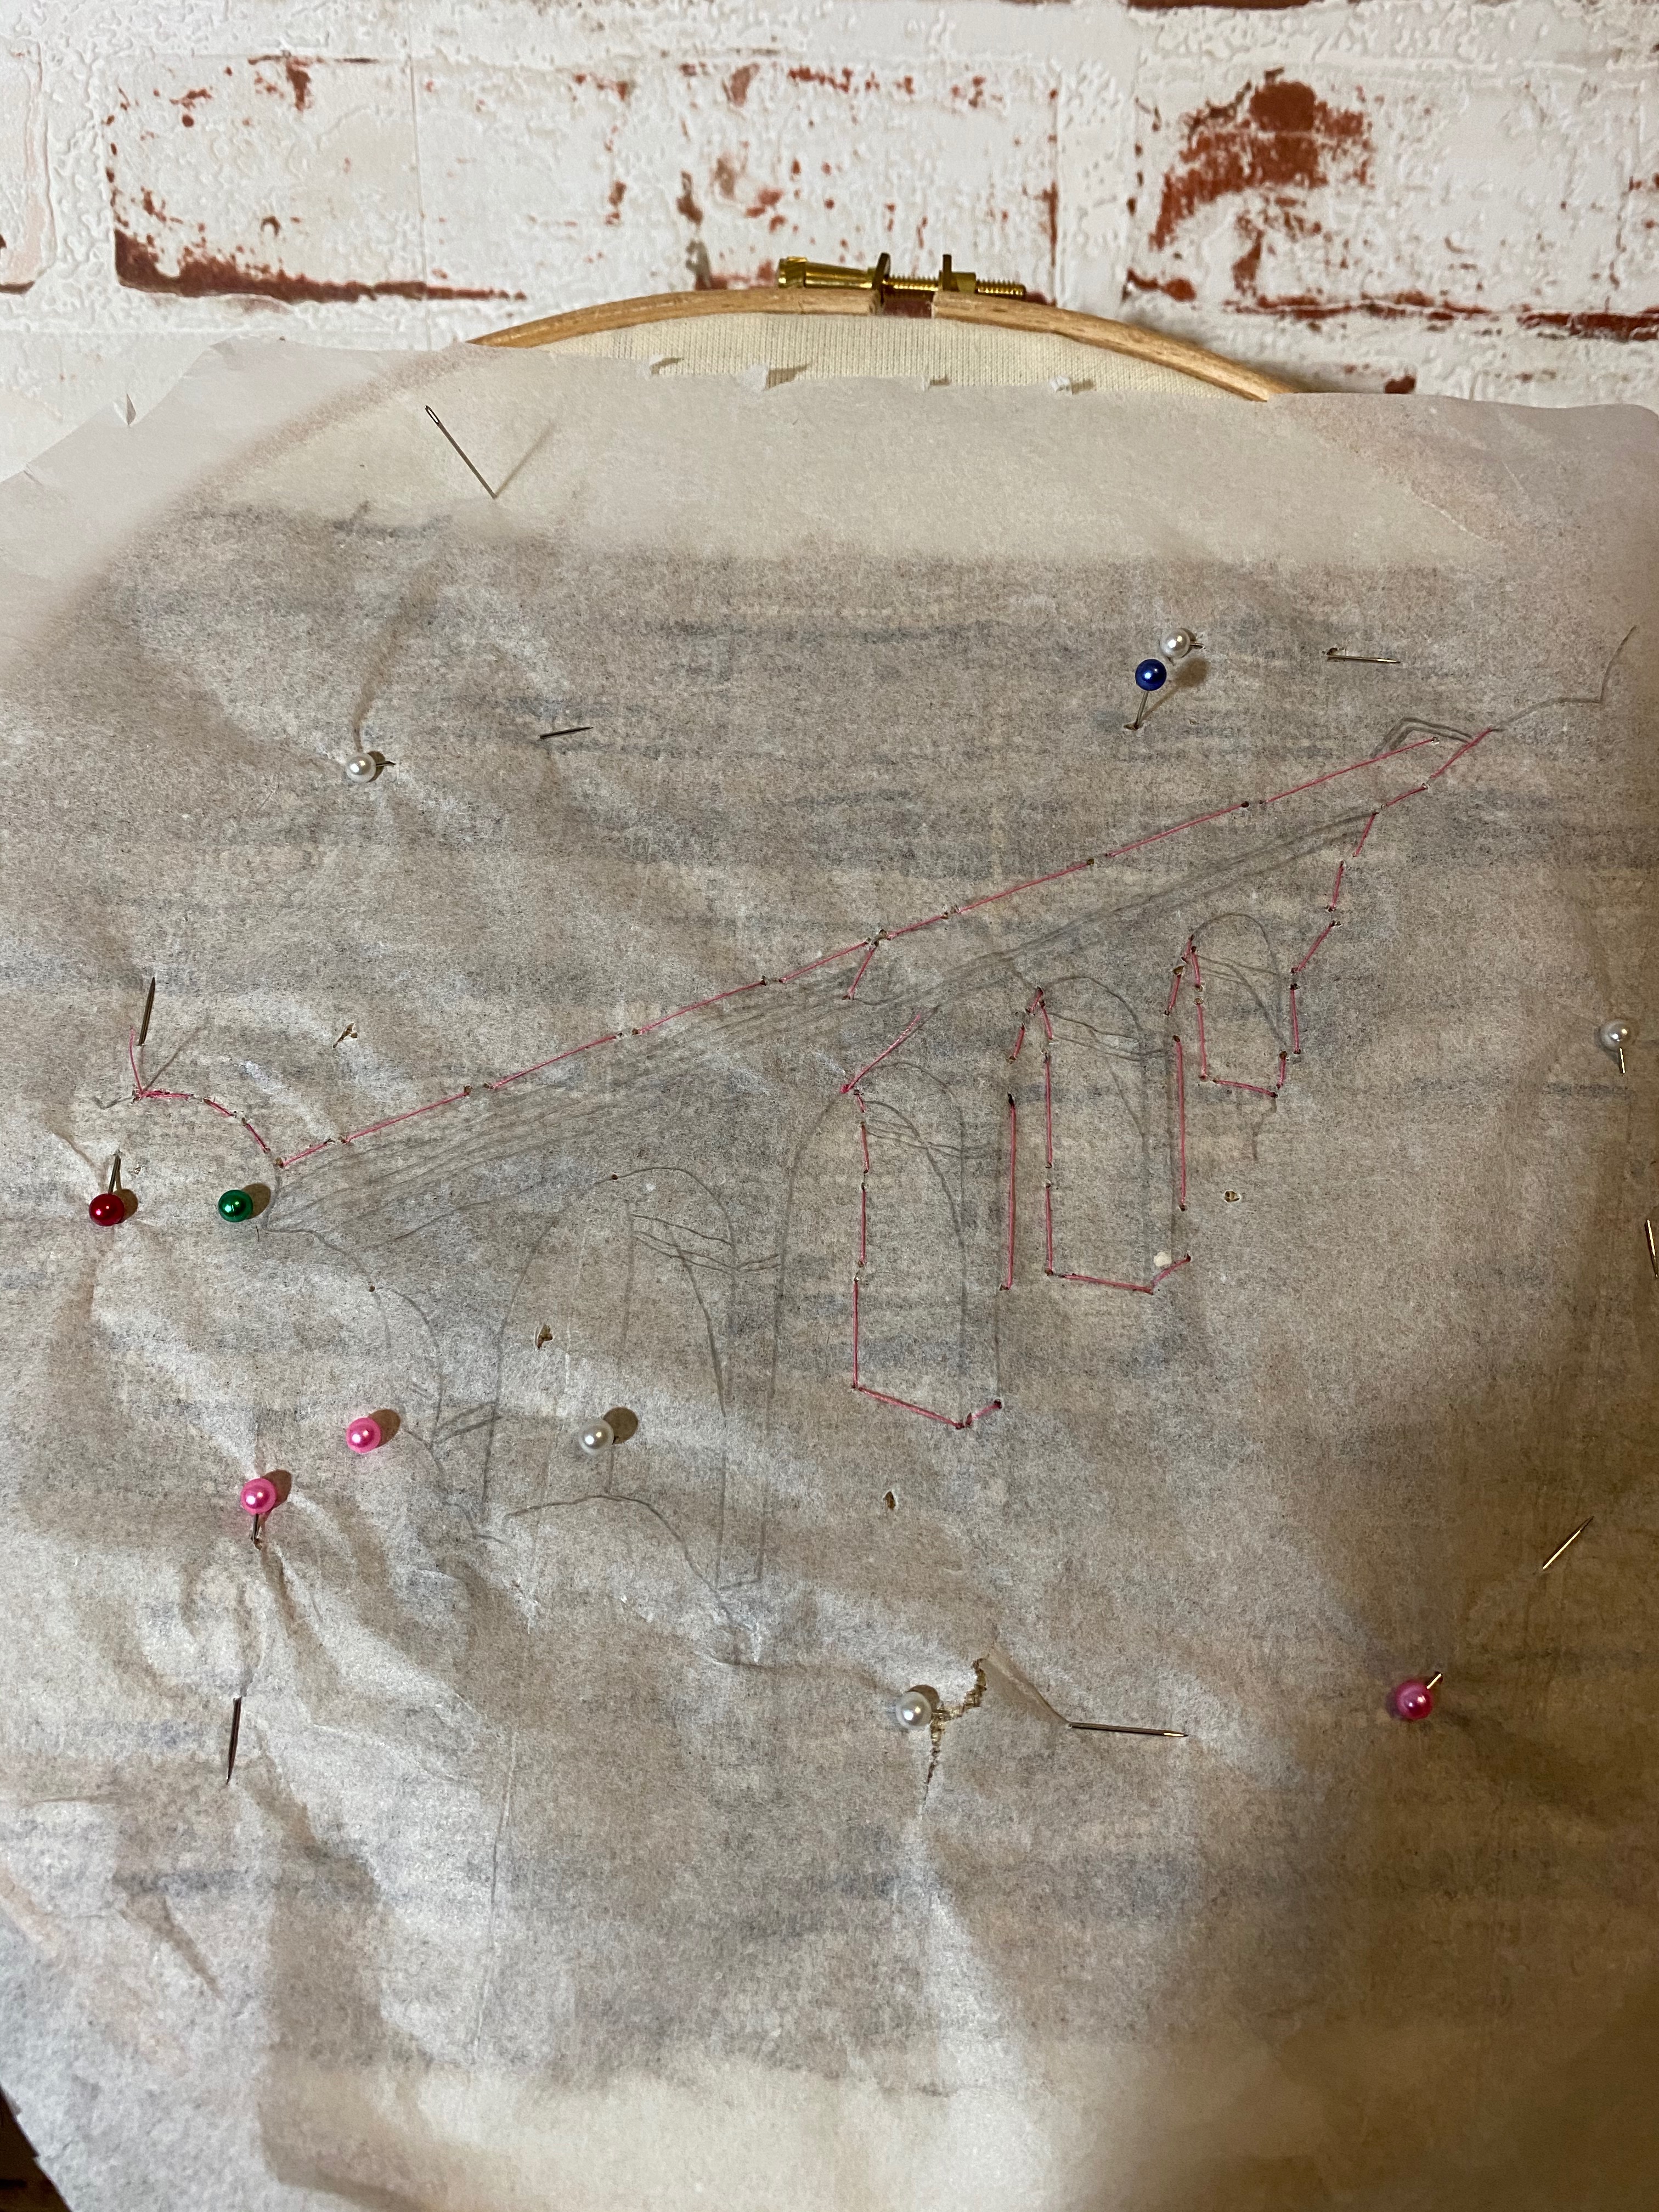
I was set on using it though as the texture was perfect. In order to stabilise it, I ironed the dark coloured tussah on bondaweb and cut out the required shape. The lighter coloured tussah I bondawebbed to a cotton calico. I then positioned the cut-out darker coloured tussah on top of the lighter coloured and ironed them together. I put the whole thing together in a ring frame and using tracing paper and tacking thread transferred the shape of the viaduct. I buttonholed around the edges of the viaduct using a chameleon hand-died stranded cotton. I also added the train tracks and the red details by couching on the threads using Golden-Hinde’s translucent thread. Couching with the translucent thread worked better than actually stitching with the thread I was couching. Due to the loose woven texture of the tussah it split easily when putting a thicker needle through it. The translucent thread I could stitch with a no. 10 embroidery needle and worked therefore didn’t disturb the fabric as much.
Next I painted on the blue shadows underneath the arches using Derwent Inktense pencils and added some blue stitches for the finer details. As you can see from the pictures I tried different paints and also stitching more of the shadows, but I found that the Inktense pencils worked best. When the entire viaduct was complete I added some Prym fray stop around the edges carefully cut around the buttonhole edges and attached the viaduct to the main design. As the viaduct is sitting over rolling hills and a river valley it wouldn’t have sat flat on the main design. I, therefore, added some felt padding underneath the pylons on the river to create a sense of depth.


The Train
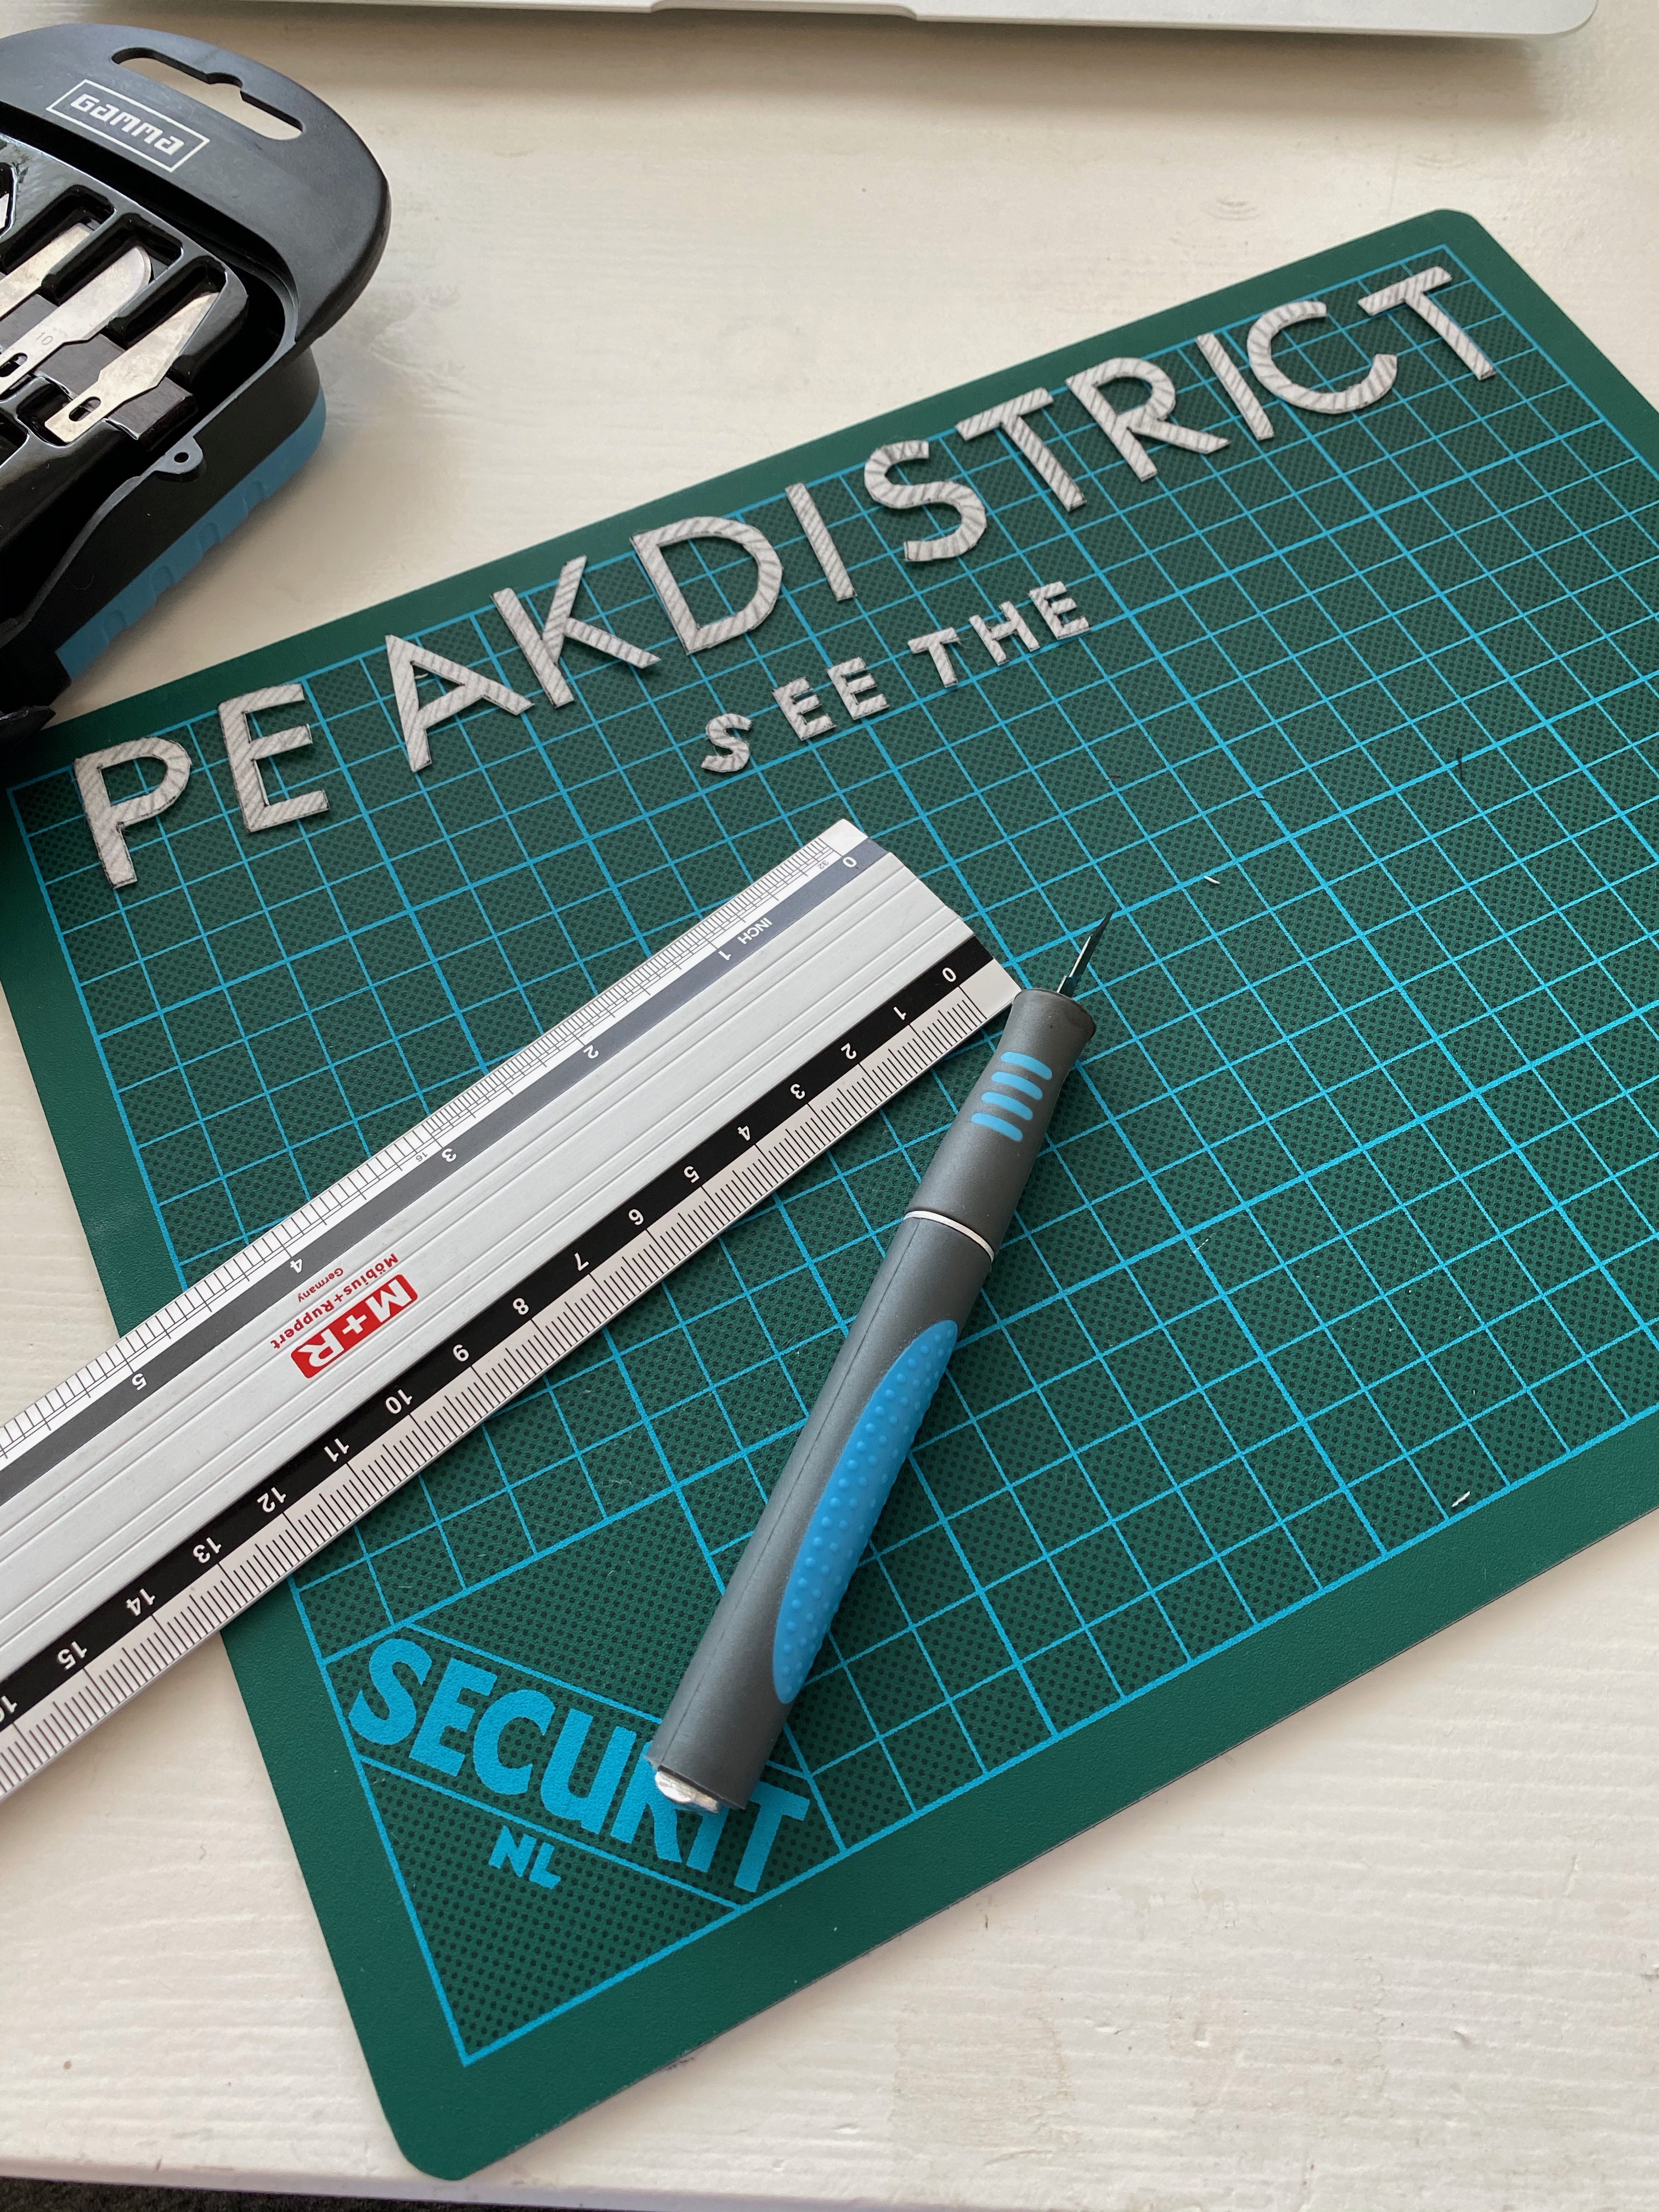
For the metal train I wanted something shiny so I settled on a red leather. However, I still needed the detail of the windows etc. From acetate I cut a template so I could stencil / paint in the details. I used acrylic paints to paint on the details. After a bit of practise this worked really well, to get all of the details in the right place. Using another acetate template I cut out the shape of the train using a very fine and sharp craft knife.
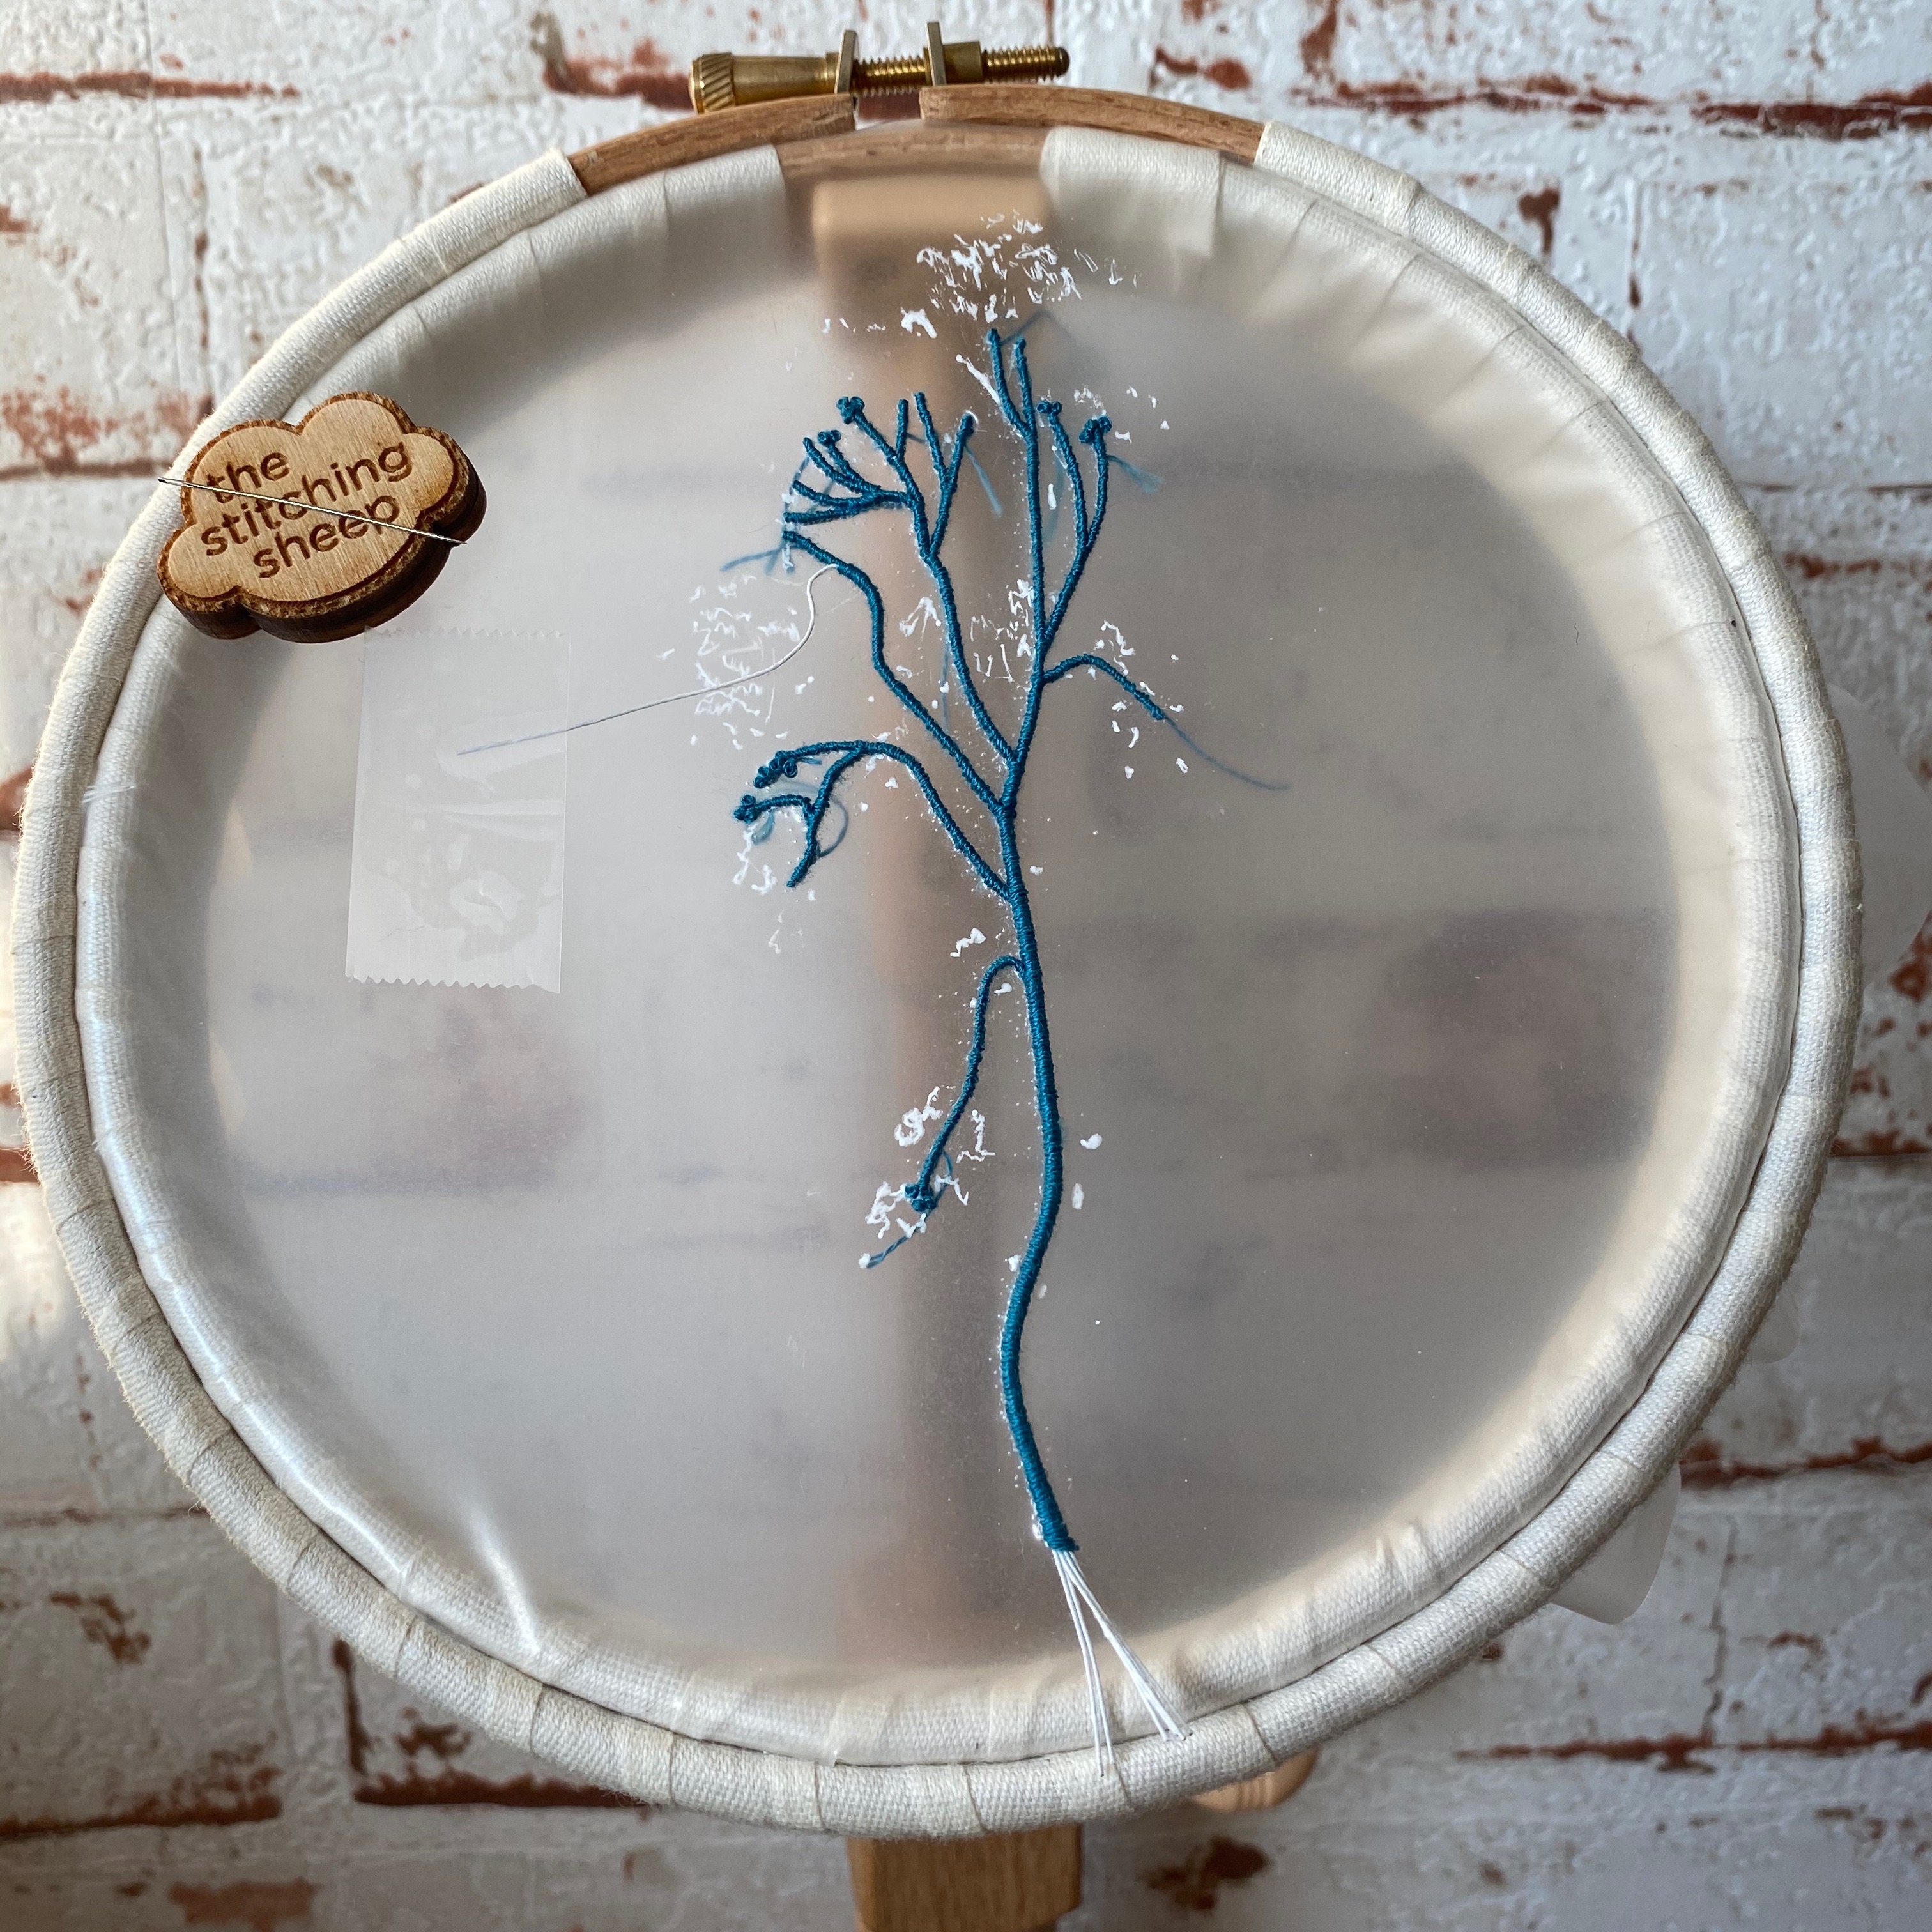
The Tree
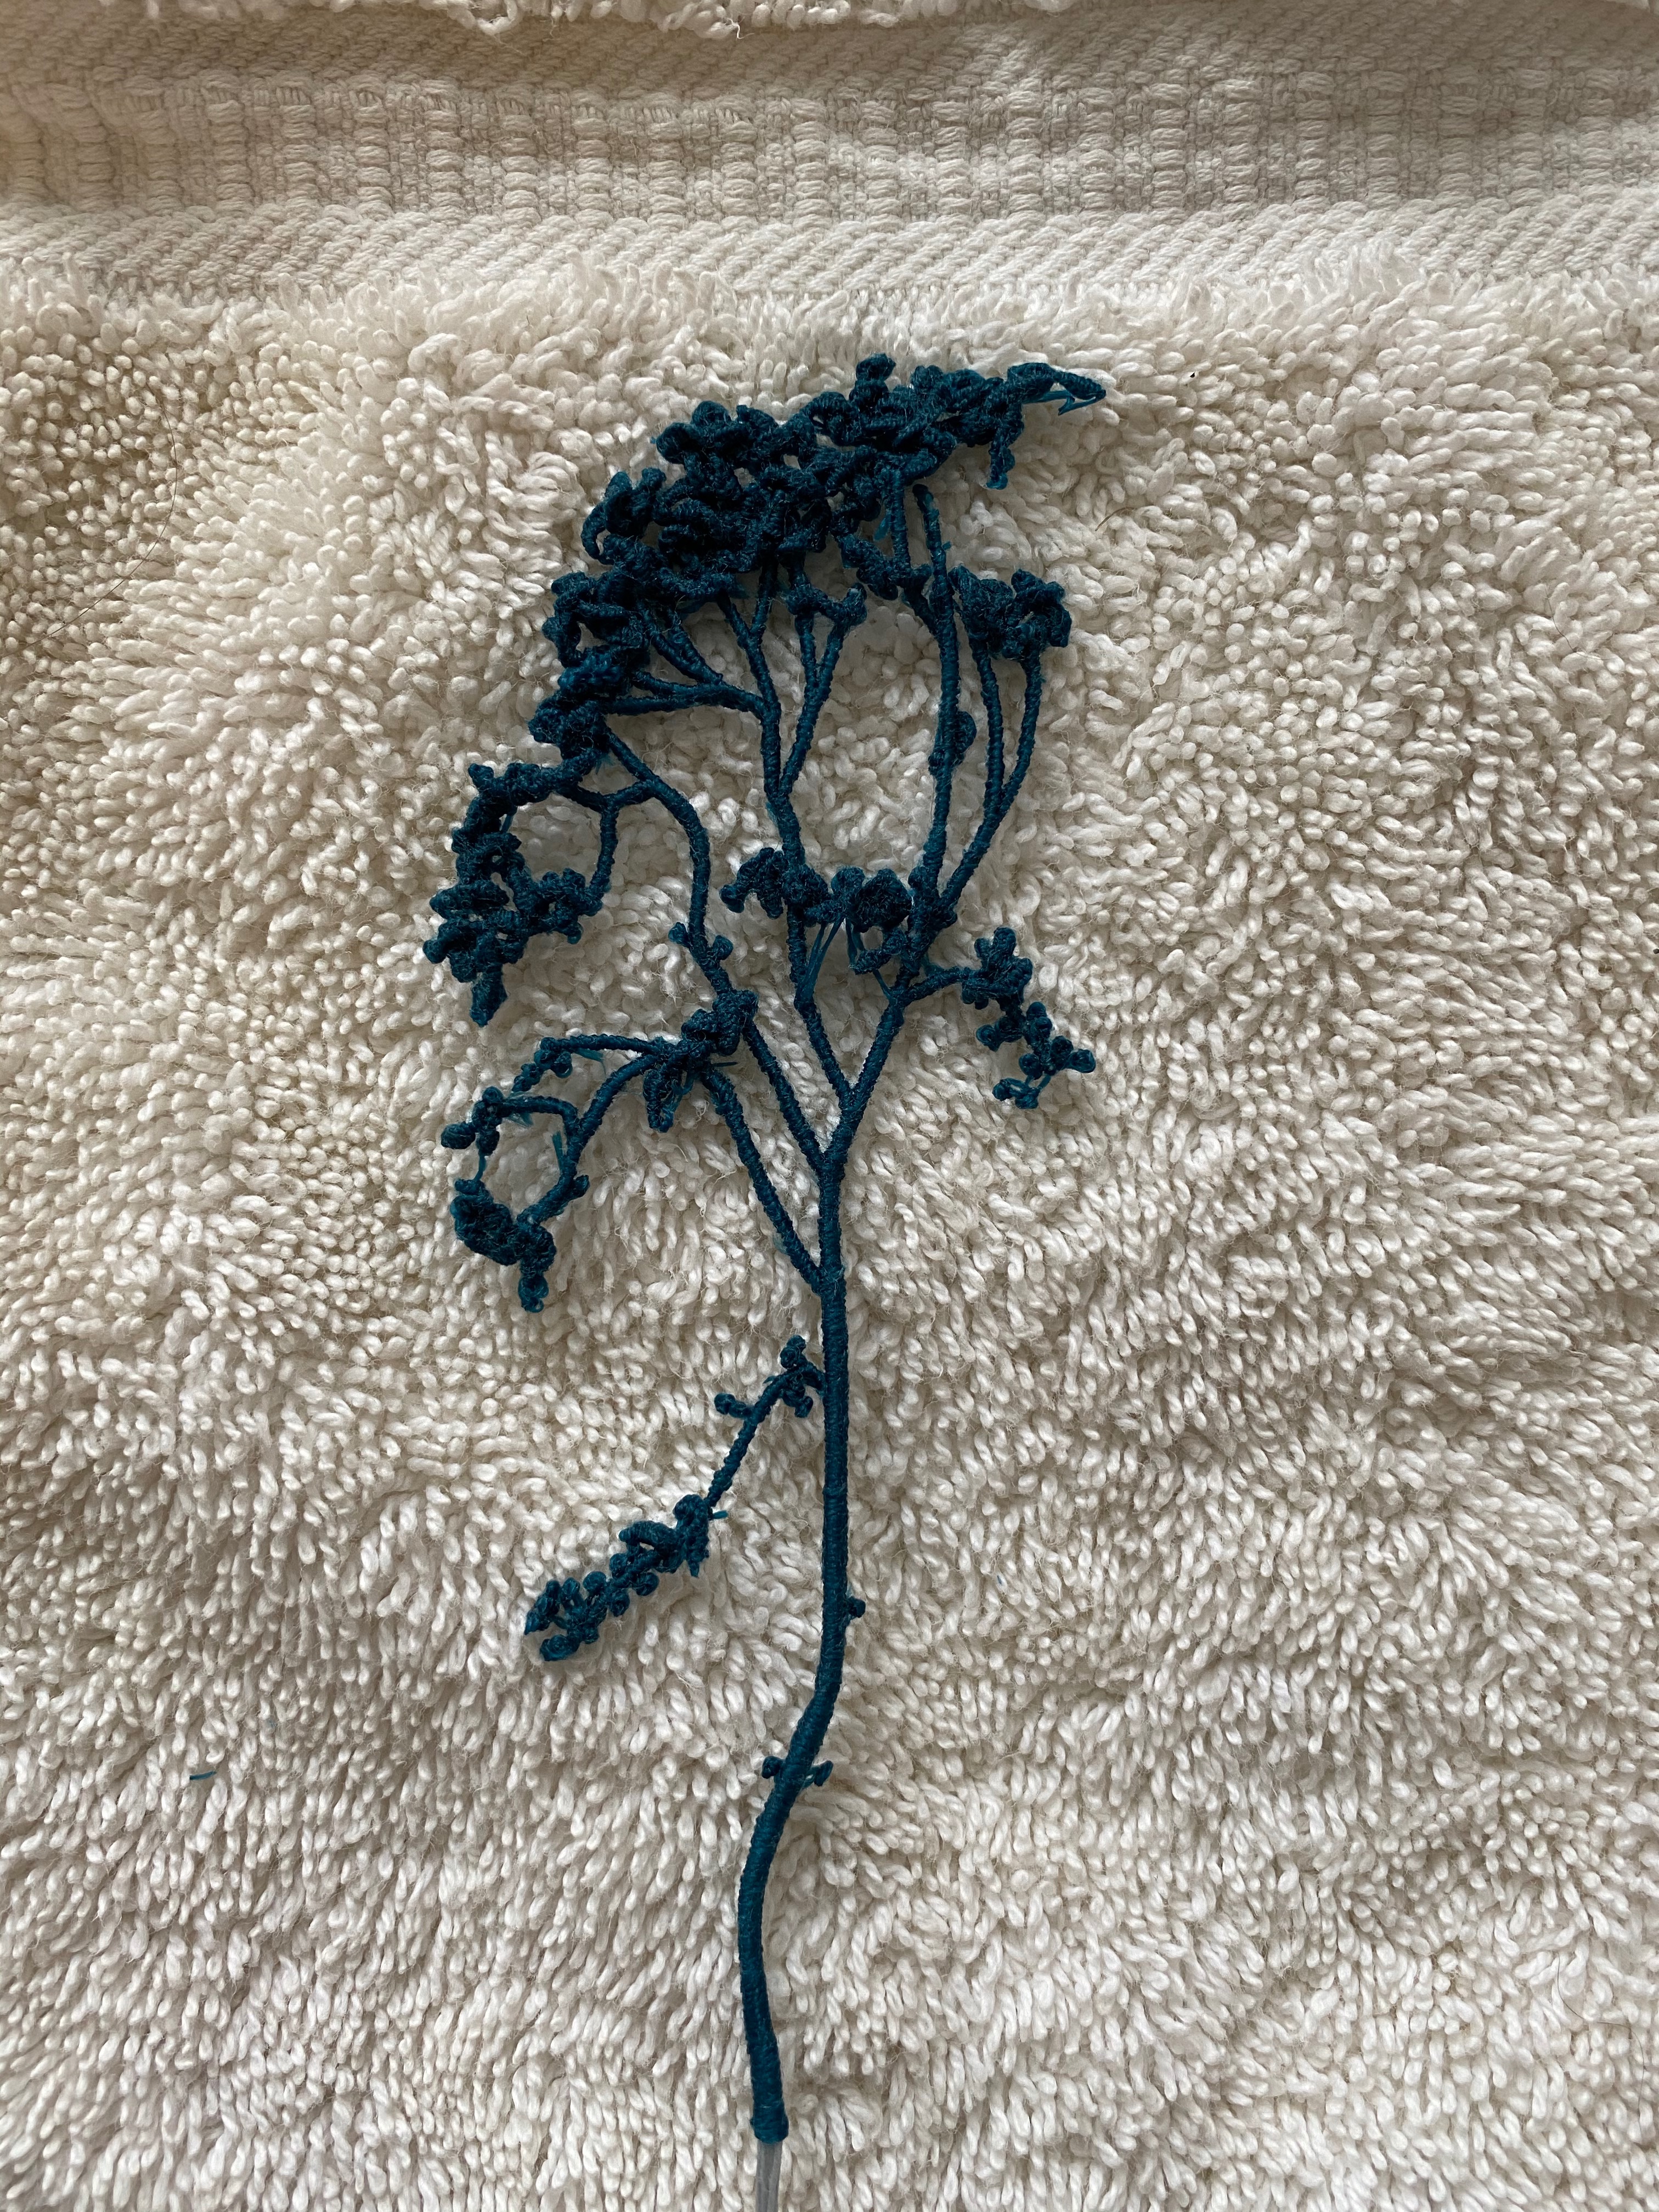
I got the idea for how to make the tree from a kit from Lorna Bateman I made. In it you make a scissor fob by stitching french knots on soluble fabric, making sure all the knots connect by crossing the treads on the back. I did something similar for the tree. I placed some soluble fabric in a hoop and drew on the design of the tree with a white gel pen. Next I cut some florist wires outlining the main branches of the tree. I would then circle the wire with a single strand of stranded cotton attaching it to the soluble fabric in the process, adding smaller pieces of wire for when the tree branched out. When the entire wire shape was covered I would add in drizzle stitches and french knots making sure everything was connected and also attached to the tree. When it was all done I soaked the tree in water to get rid of the soluble fabric and let the tree dry. As the colour wasn’t quite right I did end up soaking the tree again in a tea to get a more muted tone, so the tree wouldn’t stand out as much.


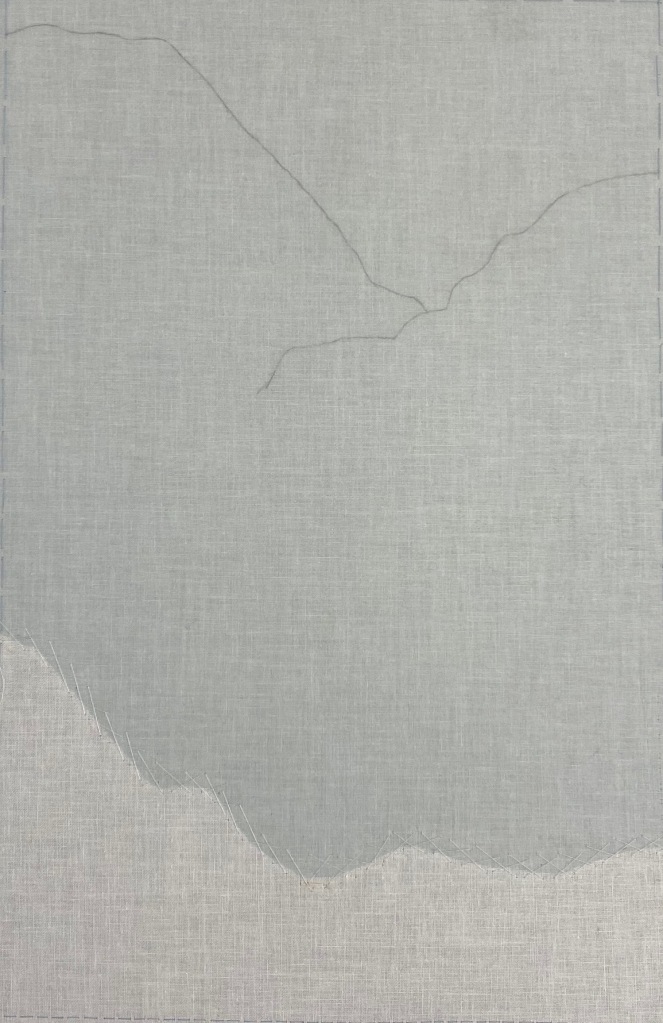
Templates
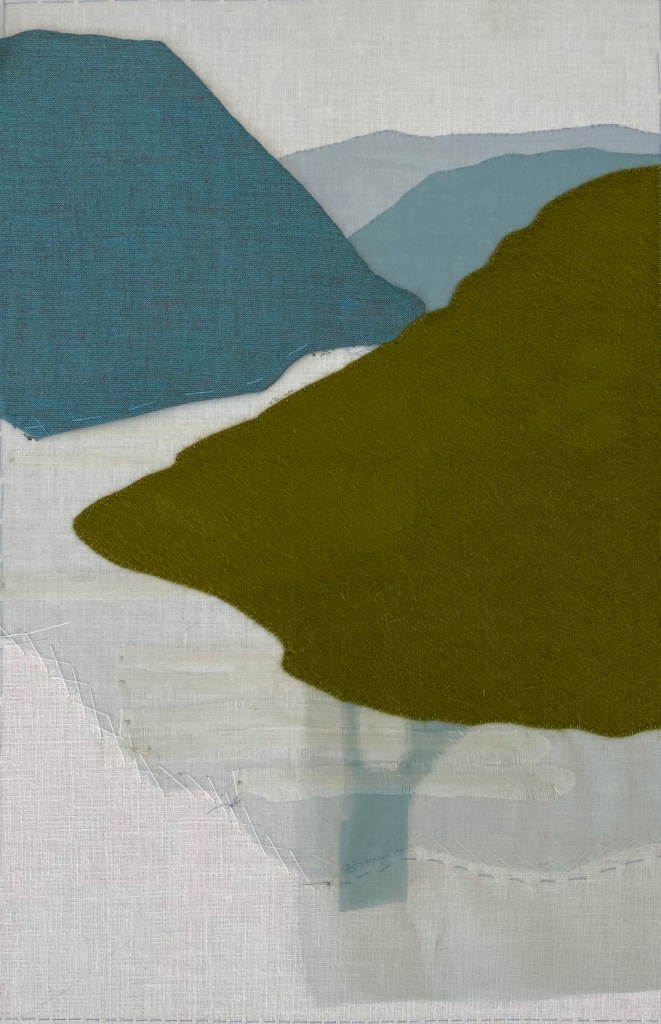
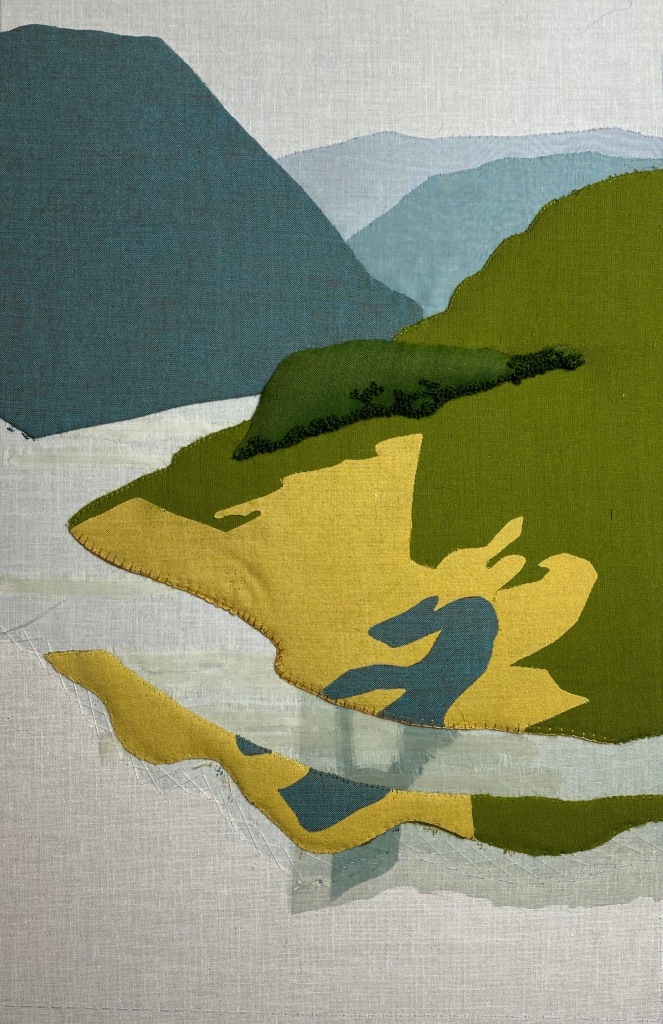
Normally you would prick and pounce on your design or even draw it on using a pencil. However, with applique design lines quickly get covered. For this project I used many different techniques, depending on the situation to get everything in the right place. I often used old fashioned overhead projector film. I was able to photocopy my design on to it and cut it out or hold it in place when I moved the fabric shapes and details around. I also cut out paper templates from the original design that I could pin in place to give my guidance when placing other elements or stitches. That is for instance the way I stitched the bushes and houses on the blue hill. I am also a big fan of water soluble pens. I traced hills (which were going to be toy-stuffed) on the back of the fabric before adding the french knot details and cutting out the shapes. It made stitching so much easier. I have also already mentioned the use of soluble fabric for placing the letters on the foreground.
As you might have seen on social media, my appliqué project has already been assessed. I will share the results and all of the details of the assessment in my next post.


I too have watched your piece develop on Instagram. Well done with your success! I’ve really enjoyed reading the detail of your work: it is very inspirational and invaluable for future students. I am endlessly curious about exactly how such beautiful pieces are achieved. That tree is lovely!
LikeLiked by 1 person
Thank you so much Pam for your lovely comments. So glad you have enjoyed reading my post and following my progress with it on Instagram.
LikeLike
I enjoyed watching this one develop on instagram, and it is lovely to have an overview now it’s finished.
LikeLiked by 1 person
Thank you Rachel! Yes, the overview is really handy for myself as well to remember the techniques and materials I have used.
LikeLike
Veel werk verricht. Duidelijk verhaal met foto’s. Vooral het schuifpaneel vind ik erg mooi. Precies hetzelfde.
LikeLiked by 1 person
Dankjewel Mama! Leuk he? Er konden allemaal nieuwe dingen met mijn website.
LikeLike
Thank you so much for sharing this! I love seeing your process.
It is an amazing piece and the time you spent on it really shows. It makes me want to try something like this!
LikeLiked by 1 person
Thank you so much CaLynn! Glad you enjoyed reading it. I never thought I would enjoy this technique as much as I did. Hope you get to enjoy it too!
LikeLike