I have done a few projects with felt including a 3d needle felting workshop with The Makerss at the Knitting & Stitching show making a robin and I have also done a few kits by Atelier Oog van de Naald and Huis Vol Kleur which used sheets of wool felt to create pictures or 3d scenes. However, I had never tried 2d needle felting until this weekend.


It was already waiting for me on the doormat when I arrived back home from my RSN certificate classes at Hampton Court Palace on Wednesday and I thought it would be a lovely quick project and a relaxing change from my silk-shaded anemone I am working on.
With the lovely spring sunshine beaming through the window I started the kit on Saturday afternoon and finished it this morning. The kit includes everything you need to get started: wool fibres, embroidery thread, beads, base fabric, needles and instructions. I purchased the kit without a foam pad as I already had one. However, Aileen also sells the kit with a foam pad should you need one.

Instead of the felting needles included in the kit I used my Clover Pen Style Needle Felting Tool as it is a bit more confortable to hold compared to the separate needles. In the pen style tool you can use 3 needles at a time or remove 2 and work with a single needle as I did for this project.
Even though the instructions are very detailed I did find it a little bit difficult at first to figure out how many fibres I need to use at a time to create the right effect. It was a little trial and error, but the good thing is that you can remove (carefully!) the fibres if you have used too much or if it doesn’t look right.

I learned quickly that a few fibres go a long way and it is quite quick to build up the design. With the included picture of the finished design, I just went with what I thought looked right. It was also a really good exercise for shading, something I do find difficult in embroidery so it was very educational to try it in a different medium. It really is surprising how much depth a tiny bit of a darker fibre can create.

Because I used less and less fibre I still have plenty left to make a second (and maybe even third) design. The only thing I ran out of before finishing is the dark green embroidery thread you use to backstitch the stem and leaves. I justed ended up matching the included thread to the nearest DMC colour in my stash and you can’t really notice the difference. I ended up needing 3 times the amount of thread included! [Aileen already replied to my FB post and said that she would include more embroidery thread in new kits she sends out!]
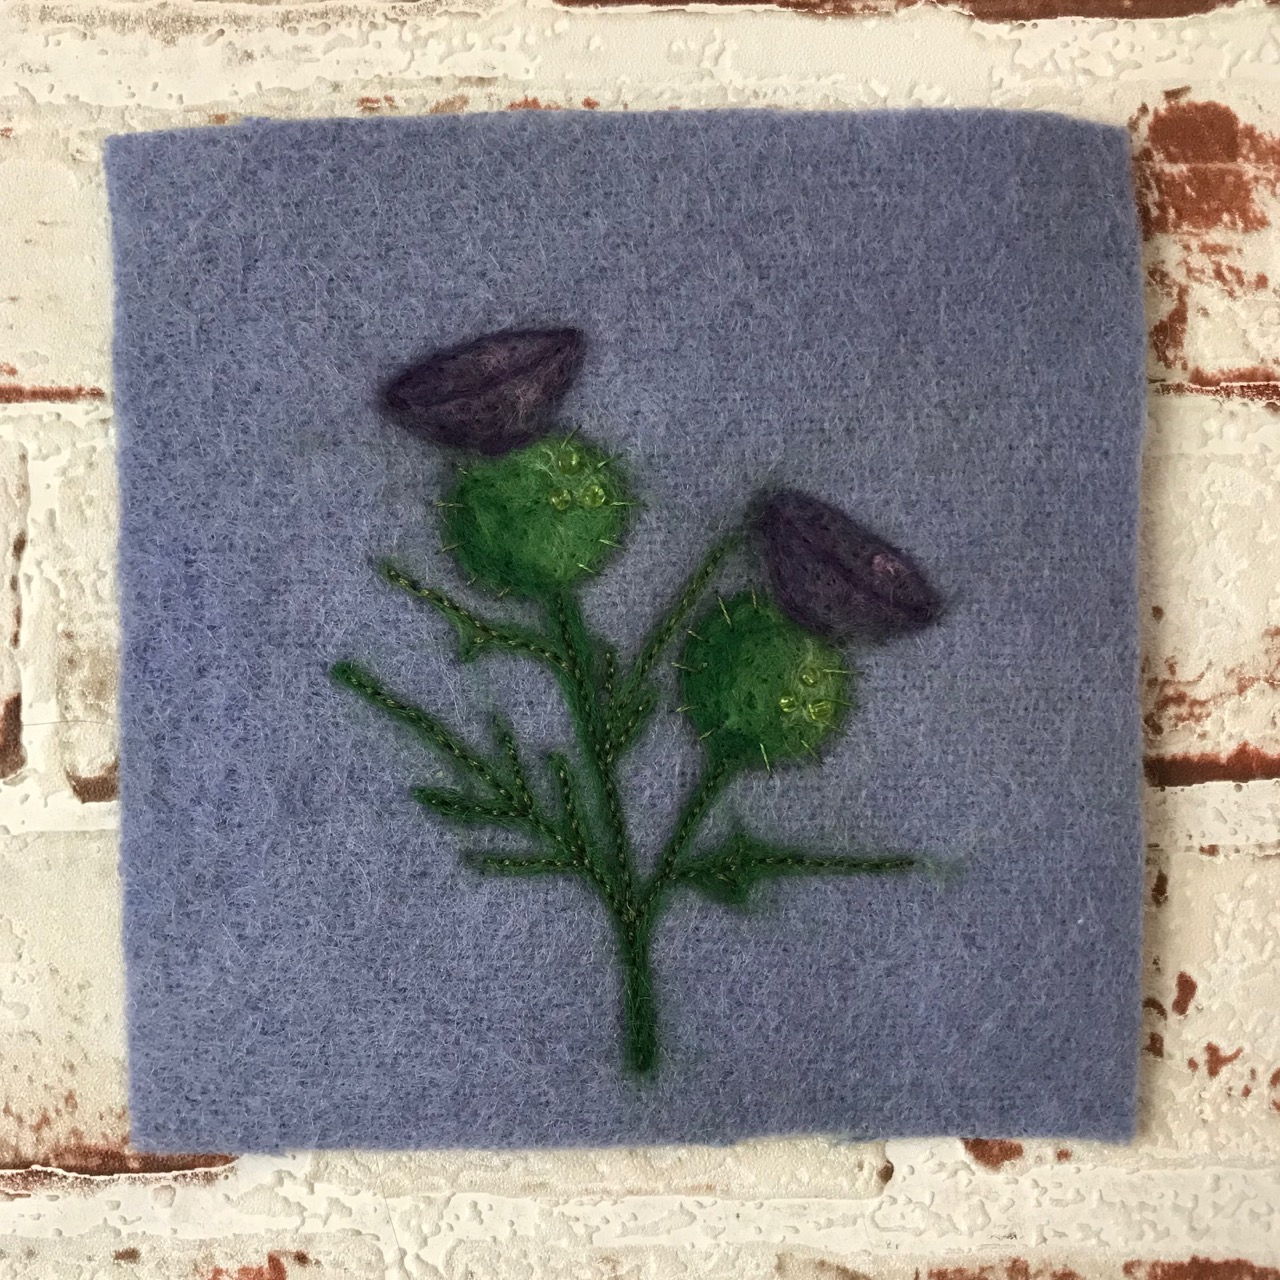
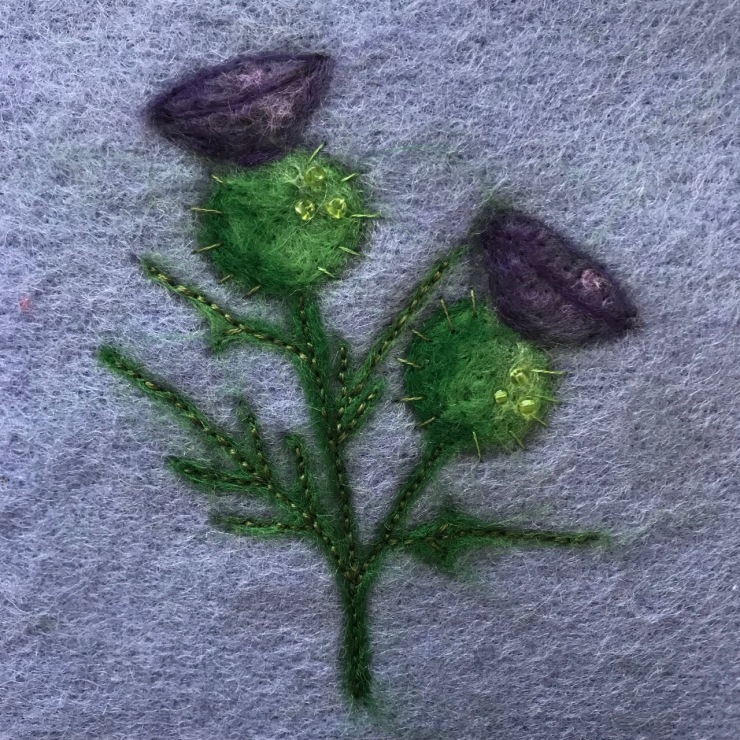
I love the way in which beads and embroidery are included in this needle felting kit. It really creates texture and a 3d effect.
I am quite happy with how my first attempt at needle felting turned out. It looks like thistles and I have managed to make them look 3d by using the shading. It was also really fun to have a go at a quick project rather than one of my recent embroidery ones which are taken forever to complete. I really would like to use my finished project on something such as pouch or bag or maybe even a pincushion. The jury is still out on what I will make so any suggestions are welcome!

What a lovely piece! I’ve never tried felting in any way, but it does look interesting and that there is lots of scope with it.
LikeLiked by 1 person
Thank you Catherine! Do give it a go, it is lots of fun and relatively easy. It is a great background for embroidery too.
LikeLike
Very nice. I always found felting fascinating.
LikeLiked by 1 person
Thank you Dima! It is really isn’t it. It is unbelievable who quickly colours and textures change by using a needle!
LikeLike
It is a rather quicker way to explore shading and learn about it than stitching – one reason why I paint, which is also much quicker than stitch! You’ve created a charming effect here – maybe the other versions you try could change the direction of the light…?
LikeLiked by 1 person
Yes it definitely is a lot quicker! That sounds like a great idea. I hadn’t thought how I would use the excess, but trying different shading sounds perfect!
LikeLike
Hi Marlous, I think I would try to use this lovely design as a needle book cover. I think you have made a raally great start in felting!
LikeLiked by 1 person
That sounds like a really good idea too Sally! Thank you!!!
LikeLike
I love your version of the Scottish Thistles, it’s so light and delicate! And those Beatrix Potter figurines are delightful, I’ve always loved her characters and they capture the personalities so well 😊 The Four Seasons hearts are adorable too, they must be fun to display throughout the year. I’ve never tried needlefelting. Your Thistles would make a pretty pincushion!
LikeLiked by 1 person
Thank you Aurelia and thank you for the vote for a pincushion! I really liked doing the Beatrix Potter character. I actually still have one as WIP and two kits waiting! They are just so cute. The hearts are decoration in a baby’s bedroom now as I gave them to my colleague became a mum last year!
LikeLike