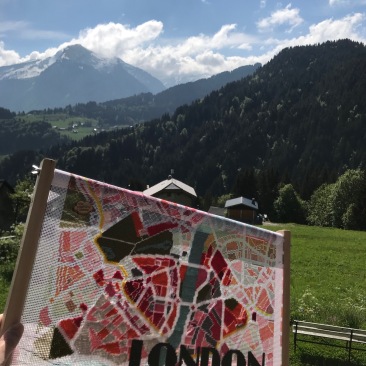
With only 12 hours to go until the end of 2018 I have finished my London Light needlepoint cushion. 2018 has been a year of only a few rather large projects.
I started this kit by Hannah Bass Needlepoint back in April 2018. I had spotted Hannah’s kits during my first visit to the Knitting & Stitching show at Alexandra Palace back in 2015 and I immediately liked their design. Probably partly because they reminded me of the Spatial Analysis maps I have made for my PhD thesis. If you are interested in reading more about my research into Spatial Patterns of the Medieval economy you can find a copy of my thesis here.
However, I didn’t buy a kit straight away because I wasn’t sure whether I would like needlepoint so much that would permit me to spend so much money on a single kit. On the other hand, I did start following Hannah on Facebook and Instagram and when she announced a discount offer on her kits when I was looking for something relaxing to stitch on holiday I jumped at the chance and bought a kit of my favourite city in a colourway that would match my craft room.
The kit is really lovely packaged and comes with enough wool, 3 tapestry needles, instructions, the patterns and the printed canvas. I thought I would run out of some of the colours but in the end, I had lots left of every shade. Even though, I had restitched some bits as I hadn’t stopped soon enough when stitching and the wool had got too thin so you could still see the canvas.
I had never done a painted canvas needlepoint before, and it was something to get used to. I am so used to looking at a pattern but in with painted canvasses you just have to use the pattern as a guide and just stitch whichever colour the canvas shows you. Every canvas has its own unique woven movement so no pattern will turn out exactly the same. However, because of the nature of the image, I am stitching it doesn’t really matter if some blocks or streets are actually bigger or smaller.
On the other hand, it is important that the lettering is accurate so Hannah does advise you to start stitching the letters first. She then suggested to start stitching the roads from the centre outwards and then fill in the building blocks. I thought it would be easier stitching the blocks first and then fill in the roads as I went along, however as I progress stitching the roads is actually easier. It makes to roads align better, and because the roads are white also prevents any colour transfer to the front from the adjoining building blocks already stitched. It started from the area around the letters and then worked my way north.
I did find it difficult to distinguish between the different shade of grey and pink by looking at the canvas alone and that is where the pattern really came in handy.
To keep my canvas taut I used one of my Siesta no-sew frames. Even though I had previously been happy with them for my cross stitch projects, they didn’t cope well with the stiffness of canvas as the wooden rods came away from the screws so I ended up glueing the rods to the sidebars. When we were in London last week I purchased an Elbesee Easy Clip frame which is actually the same frame Hannah recommends so I will try that out and see how that fares. I really would like a Millenium frame from Needle Needs but I have been hearing so many bad stories about the time they take to fulfil orders and their lack of customer service I don’t really fancy ordering one.
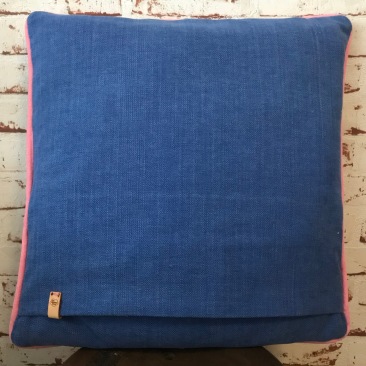
At this year’s Knitting & Stitching Show, I purchased some pink backing fabric from Hannah. However, I wasn’t quite sure about doing an all pink backing. I popped into John Lewis on Oxford Street last Thursday and purchased the same type of fabric (Romo Linara cotton linen) in a lovely shade of blue. It wasn’t an exact match to any of the colours but it really brought out all of the shades of my needlepoint and also worked well with the green colour of the seat the cushion will sit in. However, I still wasn’t sure about the colour I would end up using but I got some great help from my Instagram and Facebook followers who voted for the blue backing by a large majority!
The make the cushion even nicer, I made my own piping from 2 inch wide strips of the pink fabric and no. 5 piping cord. I tacked it by hand right on the edge of my needlepoint and then I used my sewing machine to attach the two pieces of blue fabric which make up the back. My machine had to work quite hard as the canvas and three layers of cotton linen are quite thick to sew through. I had originally intended to put a zip in the back, but two larger overlapping pieces worked just as well (and is much easier).
I am really happy with the result. I love how my cushion has turned out. It has taken me some time to finish as it was stored away over summer. However, as soon as I got going again and reached the halfway point it really motivated me to get it finished this year and I managed it by finishing the needlepoint on Christmas day! I also think blue was the right choice and the pink piping just finishes it off!


Well done – it’s so satisfying to have it out and in use, as well, isn’t it!
LikeLiked by 1 person
Thank you! Yes it is such a good feeling to have it all done. Was actually quite proud of it even though it wasn’t a really difficult project (just took a long time). Moreover, it makes my chair look a lot better as it was quite bare before!
LikeLiked by 1 person
Well done on a great finish! It looks brilliant and your finishing combination has worked really well. Good luck with your new frame, I do have a Millennium Frames one, but I’ve not ever really used it. By the time it finally arrived I had purchased another frame as I wanted to start the project, and I just haven’t really thought to use it on anything else. It is good quality, but I can’t recommend them unless they have improved their turnaround time and service.
LikeLiked by 1 person
Thank you Catherine! I am really happy with how the finishing combination turned out. It is quite difficult to imagine what it will look like when you are in the fabric shop choosing a colour and a type of fabric. I didn’t need a frame urgently as I have no projects lined up for it, but I thought I would better replace it and it was only £13. I quite fancy doing another cushion but I am not getting one until my silk shading is done and my wren is finished! Otherwise there will be another relaxing WIP to do which will tempt me away from more difficult projects!
LikeLiked by 1 person
A mammoth task and beautiful to boot!
LikeLiked by 1 person
Thank you! It was. You really need to be motivated and get into a rythm to keep this going. It is surprising how much longer simple stitches take than more complicated embroidery!
LikeLiked by 1 person
Looks absolutely amazing! I’ve really enjoyed following your progress on this project, and I love the end result. Your cushion is amazing, the pink piping is the perfect finishing touch! I’ve never worked on a painted canvas but this makes me want to try. Hope your new frame works better for you, and that you have a Very Happy New Year 😊
LikeLiked by 1 person
Thank you Aurelia! So glad you enjoyed following my progress. Working on a painted canvas is really relaxing and since it is just tentstitch there is nothing to count or worry about. A nice project for evenings and holidays! Hope so too! First I need to choose a new project after I have finished my RSN certificate silk shading and the wren I am working on!
LikeLike
I love it! Congratulations on a beautiful finished project!
LikeLiked by 1 person
Thank you Barb for your lovely comment!
LikeLike